
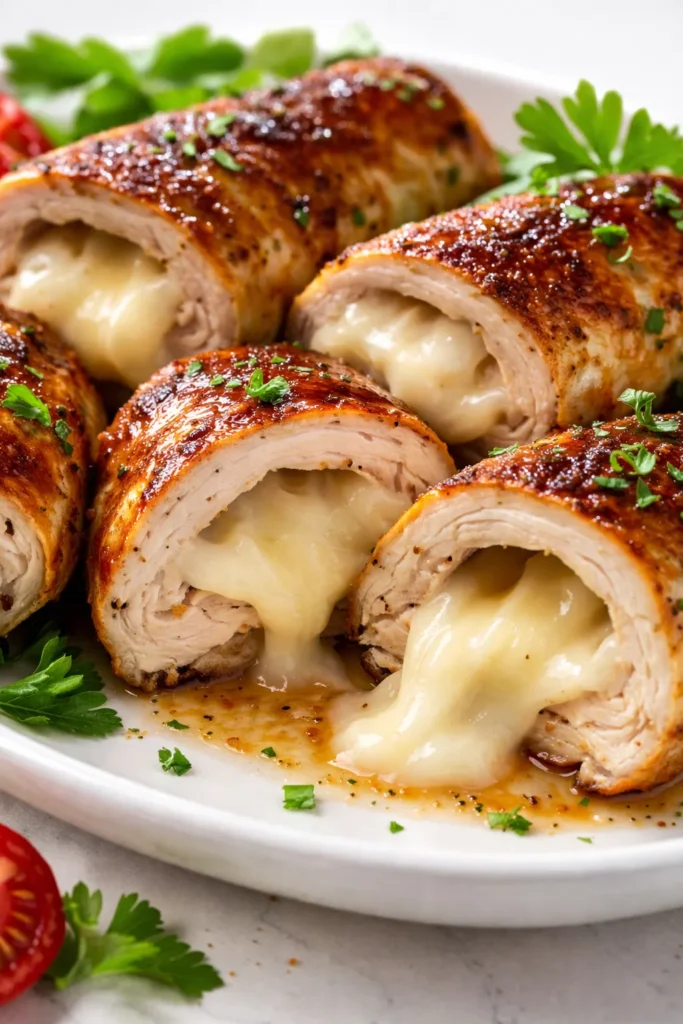
The first slice is the reveal. The knife hits the golden sear, glides through the juicy chicken, and then you see it — the tight spiral of jammy caramelized onions and melted cheese, perfectly contained. No gaps. No filling spilled out onto the pan. Just a clean, deliberate cross-section that makes a Tuesday night dinner look like you spent the whole afternoon on it. (You didn’t. Forty minutes, start to finish.)
The short version: Tender chicken rolled up with sweet caramelized onions and melty cheese, baked until golden, and sliced into spirals that look restaurant-made — all on a weeknight timeline.
I’ve made these more times than I can count, and they’ve saved me on nights when I needed dinner to feel a little bit like a project but also needed it on the table by seven. My kids call them “the swirl chickens,” which is not elegant but is extremely accurate.
- Serves: 4 as a main dish
- Hands-On Time: 25 min | Total Time: 40 min
- Difficulty: Medium — the rolling technique takes one try to get the hang of, and then you’ll have it forever
- Cost per serving: ~$4
- Calories: ~420 per serving
- Dietary Notes: Naturally low-carb / Gluten-free adaptable
(Photo above: Overhead shot of the finished chicken rolls sliced into spirals on a light wooden cutting board, natural daylight from a side window, a small dish of extra caramelized onions on the corner, one roll cut in half to show the cheese pull.)
Why These Don’t Fall Apart (And Your Chicken Stays Juicy)
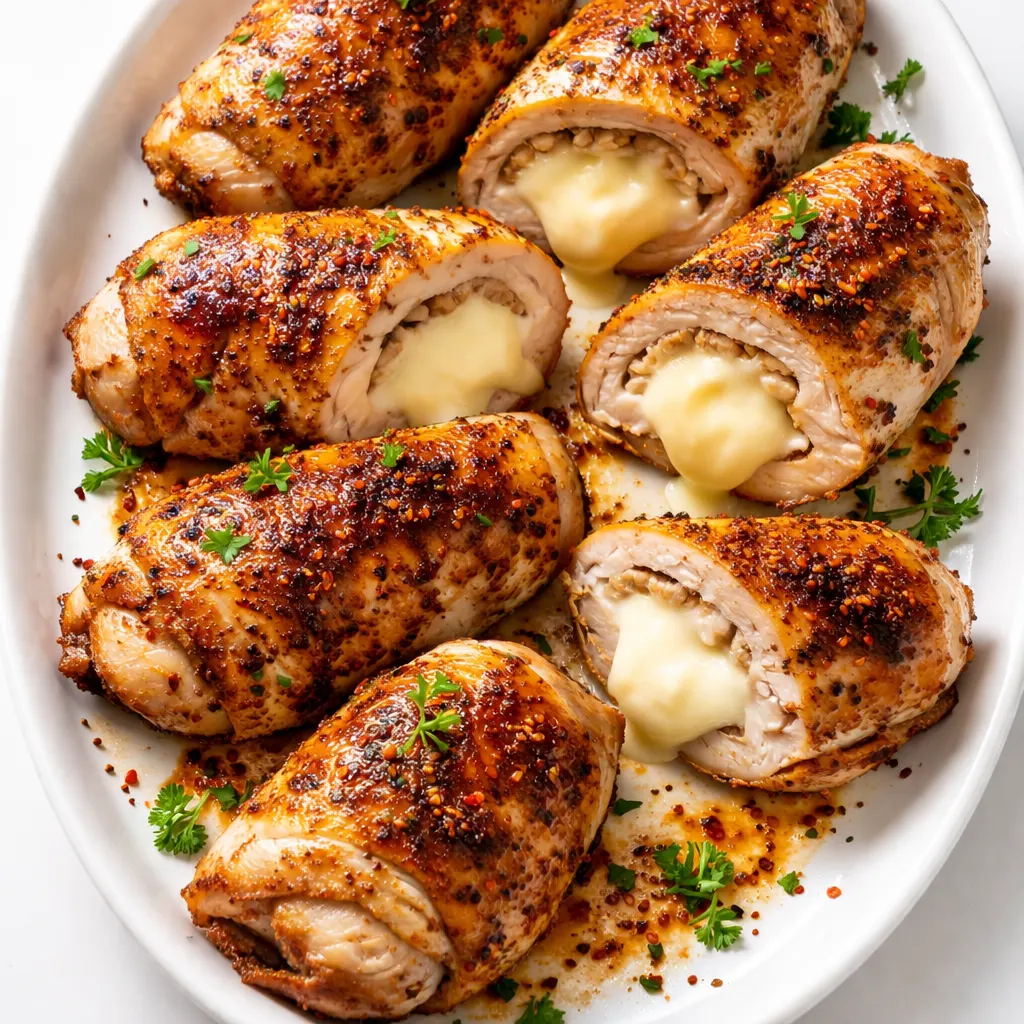
The thing that makes or breaks a stuffed chicken roll is the same thing that makes or breaks a good burrito: structure. If the chicken isn’t pounded thin enough, it won’t roll tightly, and the filling will escape out the sides. If it’s too thin, it’ll tear. A quarter-inch thickness — even across the whole cutlet — is the sweet spot. It rolls without resistance and cooks through in the time it takes the cheese to melt.
The second thing is the sear. Browning the rolls in a hot skillet before they hit the oven does two things: it builds a golden crust that locks in moisture, and it creates a barrier that keeps the seam sealed. Skipping this step means pale chicken and filling that leaks into the baking dish. I learned this the hard way on a busy Wednesday and have never skipped it since.
The third thing, and the one people forget most often: let them rest before slicing. Five minutes off the heat lets the juices redistribute and the cheese firm up just enough that it stays inside the roll instead of flooding the cutting board. That rest is the difference between a clean spiral and a messy pile of delicious components.
What Goes In — Plus My Honest Notes
- 4 large boneless skinless chicken breasts (6–8 oz each): Buy the biggest ones you can find. They pound out into nice wide cutlets that roll easily. If they’re small, you’ll struggle to get a tight roll.
My grocery store often only has medium-sized ones, so I buy 5 and butterfly them before pounding. It gives me more surface area. - 2 large yellow onions, thinly sliced: Yellow onions caramelize the best. Red onions turn a muddy color. Sweet onions work but take longer to caramelize.
I slice mine pole to pole — root to stem — so they hold their shape better during cooking. - 4–6 slices provolone or low-moisture mozzarella: Provolone holds its shape when baked and has a subtle tang that cuts through the richness. Low-moisture mozzarella is stretchier. Avoid fresh mozzarella — it weeps water and makes the chicken soggy.
My kids prefer mozzarella for the pull factor. I prefer provolone. We compromise by using one slice of each. - 2 cups fresh spinach: It wilts down to almost nothing inside the roll, so don’t skip it. Adds color and a little green credibility.
I’ve also used arugula here when I wanted a peppery bite — it works beautifully. - 2 cloves garlic, minced: Goes into the spinach as it wilts.
- Olive oil, salt, pepper, red pepper flakes (optional): Basics.
- Toothpicks: The unsung hero. You need at least 3 per roll. Regular flat toothpicks work fine. Don’t use colored ones — they can bleed dye into the chicken.
What to Pull Out Before You Start
- 12-inch cast iron skillet (or heavy stainless steel pan)
- Baking dish (8×8 or similar)
- Plastic wrap (for pounding)
- Meat mallet or rolling pin
- Toothpicks
- Instant-read thermometer
If you don’t have a meat mallet, a wine bottle works in a pinch. Just wrap the chicken well so the glass doesn’t touch the raw meat.
Let’s Make It (Step by Step)
This goes fast once the onions are done, so read through once before you start. The caramelizing is the longest part, and it’s mostly hands-off.
Caramelize the Onions (Start Here):
- Heat 2 tbsp olive oil in a large skillet over medium-low heat. Add the sliced onions and a generous pinch of salt. Stir to coat. Cook, stirring every 5 minutes, for 25–30 minutes, until the onions are deep golden brown and jammy. If they start to stick, add a splash of water.
- Add the garlic and spinach: Push the onions to the side of the pan, add a tiny splash of oil, and toss in the garlic and spinach. Cook just until the spinach wilts — about 60 seconds. Stir everything together, then transfer to a plate to cool slightly.
(📸 Photo tip: The onions should look like wet sand — dark, glossy, and reduced to about a quarter of their original volume.)
Prep the Chicken:
- Pound the chicken: Place one chicken breast between two sheets of plastic wrap. Pound to ¼-inch thickness with the flat side of a meat mallet. You want the pieces thin enough to roll easily but not so thin they tear. Repeat with all 4.
(📸 Photo tip: The chicken should be even across the whole surface — no thick spots in the middle. If you can see your hand through it vaguely, you’re good.) - Season: Season both sides of each cutlet with salt, pepper, and a pinch of red pepper flakes if you’re using them.
- Assemble the rolls: Lay a cutlet flat on a cutting board. Place 1–2 slices of cheese on top, leaving a 1-inch border at the edges. Spoon about 2 tablespoons of the onion-spinach mixture over the cheese. Spread it evenly.
Roll it: Fold the short ends of the chicken over the filling, then roll tightly from one long side to the other, like a little package. Tuck in any bits of cheese or spinach that try to escape. Secure with 3 toothpicks placed evenly along the seam.
Cook the Rolls:
- Sear: Heat 1 tbsp olive oil in the same skillet over medium-high heat. Add the chicken rolls seam-side down. Cook without moving them for 2–3 minutes, until deep golden brown. Turn and repeat on all sides. You want a nice crust all over.
This is the structural step. Don’t rush it. The sear seals the seam. - Bake: Transfer the rolls to a greased baking dish. Bake at 400°F for 15–18 minutes, or until an instant-read thermometer inserted into the center registers 160°F (carryover cooking will take it to 165°F).
- Rest and slice: Let the rolls rest on a cutting board for exactly 5 minutes. Remove the toothpicks. Slice each roll crosswise into 1-inch rounds using a sharp knife.
This is where the magic happens. A clean slice reveals the spiral.
How I Meal Prep These for the Week
These are surprisingly meal-prep friendly. I make a double batch on Sunday and we eat them two ways: hot for dinner, and cold sliced over a salad for lunch the next day. The trick is to store them unsliced so the moisture stays inside.
- Fridge: Store cooked, unsliced rolls in an airtight container for up to 4 days. Slice right before serving.
- Freezer: I don’t freeze these. The texture of the cheese and the onions changes too much when thawed. They’re so quick to assemble that I’d rather make them fresh.
- Reheat: Reheat in a 350°F oven for 10 minutes, covered loosely with foil. The microwave works but the chicken gets slightly rubbery — the oven is worth the extra 7 minutes.
Things I Wish I’d Known the First Time
- Don’t overstuff: It’s tempting to pile on the filling. Don’t. Two tablespoons of onions and one slice of cheese is plenty. Overstuffing makes the rolls impossible to close and the filling will escape during searing.
- Toothpick placement matters: Insert them at an angle — too straight and they’ll slide out during cooking. Also, don’t forget to remove them before serving. I use colored toothpicks so I can spot them easily.
- Resting is non-negotiable: I know it’s tempting to slice right away. But 5 minutes of rest is what turns a messy plate into a clean spiral. The cheese needs to set up. Trust me on this one.
- Even thickness is everything: If one part of the chicken is thicker than the rest, it’ll take longer to cook, and by the time it’s done, the thin bits will be dry. Pound it even. I use the flat side of the mallet and check with my fingers.
Swaps That Actually Work
- Dairy-Free: Use dairy-free provolone-style slices (they melt decently) or omit the cheese entirely and double the onions and spinach. The chicken stays juicy from the caramelized onions alone.
- Gluten-Free: This recipe is naturally gluten-free as written. Just make sure your spice blends don’t contain hidden gluten.
- Mushroom & Swiss: Sauté 8 oz sliced mushrooms with the onions and swap provolone for Swiss cheese. This is my personal favorite fall version.
- Sun-Dried Tomato & Mozzarella: Replace the spinach with chopped sun-dried tomatoes (drained of oil) and use fresh basil instead. It gives the rolls a bright, almost Italian feel.
- Kid-Friendly Spicy: My kids eat the plain version without red pepper flakes. For the adults, I add a drizzle of hot honey over the finished rolls before serving. It cuts through the richness perfectly.
Questions I Get About This Recipe All the Time
Q: Why did my chicken roll fall apart while cooking?
A: Most likely the chicken wasn’t pounded thin enough to roll tightly, or you didn’t use enough toothpicks. Aim for ¼-inch thickness and at least 3 toothpicks per roll. Also, make sure you’re not overstuffing — a heaping 2 tablespoons is plenty.
Q: Can I use chicken thighs instead of breasts?
A: Yes, and they’re actually more forgiving. Boneless skinless thighs stay juicier and are harder to overcook. Pound them slightly to even out the thickness. The cook time is roughly the same — check for 160°F internal temp.
Q: How long do these last in the fridge? Can I freeze them?
A: They keep in the fridge for 3–4 days in an airtight container. Store them unsliced to retain moisture. I don’t recommend freezing — the texture of the cheese and onions changes too much. They’re quick enough to make fresh.
Q: What do you serve with these?
A: A simple arugula salad with lemon vinaigrette is my go-to — the peppery greens cut through the richness. Roasted asparagus or a side of couscous also works beautifully. My kids like them with buttered egg noodles, which is not elegant but is very popular at my table.
More Recipes My Family Makes on Repeat
If you liked this one, here are a few others that get the same reaction at our table:
- [INTERNAL LINK PLACEHOLDER: Crispy Baked Chicken Thighs That Are Juicier Than Fried] — Same weeknight energy, less rolling required.
- [INTERNAL LINK PLACEHOLDER: One-Pan Lemon Garlic Salmon with Asparagus] — The sheet pan version of a fancy dinner.
- [INTERNAL LINK PLACEHOLDER: Easy Spinach and Ricotta Stuffed Shells] — For when you want stuffed pasta instead of stuffed chicken.
Make these once and you’ll see why the cross-section reveal is the whole point. Plate the slices in a slight fan, drizzle any pan juices over the top, and take the photo before anyone sits down. You’ll want the record — the table won’t look like that again once the first fork goes in.
If you try it, drop a comment below — I love hearing how it goes for you!
📌 Save this cheesy stuffed chicken rolls recipe for the weekend when you want a dinner that feels like a project but comes together in 40 minutes.
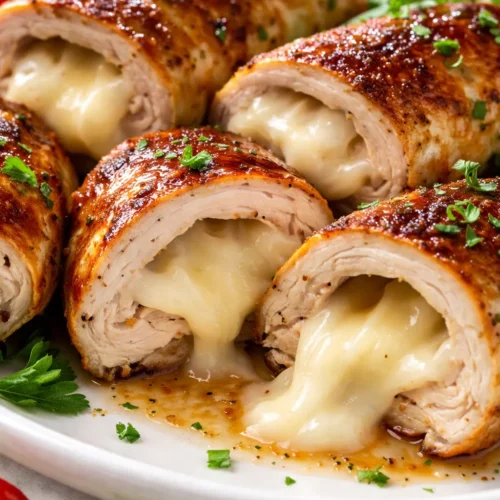
Cheesy Stuffed Chicken Rolls with Caramelized Onions
Equipment
- Large Cast Iron Skillet
- Baking Dish (8×8 inch)
- Meat Mallet or Rolling Pin
- Plastic wrap
- Toothpicks
- Instant-Read Thermometer
Ingredients
- 4 large boneless skinless chicken breasts (6-8 oz each)
- 2 large yellow onions, thinly sliced pole to pole
- 4-6 slices provolone or low-moisture mozzarella
- 2 cups fresh spinach
- 2 cloves garlic, minced
- 3 tablespoons olive oil (divided)
- to taste salt and black pepper
- optional pinch red pepper flakes
Instructions
- Caramelize the onions: Heat 2 tablespoons olive oil in a large skillet over medium-low heat. Add sliced onions and a generous pinch of salt. Cook, stirring every 5 minutes, for 25–30 minutes until deep golden brown and jammy. If they stick, add a splash of water.
- Add spinach and garlic: Push onions to one side. Add remaining 1 teaspoon olive oil, garlic, and spinach. Cook just until spinach wilts, about 60 seconds. Stir together with onions and transfer to a plate to cool.
- Pound the chicken: Place each chicken breast between two sheets of plastic wrap. Pound to ¼-inch thickness using the flat side of a meat mallet or a rolling pin. Even thickness is critical.
- Season and assemble: Season both sides of each cutlet with salt, pepper, and red pepper flakes if using. Lay a cutlet flat. Place 1–2 slices of cheese on top, leaving a 1-inch border. Spoon about 2 tablespoons of the onion-spinach mixture over the cheese and spread evenly.
- Roll and secure: Fold the short ends over the filling, then roll tightly from one long side to the other. Tuck in any filling. Secure with 3 toothpicks placed at an angle along the seam.
- Sear the rolls: Heat remaining 1 tablespoon olive oil in the same skillet over medium-high heat. Add rolls seam-side down. Cook without moving for 2–3 minutes until deep golden brown. Turn and repeat on all sides to seal.
- Bake: Transfer rolls to a greased baking dish. Bake at 400°F for 15–18 minutes, until an instant-read thermometer inserted into the center registers 160°F (carryover will take it to 165°F).
- Rest and slice: Let rolls rest on a cutting board for exactly 5 minutes. Remove toothpicks. Slice crosswise into 1-inch rounds using a sharp knife. The spiral will reveal itself.
- Serve: Fan the slices on a plate, drizzle with pan juices, and serve immediately.
Notes
Related Recipes:
 Garlic Steak Bites and Potatoes That Are Ready in 30 Minutes — and Actually Crispy
 Cheesy Dynamite Chicken Buns That Taste Like Takeout — Made in 30 Minutes
 Peach Arugula Salad with Brown Butter Pecans: The 15-Minute Summer Dinner I Make on Repeat
 Twice Baked Breakfast Potatoes for a Lazy Sunday: The Only Brunch Dish You Actually Want to Make
 The Perfectly Pillowy Chocolate Chip Milk Buns (Tangzhong Method)
 Bagel Breakfast Sliders That Taste Like a Diner Breakfast — in 25 Minutes