
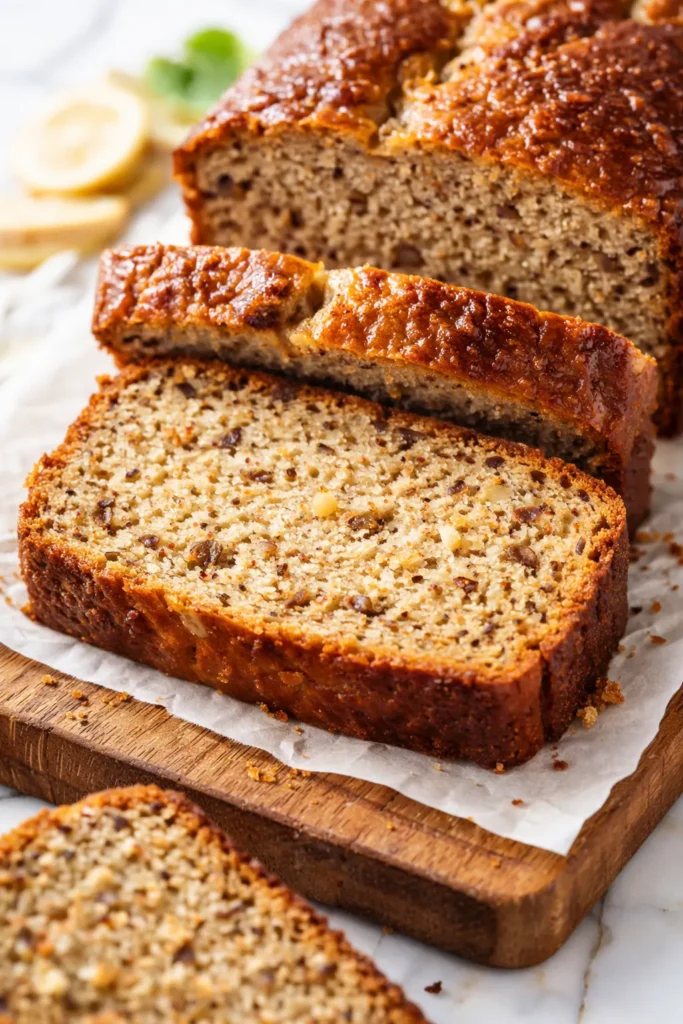
I’ve made more version of protein banana bread than I care to count — most of them dry, rubbery, and only edible if you drown them in nut butter. This one? My friend’s toddler ate a slice before I could take the blog photo. That’s the kind of review I trust. It’s tender, properly sweet (but not cloying), and has a crumb that actually stays intact when you slice it. The secret isn’t a magic protein powder — it’s treating the protein powder like a delicate star ingredient, not a substitute for flour.
The short version: This banana bread is moist, sliceable, and has 10g of protein per slice without tasting like a chalky health project.
I tweaked the ratios over six batches to get the texture right — the winning move was adding an extra egg white and a splash of milk to compensate for how protein powder absorbs liquid. Worth every gram of effort.
- Serves: 8 slices (as a snack or breakfast)
- Hands-On Time: 10 min | Total Time: 35 min
- Difficulty: Easy enough for a Tuesday when you’re meal-prepping at 10 PM
- Cost per serving: ~$0.85
- Calories: ~275 per slice
- Dietary Notes: Gluten-free option below
(Photo above: A loaf pan with the banana bread cut into thick slices, golden-brown crust visible, a few streusel-like crumbs on the cutting board, natural light from a kitchen window hitting the top slice — that bakery-window lighting you’d save on Pinterest.)
The One Step Everyone Skips (Don’t Skip It)
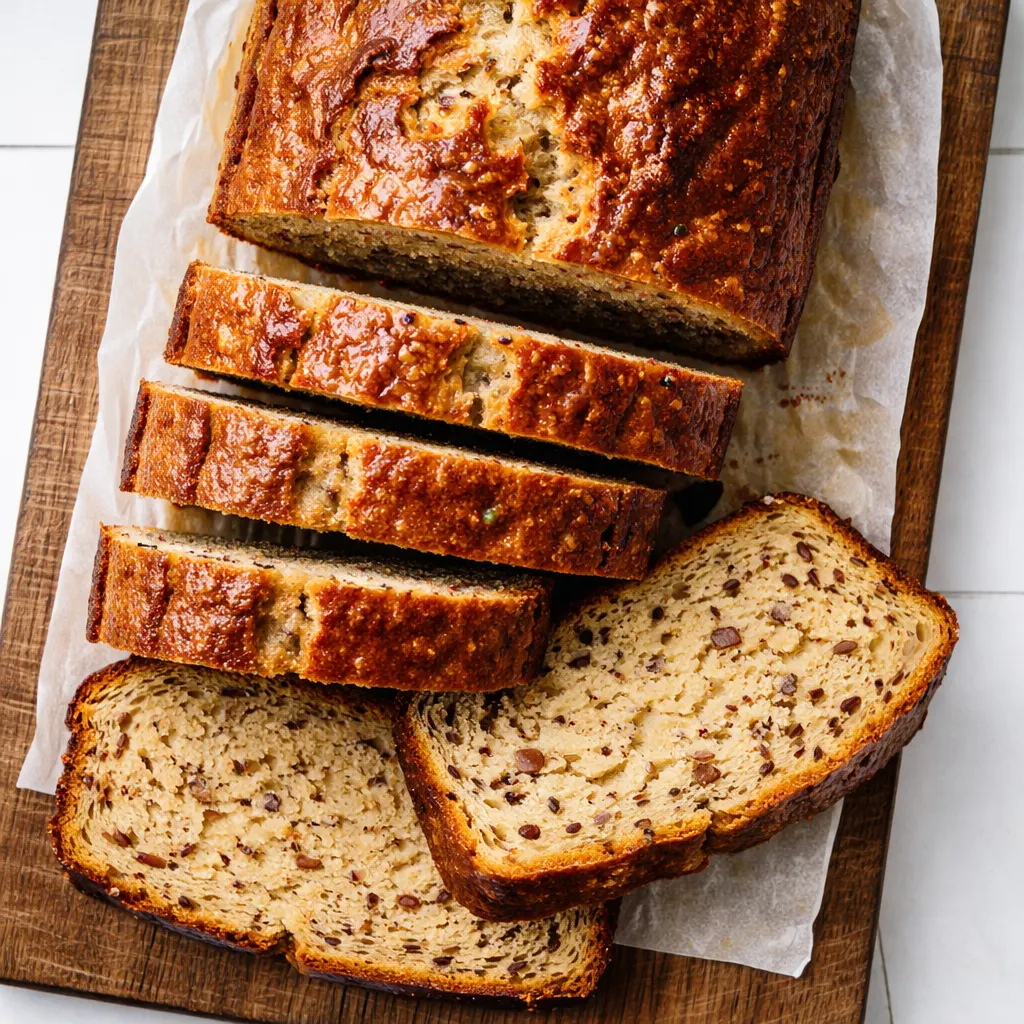
Protein powder behaves nothing like flour. If you just swap it one-for-one, your bread turns into a dense brick that tastes faintly of vanilla powder. The fix is simple: add extra moisture in the form of a fat (butter or coconut oil) and a liquid (milk or yogurt). I use a mix of melted butter and Greek yogurt — the butter gives flavor, the yogurt keeps the crumb tender. Also, don’t overmix. Seriously. Overmixing develops gluten in the little bit of flour you use and makes the whole thing tough. Stop stirring the second the streaks are gone.
The second thing everyone gets wrong is the banana ripeness. Use bananas that are so spotty they look like they’ve been through something. Under-ripe bananas won’t give you enough sweetness or moisture, and you’ll end up adding extra sugar to compensate.
This bread stays moist in the fridge for four days. I’ve tested that. You can thank me later.
Ingredients Worth Talking About
- 1 ½ cups (210g) overripe mashed banana (about 3 medium): This is the main source of moisture and sweetness. Don’t even think about using barely ripe bananas — your bread will be sad and dry. I’ve tried. It was sad.
- 2 large eggs + 1 egg white: The extra white adds protein and structure without fat. I tested with just two eggs — it was fine but not as tall. The extra white makes the loaf rise higher.
- ⅓ cup (80g) plain Greek yogurt: Adds moisture and tang. My friend’s kid can’t tell it’s there. That’s the highest praise.
- ¼ cup (60ml) melted butter or coconut oil: Butter gives flavor; coconut oil keeps it dairy-free. I use salted butter because I like the salt contrast with the sweet banana.
- ¼ cup (60ml) milk of choice: I use whole milk, but oat milk works. Don’t use almond milk — it’s too watery and the bread gets gummy.
- ⅓ cup (65g) coconut sugar or brown sugar: Coconut sugar is less refined and keeps the bread moist. Brown sugar works fine if that’s what you have.
- 1 scoop (30g) vanilla or unflavored protein powder: This is the star. Whey gives the best texture; plant-based works but needs 2 extra tablespoons of milk.
- 1 cup (120g) whole wheat pastry flour or all-purpose flour: Pastry flour keeps it tender. White whole wheat also works.
- 1 tsp baking soda
- ½ tsp salt
- ½ tsp cinnamon (optional but highly recommended)
What to Pull Out Before You Start
- 8.5×4.5-inch loaf pan: Metal or glass works; grease it well. I line the pan with parchment paper leaving an overhang — makes lifting the loaf out so much easier.
- Large mixing bowl + medium bowl: For wet and dry ingredients separately.
- Whisk and spatula: No mixer needed. A spatula for folding is best.
Let’s Make It (Step by Step)
This comes together in one bowl (well, two, but close enough). Read through once — the only critical timing is not overmixing.
Preheat and prep: Set oven to 350°F (175°C). Grease your loaf pan and line with parchment paper if you’re fancy (I am).
- Mash the bananas: In a large bowl, mash the bananas until almost smooth — a few lumps are fine. I use a potato masher but a fork works. My grandmother would say “do it with a fork, you’ll feel the banana better.” I do not follow that advice, but you can.
- Mix the wet ingredients: Add the eggs, egg white, yogurt, melted butter, milk, and sugar to the banana. Whisk until smooth. Make sure the butter isn’t hot — you don’t want scrambled eggs. (📸 Photo tip: The mixture should be a tan, creamy color with no streaks of yogurt.)
- Add the dry ingredients: Sprinkle the protein powder, flour, baking soda, salt, and cinnamon over the wet mixture. Fold gently with a spatula — just until no flour streaks remain. Lumps are okay. Overmixing is the enemy. I fold about 15 strokes. That’s it.
- Pour and bake: Scrape batter into the prepared pan and smooth the top. Bake for 30–35 minutes, until a toothpick inserted in the center comes out with a few moist crumbs (not raw batter). Mine usually takes 32 minutes exactly in my oven. Your oven might vary by a minute or two. (📸 Photo tip: The top should be a deep golden brown and spring back when you press it gently.)
- Cool in pan: Let it sit in the pan for 10 minutes, then transfer to a wire rack to cool completely. If you try to slice it while warm, it will crumble. I’ve done it. I regretted it.
How I Meal Prep This for the Week
I bake this on Sunday evenings and we (me and whoever’s crashing on my couch) have breakfasts covered through Thursday. I slice the whole loaf, wrap each slice individually in parchment paper, and stack them in a zip-top bag in the fridge. That way I can grab one and run — or toast it if I’m feeling fancy.
- Fridge: Airtight container, up to 5 days. Toast slices for best texture.
- Freezer: Yes — wrap the whole loaf (or individual slices) in plastic wrap then foil. Freezes for up to 3 months. Thaw overnight in the fridge, then toast.
- Reheat: Toaster or toaster oven is ideal. Microwave works in a pinch but makes it softer (not soggy, just less crisp).
Things I Wish I’d Known the First Time
- Don’t skip the parchment overhang: I used to struggle to get the loaf out without breaking it. Parchment paper with two long sides hanging over the edges? Perfect lift-out every time. I will never not do this again.
- Weigh your banana (if you can): Mashed banana volume varies wildly. If you’re using cups, go by weight — 210g is the sweet spot. Too much banana = gummy bread. Too little = dry. My kitchen scale cost $12 and it saves me every time.
- Swap protein powders with caution: Whey isolates soak up less liquid than plant blends. If you use a vegan protein powder, add an extra 2 tablespoons of milk. And always taste your protein powder first — if it tastes like cardboard by itself, it won’t taste better in the bread. Trust me, I tried the cardboard one. Not good.
- Let it cool completely before slicing: I know you want to eat it immediately. But if you slice it warm, it falls apart. Set a timer for 30 minutes. Walk away. Your patience will be rewarded with clean slices. This is a test of character. You can pass it.
Swaps That Actually Work
- Gluten-free: Use a good 1:1 gluten-free flour blend (like Bob’s Red Mill). Add 1 tablespoon extra milk because GF flours are thirsty. My best friend is GF and she devoured half a loaf — she thought it was regular flour.
- Dairy-free: Use coconut oil instead of butter, dairy-free yogurt (plain coconut or soy), and oat milk. I’ve made this for a friend’s dairy-free family and it was a hit.
- Nut-free (not that this recipe has nuts): Leave it as is. If you want crunch, add 2 tbsp pumpkin seeds on top before baking.
- Add chocolate chips: Fold in ⅓ cup dark chocolate chips after the dry ingredients. This is the version I make when I want a dessert-ish breakfast.
Questions I Get About This Recipe All the Time
Q: Why did my bread turn out dry?
A: Ugh, I’ve been there. Most likely one of three things: your bananas weren’t ripe enough, you overmixed (creates a tough crumb), or you baked it too long. Check at 30 minutes — every oven runs differently. Also, if you used plant-based protein powder without adding extra milk, that’s probably it. Try adding 2 tbsp of milk next time and use very ripe bananas.
Q: Can I make this with no flour at all — just protein powder?
A: I don’t recommend it. You need some flour for structure — otherwise the bread collapses and turns into a dense protein cake. The lowest I’ve gone is ½ cup flour + 1 scoop protein powder, which still works but is slightly more crumbly. If you need it grain-free, try almond flour (use ¾ cup + 1 scoop protein).
Q: How long does this bread last? Can I freeze it?
A: In the fridge, tightly wrapped, it’s good for 5 days. Yes, it freezes beautifully. Wrap the whole loaf (or individual slices) in plastic wrap then foil. Thaw in the fridge overnight, then toast. I always keep a couple slices in my freezer for emergency cravings.
Q: What do you serve with this?
A: Plain is great, but my favorite way is toasted with a pat of butter and a drizzle of honey. If I’m feeling extra, I’ll top with a smear of peanut butter and sliced banana. My friends love it with a side of Greek yogurt and berries for a balanced breakfast.
More Recipes My Friends Ask for on Repeat
If you liked this one, here are a few others that get the same reaction when I bring them to brunch:
- High-Protein Oatmeal Muffins — Packed with 12g protein each and actually fluffy.
- The Only Healthy Banana Oatmeal Cookies — They’re cookies, but also breakfast? Yes.
- Protein Pancakes That Don’t Taste Like Rubber — The trick is folding in whipped egg whites.
If you’re the kind of person who wants a banana bread that doesn’t crumble, looks good on the counter, and actually keeps you full until lunch, this is your new standard.
Drop a comment below if you make it — I love hearing what protein powder you used and how it turned out. Or tag me on Pinterest so I can see your beautiful loaf!
📌 Protein banana bread that stays moist for days — save this for Sunday meal prep when you need high-protein breakfasts that actually taste good.
Protein Banana Bread
Equipment
- 8.5×4.5-inch Loaf Pan
- Large Mixing Bowl
- Medium Mixing Bowl
- Whisk
- Spatula
Ingredients
- 1.5 cups overripe mashed banana (about 3 medium)
- 2 large eggs
- 1 egg white
- 1/3 cup plain Greek yogurt (80g)
- 1/4 cup melted butter or coconut oil (60ml)
- 1/4 cup milk of choice (60ml)
- 1/3 cup coconut sugar or brown sugar (65g)
- 1 scoop vanilla or unflavored protein powder (30g)
- 1 cup whole wheat pastry flour or all-purpose flour (120g)
- 1 tsp baking soda
- 1/2 tsp salt
- 1/2 tsp cinnamon (optional)
Instructions
- Preheat and prep: Set oven to 350°F (175°C). Grease an 8.5×4.5-inch loaf pan and line with parchment paper leaving an overhang.
- Mash the bananas: In a large bowl, mash the bananas until almost smooth – a few lumps are fine.
- Mix wet ingredients: Add eggs, egg white, yogurt, melted butter, milk, and sugar to the banana. Whisk until smooth. Ensure butter is not hot to avoid scrambling eggs.
- Add dry ingredients: Sprinkle protein powder, flour, baking soda, salt, and cinnamon over the wet mixture. Fold gently with a spatula until no flour streaks remain. Do not overmix; about 15 folds is enough.
- Pour and bake: Scrape batter into the prepared pan and smooth the top. Bake for 30–35 minutes, until a toothpick inserted in the center comes out with a few moist crumbs (not raw batter).
- Cool in pan: Let the bread cool in the pan for 10 minutes, then transfer to a wire rack to cool completely before slicing. Slicing warm causes crumbling.
Notes
Related Recipes:
 Twice Baked Breakfast Potatoes for a Lazy Sunday: The Only Brunch Dish You Actually Want to Make
 The Starbucks Pink Drink Recipe with the Perfect Coconut Milk Float
 Starbucks Vanilla Bean Copycat Recipe That Costs a Fraction of the Drive-Thru — and Tastes Better
 The Perfectly Pillowy Chocolate Chip Milk Buns (Tangzhong Method)
 Baked Protein Pancake Bowls That Are Fluffy, Golden, and Ready in 25 Minutes (Hands-Free)
 Blueberry Crumble Cheesecake That’s Actually Worth the Oven Time