
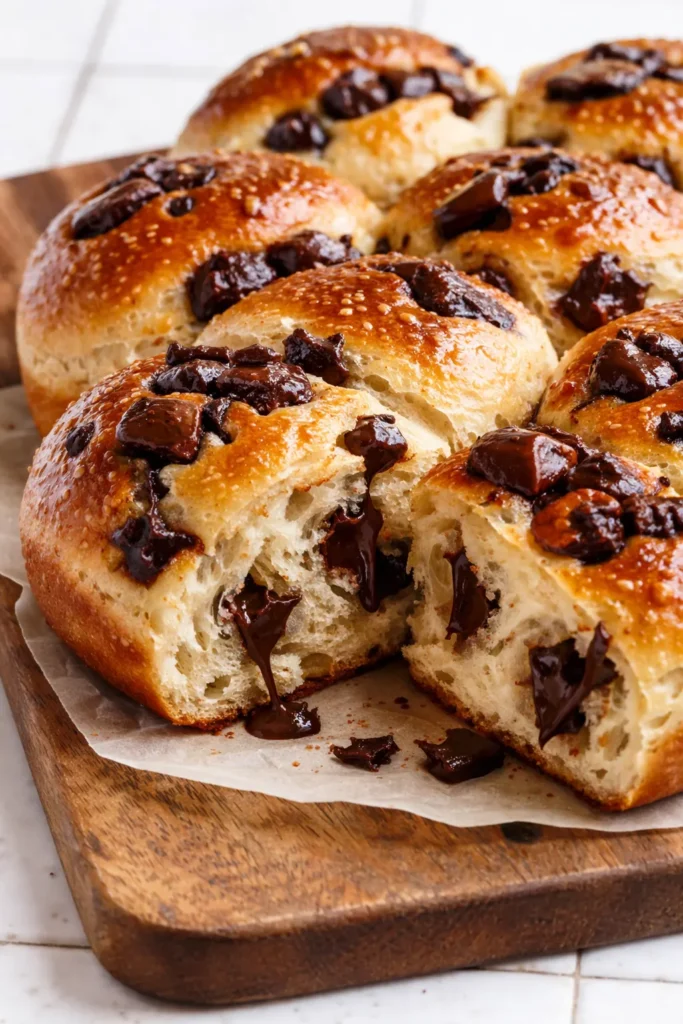
I’ve tested a lot of milk bun recipes. Most are fine the day you make them and dry toast by day two. This batch — using a specific little paste called a tangzhong — stays so soft that my husband asked if I’d bought them from a bakery on day three. That’s the kind of fluff we’re aiming for. These chocolate chip milk buns have a tight, tearable crumb, melty pools of dark chocolate, and a honey butter gloss that makes them look like they came from a very expensive pastry case.
The short version: One extra step (90 seconds, I promise) guarantees milk buns that stay pillowy for days, with melted chocolate in every bite.
I’ve made this exact batch about twelve times now, testing different flours and chocolate-to-dough ratios. My picky nine-year-old ate three in one sitting and asked if we could make them “for every Saturday from now on.” So here we are.
- Serves: 12 buns
- Hands-On Time: 35 min | Total Time: 2 hrs 45 min
- Difficulty: Medium — but the tangzhong does most of the work for you
- Cost per serving: ~$0.75 per bun
- Calories: ~290 per bun
- Dietary Notes: Adaptable for dairy-free
(Photo above: a 10-inch cast iron skillet packed with golden-brown buns, their tops brushed glossy with honey butter. A few chocolate-dark pools peek through the seams. A small bowl of flaky salt sits to the side. Warm morning light from the left edge of the frame.)
The One Trick That Keeps These Soft for Days
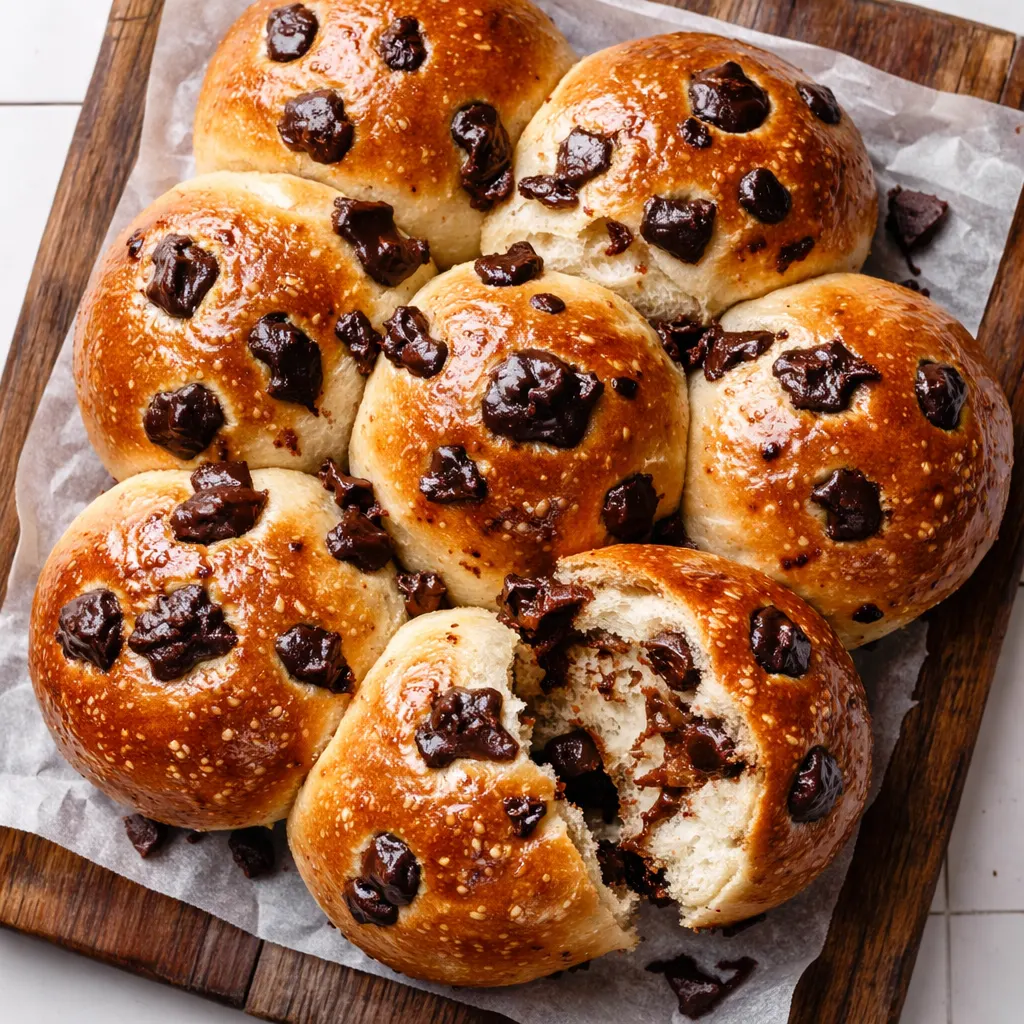
It’s called a tangzhong. One sentence of housekeeping: heating a little flour and milk together gelatinizes the starches, which means the dough traps way more moisture than it normally would. In plain English: these stay soft for days. Day one: pillowy. Day two: pillowy. Day three (if they last): still pillowy.
I learned this the hard way after making batch after batch of dry-ish rolls that were tragic by Tuesday. The tangzhong adds exactly four minutes to your prep. You whisk two tablespoons of flour with some milk in a pan until it turns into a thick paste. It looks weird. It feels weird. It works. Do not skip it.
What this produces: buns that pull apart in long, feathery strands. The crumb is tight but not dense. The chocolate stays molten because the dough is rich enough to support it. Every bite has that slight chew that says “I was made with care” without feeling like a workout.
Ingredients Worth Talking About
- For the tangzhong: 2 tbsp bread flour, 3 tbsp whole milk. This is the moisture lock. Use bread flour here — all-purpose works in a pinch but bread flour gives a better paste. My first attempt I used 2% milk and it was fine, but whole milk makes a noticeably richer tangzhong. Go with whole if you have it.
- 2 ½ cups bread flour (for the dough). Bread flour has more protein, which means more gluten, which means fluffier buns. I tested all-purpose and the buns were softer but a little flat structurally. Bread flour gives them the height you want. King Arthur or Bob’s Red Mill are my go-tos here.
- 6 oz dark chocolate, chopped. Here’s the thing: chocolate chips are stabilized with wax. They hold their shape. You do not want that. You want pools of chocolate that smear into the dough. Buy a good dark chocolate bar (70% is my sweet spot) and chop it into rough chunks. My kids complained the first time I used 85%. I told them it builds character. But 70% is where the whole family lands happily.
- 3 tbsp unsalted butter, softened. The butter goes in at the end of kneading, after the dough has started coming together. This is called the “windowpane” moment in bread nerd circles. It makes the buns tender without being greasy. I forgot the butter once. The buns were sad little hockey pucks. Do not forget the butter.
What to Pull Out Before You Start
- A small saucepan (for the tangzhong)
- A stand mixer with dough hook (or a very determined arm and a large bowl)
- A 10-inch cast iron skillet or 9×13 baking dish — cast iron gives the best crust on the bottom
- Plastic wrap or a clean kitchen towel
- Pastry brush (for the egg wash and honey butter)
You can mix this by hand, just know that it takes about 12 minutes of steady kneading to develop the gluten properly. The stand mixer does it in 8. I’ve done both. The arm workout is real, but the result is the same.
Making the Buns: My Exact Process
Read through this once before you start. The tangzhong needs to cool slightly before you add it to the dough, so timing matters — but not in a stressful way. Just a “set a timer so you don’t forget” way.
Start with the tangzhong:
- Whisk together: In a small saucepan, whisk 2 tbsp bread flour and 3 tbsp whole milk until smooth. Place over medium-low heat and stir constantly. After about 2 minutes, it will thicken into a paste that looks like very thick pudding. Remove from heat and let it cool for 10 minutes. (📸 Photo tip: You’re looking for a paste that holds its shape when you lift the whisk — it should slowly slump off, not drip.)
Make the dough:
- Combine dry ingredients: In the bowl of a stand mixer, whisk together 2 ½ cups bread flour, ⅓ cup sugar, 2 ¼ tsp active dry yeast (one packet), and 1 tsp salt.
- Add wet ingredients: Add the cooled tangzhong, ½ cup warm whole milk (about 110°F — warm but not hot to the touch), and 1 large egg. Mix on low with the dough hook until a shaggy dough forms, about 2 minutes.
- Knead and add butter: Increase speed to medium and knead for 5 minutes. The dough will look smooth. Add the 3 tbsp softened butter, one tablespoon at a time, letting each piece incorporate fully before adding the next. Then knead for another 3-4 minutes. The dough should be soft, smooth, and slightly tacky (not sticky). (📸 Photo tip: The dough should stretch into a thin, translucent “windowpane” without tearing — that’s how you know the gluten is happy.)
- First rise: Shape the dough into a ball and place it in a lightly oiled bowl. Cover with plastic wrap and let it rise in a warm spot for 1 hour, or until doubled in size. My trick: I turn my oven on to 170°F for 2 minutes, then turn it off and put the dough inside with the door cracked. Perfect rise every time.
Shape and second rise:
- Divide and flatten: Punch down the dough and turn it out onto a lightly floured surface. Divide into 12 equal pieces (about 70g each if you’re weighing). Flatten one piece into a 3-inch round.
- Add chocolate and seal: Place a small handful of chopped chocolate in the center. Pull the edges up and pinch firmly to seal. Roll the seam side down against the counter to create surface tension — this gives you a smooth, tight ball. The first few times I didn’t pinch well enough and the chocolate leaked out during baking. Leaky chocolate is still delicious, but it burns on the pan. Pinch well.
- Arrange in pan: Place the buns seam-side down in a buttered 10-inch cast iron skillet or 9×13 baking dish. They should be touching but not squished. Cover loosely with plastic wrap and let rise for 45 minutes, until they’re puffy and doubled and touching each other.
Bake:
- Preheat and egg wash: About 15 minutes before the rise is done, preheat your oven to 350°F. In a small bowl, whisk 1 egg with 1 tbsp milk. Gently brush the tops of the buns with the egg wash — this gives them that deep golden-brown bakery shine.
- Bake: Bake for 22-25 minutes, rotating the pan halfway through. They’re done when the tops are deep golden brown and an instant-read thermometer poked into the center of a bun reads 190°F. I under-baked these once and they deflated slightly. The thermometer is your friend here.
- Honey butter finish: While they bake, melt 2 tbsp butter with 1 tbsp honey. As soon as the buns come out of the oven, brush them with the honey butter. This step is not optional — it’s what gives them that glossy, almost lacquered look and a subtle sweetness on the crust.
How I Meal Prep These for the Week
These freeze like absolute champions. I make a double batch on Sunday and we’re set for school lunches and after-school snacks until mid-week. Here’s my system:
- Fridge: Store in an airtight container at room temperature for up to 3 days. They stay soft without any reheating. For day three and beyond, give them 10 seconds in the microwave to bring back that fresh-from-the-oven softness.
- Freezer: Yes! Let the baked buns cool completely, then wrap them tightly in plastic wrap and place in a freezer bag. They freeze beautifully for up to 2 months. I pop one in my kid’s lunchbox frozen — it thaws by lunchtime and is perfectly soft.
- Reheat: The microwave works in a pinch (10-15 seconds). But the oven is better: 300°F for 5 minutes. The honey butter re-melts slightly and the tops get a tiny bit crisp. I do this for weekend mornings with a cup of coffee.
Things I Wish I’d Known the First Time
- Don’t rush the tangzhong. I know it feels weird standing over a saucepan whisking flour paste. But if you undercook it, it won’t gelatinize properly and you lose the moisture advantage. Cook it until it’s thick enough to hold a line when you drag a spatula through it. Trust me on this one.
- Your dough will look too soft. It’s not. Milk bread dough is softer and more supple than standard bread dough. When I first made it, I thought it was too sticky and added extra flour. The buns came out dense. Trust the recipe. A slightly tacky dough is exactly what you want.
- Chocolate quality matters more than you think. I made a batch with grocery store chocolate chips once. They stayed as hard little pebbles in the middle of the buns. Not terrible, but not the gooey pockets you’re dreaming of. Spend the extra dollar on a good bar. It’s the difference between “these are fine” and “oh my god, what did you put in these?”
- Even if you mess up the shaping, they’ll still taste good. I’ve had chocolate leak out of every seam. I’ve had buns that looked like they’d been in a fight. They still got devoured. The tangzhong and the butter do so much heavy lifting that the flavor carries everything.
Swaps That Actually Work
- Dairy-Free: I make this for my sister-in-law who can’t do dairy. Use oat milk instead of whole milk (it has the closest fat content). Use vegan butter in the dough and for the honey butter. The tangzhong works exactly the same with oat milk. She told me these were better than the regular version. I’m not sure I agree, but I’ll take the compliment.
- White Chocolate Version: My kids’ preferred variation. Swap the dark chocolate for a good white chocolate bar (chopped, not chips). Add 1 tsp vanilla bean paste to the dough. It’s sweeter, obviously, and more dessert-adjacent, but absolutely perfect for a brunch table.
- Add Cinnamon Sugar: Before adding the chocolate, sprinkle a pinch of cinnamon sugar on top of the chocolate in each bun. It adds a subtle warmth that makes these feel like a cinnamon roll’s more sophisticated cousin. This is the version I make for adult gatherings — it pairs dangerously well with red wine.
- Savory Buns: Omit the sugar and chocolate. Add 1 cup of shredded cheddar and ½ cup of cooked chopped bacon to the dough during the last minute of kneading. Shape into buns, bake, and brush with garlic butter instead of honey butter. These are ridiculous. I’ll write a full post about them soon.
Questions I Get About These Buns All the Time
Q: Why did my buns turn out dense and not fluffy?
A: Ugh, I’ve been there. Two most likely culprits: 1) You added too much flour during shaping. The dough should be tacky — resist the urge to keep dusting. 2) The dough didn’t rise enough the first time. Milk bread needs a full hour in a warm spot. If your kitchen is cold, use my oven trick (heat to 170°F for 2 minutes, turn it off, put the dough inside with the door cracked). You’ve got this next time.
Q: Can I make these gluten-free?
A: I haven’t tested a gluten-free version myself, but readers have reported success using a high-quality 1:1 gluten-free baking flour blend (like King Arthur Measure for Measure). The tangzhong helps because it adds moisture that GF flours desperately need. Just know the texture will be denser and more tender — delicious, but different. If you try it, let me know how it goes!
Q: Can I freeze these before baking? Like a frozen dough situation?
A: Yes! After shaping the buns and placing them in the pan, cover tightly with plastic wrap and then foil. Freeze for up to 1 month. When you’re ready to bake, thaw in the refrigerator overnight, then let them sit at room temperature for 30 minutes before doing the egg wash and baking. The texture is exactly the same as fresh. I do this for holiday mornings when I want fresh buns without the 6am start.
Q: What do you serve with these?
A: Three things. 1) For breakfast: a soft-boiled egg and a strong latte. The buns are sweet enough that you don’t need jam. 2) For dessert: warm with a scoop of vanilla ice cream and a sprinkle of flaky salt. The contrast is genuinely insane. 3) For my kids: just a glass of cold milk. They pull the buns apart, dip them, and ask for three more. We always make a double batch now.
More Recipes My Family Makes on Repeat
If you liked these chocolate chip milk buns, here are a few others that get the same reaction at our table:
- [INTERNAL LINK PLACEHOLDER: The Tangzhong Dinner Rolls That Stay Soft for Days] — The savory version of these buns. Perfect for Thanksgiving or any dinner where you want “oohs” when the bread basket hits the table.
- [INTERNAL LINK PLACEHOLDER: Brown Butter Chocolate Chunk Cookies] — Nutty, salty, and uses the same “good chocolate matters” philosophy. My go-to for last-minute dessert.
- [INTERNAL LINK PLACEHOLDER: Overnight Cinnamon Rolls with Cream Cheese Glaze] — Another make-ahead breakfast dream. The tangzhong makes an appearance here too because I can’t stop using it.
These buns have become my signature bake for a reason. They look like you spent hours at the pastry table but really, you just followed one extra step and let the oven do the rest. If you make them, drop a comment below and tell me how many your family ate before they cooled. I love hearing the real numbers.
📌 Save this fluffy chocolate chip milk bun recipe for your next weekend baking session — they freeze beautifully, so you can always have soft, pillowy buns ready to go.
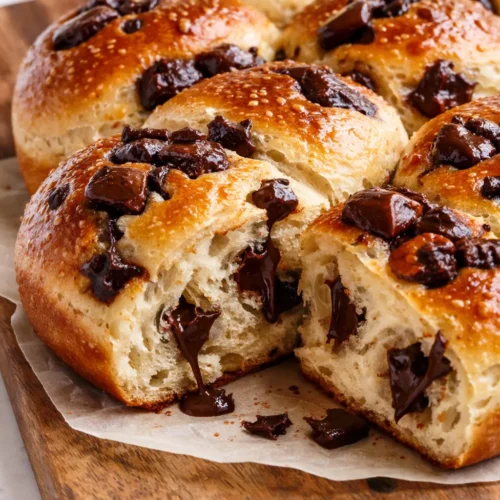
The Perfectly Pillowy Chocolate Chip Milk Buns (Tangzhong Method)
Equipment
- Small saucepan
- Stand mixer with dough hook
- 10-inch cast iron skillet or 9×13 baking dish
- Plastic wrap
- Pastry brush
Ingredients
For the tangzhong
- 2 tbsp bread flour
- 3 tbsp whole milk
For the dough
- 2 1/2 cups bread flour
- 1/3 cup granulated sugar
- 2 1/4 tsp active dry yeast (one packet)
- 1 tsp salt
- 1/2 cup warm whole milk (about 110°F)
- 1 large egg
- 3 tbsp unsalted butter, softened
For the filling and finish
- 6 oz dark chocolate (70%), chopped into chunks
- 1 large egg (for egg wash)
- 1 tbsp milk (for egg wash)
- 2 tbsp unsalted butter
- 1 tbsp honey
Instructions
- Make the tangzhong: In a small saucepan, whisk together 2 tbsp bread flour and 3 tbsp whole milk until smooth. Place over medium-low heat and stir constantly until it thickens into a paste that holds its shape when you lift the whisk, about 2 minutes. Remove from heat and let cool for 10 minutes.
- Combine dry ingredients: In the bowl of a stand mixer, whisk together 2 1/2 cups bread flour, 1/3 cup sugar, 2 1/4 tsp yeast, and 1 tsp salt.
- Add wet ingredients: Add the cooled tangzhong, 1/2 cup warm milk, and 1 egg. Mix on low with the dough hook until a shaggy dough forms, about 2 minutes.
- Knead and add butter: Increase speed to medium and knead for 5 minutes. Add 3 tbsp softened butter one tablespoon at a time, letting each incorporate fully. Knead another 3-4 minutes until the dough is smooth, soft, and slightly tacky. It should stretch into a thin windowpane without tearing.
- First rise: Shape the dough into a ball and place in a lightly oiled bowl. Cover with plastic wrap and let rise in a warm spot for 1 hour, or until doubled in size. (Oven trick: heat to 170°F for 2 minutes, turn off, place dough inside with door cracked.)
- Divide and flatten: Punch down the dough and turn it onto a lightly floured surface. Divide into 12 equal pieces (about 70g each). Flatten one piece into a 3-inch round.
- Add chocolate and seal: Place a small handful of chopped chocolate in the center of each round. Pull the edges up and pinch firmly to seal. Roll seam-side down to create surface tension.
- Arrange in pan: Place buns seam-side down in a buttered 10-inch cast iron skillet or 9×13 baking dish. Cover loosely with plastic wrap and let rise 45 minutes until puffy and doubled, touching each other.
- Preheat and egg wash: About 15 minutes before the rise is done, preheat oven to 350°F. Whisk 1 egg with 1 tbsp milk. Gently brush the tops of the buns with egg wash.
- Bake: Bake for 22-25 minutes, rotating pan halfway through. Buns are done when deep golden brown and internal temperature reaches 190°F.
- Honey butter finish: While baking, melt 2 tbsp butter with 1 tbsp honey. As soon as buns come out of the oven, brush with honey butter. Serve warm or at room temperature.
Notes
Related Recipes:
 Twice Baked Breakfast Potatoes for a Lazy Sunday: The Only Brunch Dish You Actually Want to Make
 The Starbucks Pink Drink Recipe with the Perfect Coconut Milk Float
 Starbucks Vanilla Bean Copycat Recipe That Costs a Fraction of the Drive-Thru — and Tastes Better
 The Crispiest Breakfast Egg Sandwich You’ll Make at Home (No Soggy Bread)
 Caramel Ribbon Crunch Bars That Look Like a Bakery Item (But You Made in 35 Minutes)
 Frozen Whipped Coffee That’s Creamy, Dreamy, and Ready Whenever You Are