
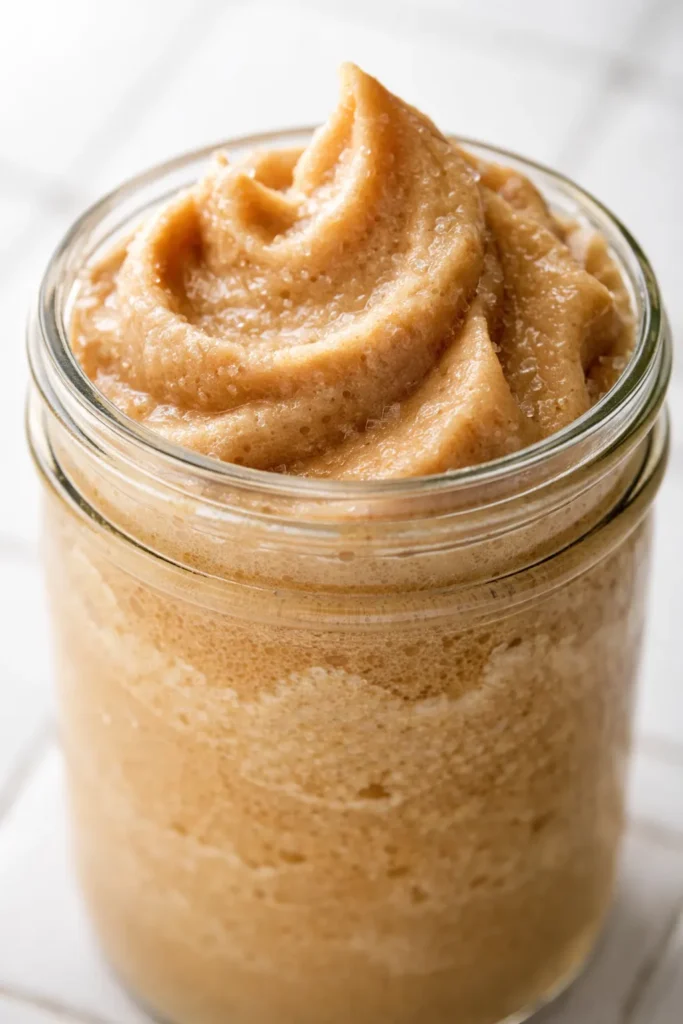
That first pull of the spoon through the frozen foam — when it cracks just slightly on top and then gives way to something silky and almost mousse-like underneath — is genuinely the best part of my morning routine right now. I’ve made this about twelve times since I figured out the ratio, and let me tell you: having a container of frozen whipped coffee in the freezer changes everything about how I start my day.
The short version: Instant coffee and sugar whipped into a cloud, frozen solid, and scooped into cold milk whenever you need a hit of caffeine that tastes like dessert.
I spent a whole summer testing this after that Dalgona coffee trend swept through and I got curious about whether the whipped version would survive a deep freeze. Turns out it does — beautifully — and the texture is actually better after a night in the freezer than it is fresh.
- Serves: 6-8 as a coffee base (makes about 2 cups of whipped mixture)
- Hands-On Time: 10 min | Total Time: 8 hours (mostly freezing)
- Difficulty: Embarrassingly easy — if you can whip cream, you can do this
- Cost per serving: ~$0.30 (cheaper than any coffee shop drink, and I stand by that)
- Calories: ~45 per 2-tablespoon scoop (with sugar; about 20 with monkfruit)
- Dietary Notes: Naturally vegan and dairy-free — just watch your milk choice
(Photo above: A wide-mouth mason jar filled with pale-brown frozen whipped coffee, spoon poised for that first scoop. Morning light from the left catching the tiny air bubbles in the frozen foam. A glass of oat milk waiting beside it.)
Why Freezing the Whipped Coffee Actually Works (And Why You Should Try It)
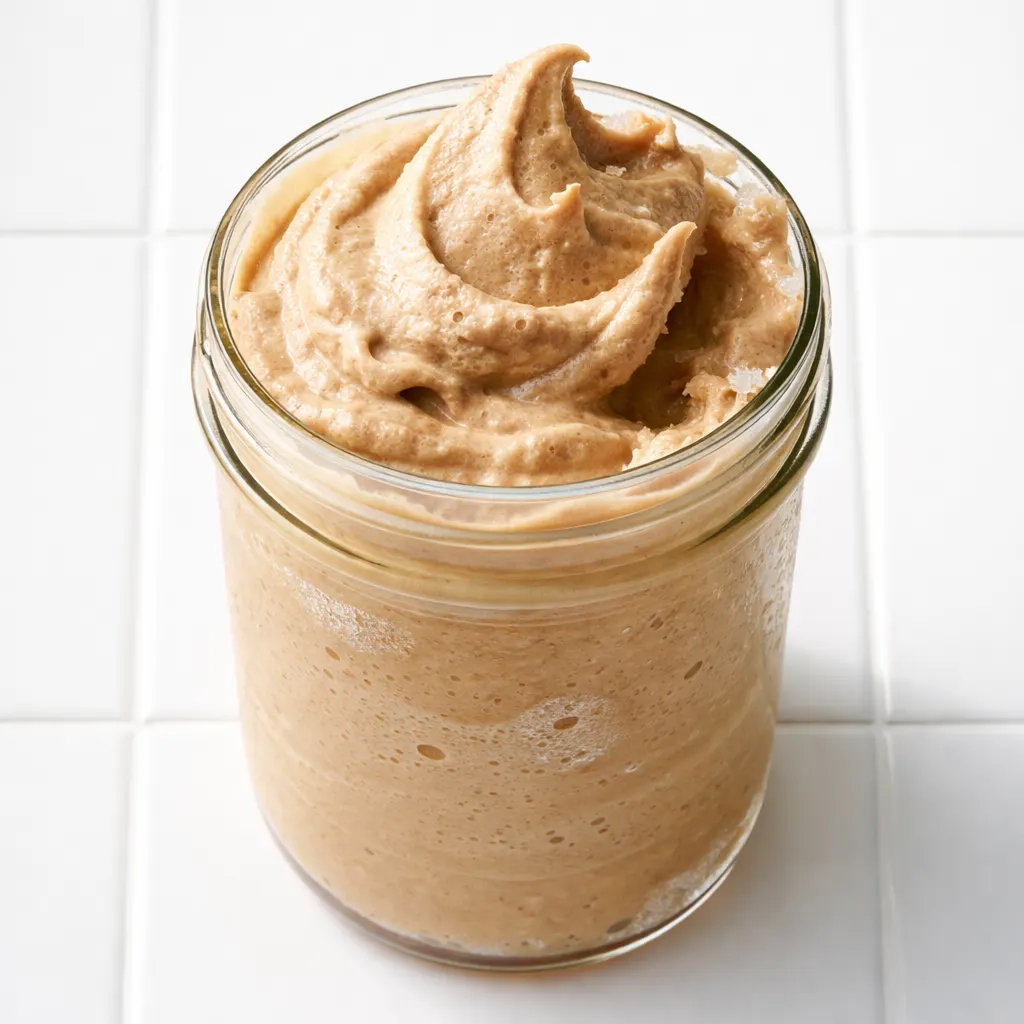
The magic here is in the whipping. The instant coffee and sugar dissolve into the hot water and then get aerated into a thick, stable foam — all those tiny air bubbles are what freeze into something that’s part mousse, part frozen cloud. When you scoop it into cold milk, it doesn’t just dissolve instantly; it floats on top and slowly melts into the milk, giving you layers of sweet coffee flavor that build as you drink it.
I learned the hard way that under-whipping is the enemy. If you stop at soft peaks, the mixture freezes into a dense, icy block that’s hard to scoop and doesn’t melt evenly. You need stiff peaks — the kind that hold their shape when you lift the beaters. That extra minute or two of whipping is the difference between a frozen treat and a frozen disaster.
The result is something that looks like you put way more effort into it than you actually did. Which is my favorite kind of thing to make.
What Goes In — Plus My Honest Notes
- 25 g instant coffee: This is about 3 tablespoons of granules — not the fine powder, the little crunchy crystals. Instant coffee is non-negotiable here; brewed coffee has too much water and won’t whip. I use Nescafé Taster’s Choice because it dissolves cleanly and has a smooth flavor, but any brand works. My test kitchen discovery: The cheaper instant coffees actually whip faster because they have more processing aids. File that one away.
- 1 cup white sugar (or Lakanto monkfruit sweetener): Regular sugar gives you that classic sweet coffee shop taste and the most stable foam. The monkfruit version works beautifully too — it whips up slightly less fluffy but freezes fine. I tested both side by side and my nine-year-old couldn’t tell the difference in the final drink. That’s my gold standard for sugar swaps.
- 1/2 cup hot water: Not boiling — just hot from the tap is fine. Too-hot water can deflate the foam as you whip it, so I let my kettle sit for about 30 seconds after it boils before measuring.
Equipment You’ll Actually Need
- Hand mixer — a stand mixer works too, but you’d need to scrape down the sides more. I use my hand mixer every time because it’s faster and easier to control.
- Large bowl — the mixture triples in volume as you whip it, so go bigger than you think you need. I use my biggest mixing bowl and I’m never sorry.
- Freezer-safe container — anything with a tight lid. I use a wide-mouth mason jar or a small glass loaf pan. The wider the container, the easier it is to scoop from frozen.
That’s it. Three things. This is not a complicated setup.
Here’s How I Do It (Step by Step, No Fancy Skills Required)
I’ve made this so many times now that I can do it while half-asleep, which is honestly the best endorsement I can give a morning recipe.
Whip it good: In a large bowl, combine the instant coffee, sugar (or monkfruit), and hot water. Start whipping on low speed so the dry ingredients don’t fly everywhere, then gradually increase to high. Set a timer for 4 minutes — that’s usually the sweet spot.
- Whip until stiff peaks form: The mixture will go from dark brown and watery to pale brown and thick. You’re looking for the texture of meringue — when you lift the beaters, the foam should form a peak that holds its shape for a second or two before collapsing slightly. (📸 Photo tip: The foam should look like a thick, glossy mousse — pale enough that you can see the light through it, with visible air bubbles that stay put. If you tilt the bowl, the foam should hold in place.)
- Transfer to container: Scoop the whipped mixture into your freezer-safe container. Use a spatula to get every last bit — this stuff is liquid gold. Smooth the top gently so it freezes evenly.
- Freeze overnight: Seal the container and freeze for at least 8 hours, or overnight. The mixture will be solid but scoopable — think the texture of firm frozen mousse. (📸 Photo tip: After freezing, the surface should be matte and pale brown, with tiny air bubbles visible at the edges. A perfect scoop should look like a quenelle of frozen foam.)
- Scoop and serve: Let the container sit at room temperature for about 2 minutes before scooping — it makes the texture creamier. Drop 2-3 tablespoons of frozen whipped coffee into a glass of cold milk, iced almond or oat milk, or blend it into a frozen latte. Or, and this is my personal favorite, spoon it over vanilla ice cream for the most ridiculous dessert.
How I Meal Prep This for the Week (Because Mornings Are Hard Enough)
I make a double batch on Sunday and we’re set for the whole week. The kids grab their glasses of milk and scoop their own frozen coffee on school mornings — they think it’s a treat, I know it’s caffeine. Everybody wins.
- Fridge: Don’t — the whipped mixture needs to freeze to set up properly. Keep it in the freezer at all times.
- Freezer: Yes, absolutely. Stored in an airtight container, it keeps for up to 3 months. The texture stays perfect. I’ve tested this at 2 weeks, 4 weeks, and 8 weeks — no noticeable difference.
- Reheat: No reheating needed. Just scoop straight from frozen. If the mixture is too hard to scoop, let it sit on the counter for 5 minutes — it softens just enough.
Things I Wish I’d Known the First Time (After Way Too Many Soggy Scoops)
- Don’t over-wet your spoon: Use a dry spoon to scoop from the container. Any water that gets into the frozen mixture will turn into ice crystals and ruin the creamy texture. Learned this one the hard way.
- Let it sit before scooping: 2 minutes on the counter is all it needs. This softens the outer layer just enough that you can get a clean scoop instead of chipping at a frozen brick.
- The milk matters more than you think: Whole milk makes the creamiest drink, but oat milk is my personal favorite — it’s thick enough to carry the coffee flavor without diluting it. Almond milk works but it’s thinner, so use a bit less frozen coffee to keep the balance right.
- Scale the serving to your caffeine tolerance: One tablespoon of frozen whipped coffee has roughly the caffeine of half a shot of espresso. I use 2-3 tablespoons per glass. If you’re sensitive to caffeine, start with one and see how you feel.
Swaps That Actually Work (For Every Situation)
- Lower sugar version: The Lakanto monkfruit sweetener is my go-to. It measures 1:1 with sugar and whips up beautifully. The texture is slightly less stable — it’s a bit softer frozen — but it still works perfectly for daily drinking. This is the version I make for myself most mornings because I like my coffee sweet but not sugar-crash sweet.
- Extra coffee kick: Add a tablespoon of instant espresso powder along with the instant coffee. It makes the flavor deeper and more intense without adding bitterness. My husband does this and calls it his “adult version.”
- Flavored coffee: Use a flavored instant coffee — I’ve tried vanilla and hazelnut varieties and they’re both excellent. Or add 1/2 teaspoon of vanilla extract to the water before whipping. My kids love the vanilla version and don’t realize it’s still coffee.
- Ice cream topping version: Skip the milk entirely and scoop the frozen whipped coffee directly over vanilla ice cream. The texture contrast is incredible — creamy, cold, coffee-flavored, and just sweet enough.
- Frozen latte version: Blend 3 tablespoons of frozen whipped coffee with 1 cup of milk and a handful of ice. It comes out like a fancy coffee shop frappé — costs pennies instead of six dollars.
Questions I Get About This Recipe All the Time
Q: Why did my mixture not whip into stiff peaks?
A: Ugh, I’ve been there. Two most common culprits: your bowl wasn’t perfectly clean (even a trace of oil will deflate the foam), or you didn’t whip long enough. That 4-minute mark is real — set a timer and don’t stop until you see those stiff peaks. If it still won’t hold, add a pinch of cream of tartar to stabilize it.
Q: Can I make this with decaf instant coffee?
A: Yes, absolutely. Decaf instant coffee works exactly the same — the whipping is all about the sugar and water, not the caffeine. I’ve tested it and the texture is identical. Great for afternoon coffee drinks when you want the taste without the buzz.
Q: How long does the frozen whipped coffee last in the freezer?
A: Up to 3 months in an airtight container. The texture stays creamy and scoopable for at least 8 weeks in my experience. After that, it might develop a few ice crystals on the surface, but it’s still perfectly good — just stir it gently before scooping. Keep it sealed and away from strong-smelling foods (it’s porous and can pick up freezer odors).
Q: What kind of milk works best with this?
A: Whole milk or oat milk are my top picks — they’re creamy enough to carry the intense coffee flavor. I love oat milk with this because it’s subtly sweet without adding sugar. My kids prefer it with whole milk. If you’re using almond milk or another thin plant milk, use less frozen coffee (about 1.5 tablespoons per glass) so the flavor doesn’t overwhelm the milk.
More Recipes My Family Makes on Repeat
If you liked this one, here are a few others that get the same reaction at our table:
- [INTERNAL LINK PLACEHOLDER: 5-Minute Iced Brown Sugar Shaken Espresso] — My go-to when I need caffeine fast and don’t want to wait for the freezer.
- [INTERNAL LINK PLACEHOLDER: Easy Homemade Vanilla Syrup] — Make this once and you’ll never buy store-bought coffee syrup again.
- [INTERNAL LINK PLACEHOLDER: The Best Cold Brew I’ve Ever Made at Home] — For when you want straight-up cold brew without the foam.
This is the kind of thing that makes you look deeply organized when really you just made a batch of frozen foam on a quiet Sunday afternoon. Pour yourself a glass of cold milk, drop in a scoop, and watch that coffee cloud slowly melt into something beautiful. It’s my favorite way to say “good morning” without having to say much at all.
If you try it, drop a comment below — I love hearing how it goes for you and which milk you ended up using. And tag me on Pinterest or Instagram so I can see your gorgeous coffee creations!
📌 Frozen whipped coffee recipe that’s creamy, make-ahead, and costs pennies per serving — save it for your next lazy Sunday morning or busy weekday coffee fix.
Frozen Whipped Coffee
Equipment
- Hand Mixer
- Large Mixing Bowl
- Freezer-Safe Container
Ingredients
- 25 g instant coffee (about 3 tablespoons)
- 1 cup white sugar or Lakanto monkfruit sweetener
- 1/2 cup hot water (not boiling)
Instructions
- Combine instant coffee, sugar (or monkfruit), and hot water in a large bowl. Whip with a hand mixer on low speed then gradually increase to high. Whip until stiff peaks form, about 4 minutes. The mixture should be pale brown and thick, holding its shape when you lift the beaters.
- Scoop the whipped mixture into a freezer-safe container. Use a spatula to get every last bit. Smooth the top gently so it freezes evenly.
- Seal the container and freeze for at least 8 hours or overnight. The mixture will be solid but scoopable, like a firm frozen mousse.
- Let the container sit at room temperature for 2 minutes before scooping. Drop 2-3 tablespoons of frozen whipped coffee into a glass of cold milk, iced almond or oat milk, or blend into a frozen latte. Enjoy!
Notes
Related Recipes:
 Twice Baked Breakfast Potatoes for a Lazy Sunday: The Only Brunch Dish You Actually Want to Make
 The Starbucks Pink Drink Recipe with the Perfect Coconut Milk Float
 Starbucks Vanilla Bean Copycat Recipe That Costs a Fraction of the Drive-Thru — and Tastes Better
 The Crispiest Breakfast Egg Sandwich You’ll Make at Home (No Soggy Bread)
 Caramel Ribbon Crunch Bars That Look Like a Bakery Item (But You Made in 35 Minutes)