
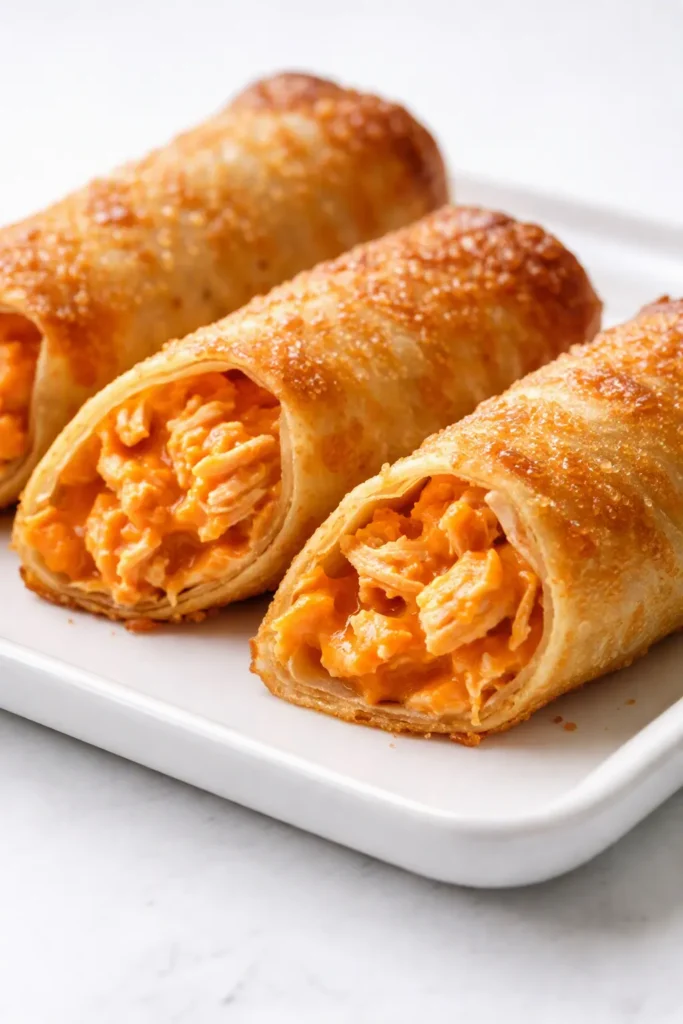
My husband once hid the last egg roll from me during a Bills game. Not even joking. I found it later, wrapped in a napkin behind the ketchup. These buffalo chicken egg rolls are that good — crispy, spicy, cheesy, and so much easier to eat than actual wings while you’re yelling at the TV. Every single game day, they disappear in minutes. I’ve learned to make a double batch just to keep the peace.
The short version: They come together in 30 minutes and taste like your favorite bar snack, but way easier to make at home.
I’ve made these for every Super Bowl, playoff game, and random Sunday for five years now, and not once has a single one been left over. My nine-year-old — who claims she hates anything “spicy” — eats three before I even sit down.
- Serves: 4 as an appetizer (or 2 very hungry people)
- Hands-On Time: 15 min | Total Time: 30 min
- Difficulty: Easy, even on a school night if you use rotisserie chicken
- Cost per serving: ~$3.50
- Calories: ~240 per egg roll
- Dietary Notes: Naturally nut-free; easily adaptable for dairy-free or gluten-free
(Photo above: a close-up shot of two golden egg rolls on a wooden board, sliced in half so you can see the melty cheese strings and specks of orange buffalo sauce, a small bowl of ranch dip in the background with natural light coming in from the left — the kind of picture that makes you want to reach into the screen.)
The Thing That Makes These Actually Crispy (Not Soggy)
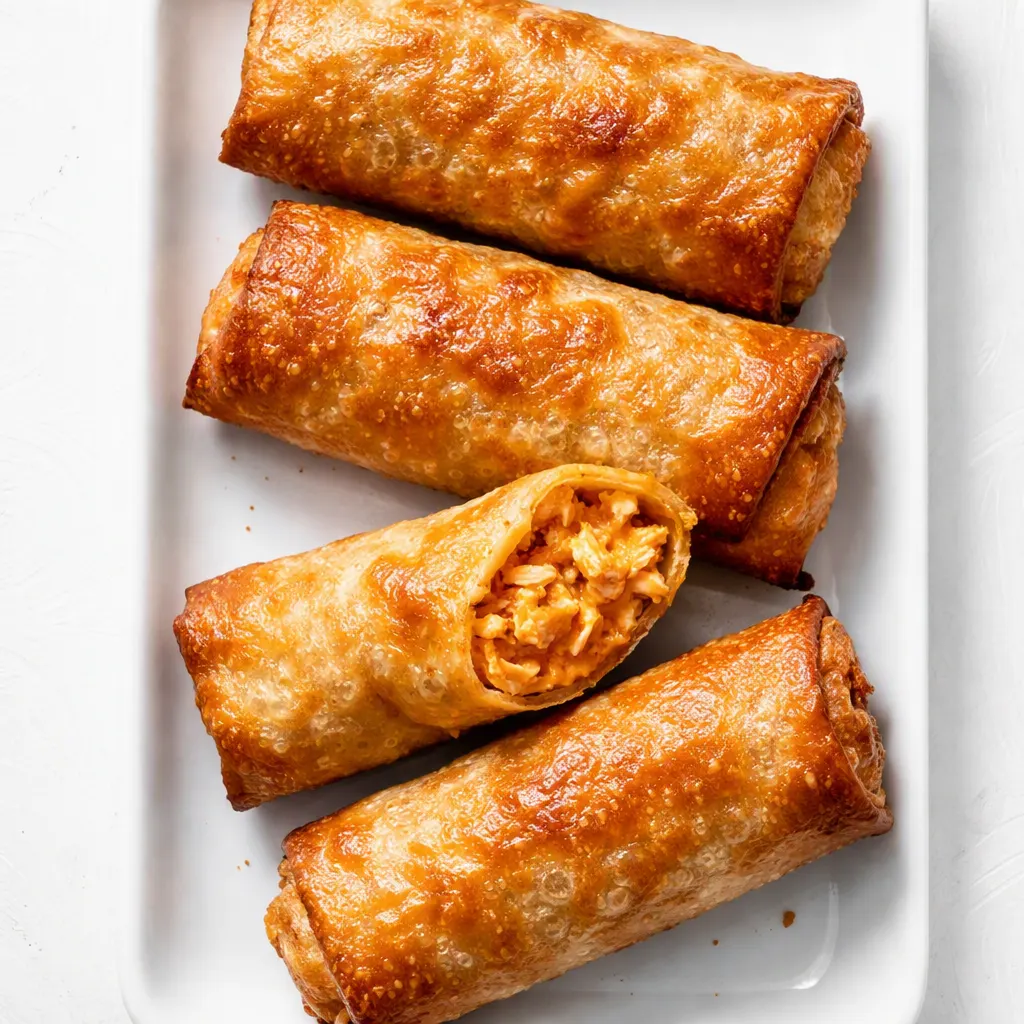
Most homemade egg rolls turn out sad and soft because the filling steams the wrapper from the inside. The fix is stupid simple: a wire rack and a little oil. When you bake them on a rack set over a baking sheet, the hot air circulates all around, so the bottom gets just as crispy as the top. Brushing them with a bit of oil before they hit the oven helps them turn that deep golden brown you’d normally only get from frying — minus the splattering mess.
Also, using fully cooked, cooled filling is everything. If you dump hot chicken straight from the stove into the wrapper, the steam will soften the dough before you even get them in the oven. I learned that the hard way after a batch that looked gorgeous going in and came out like sad, floppy ravioli. Now I stir the filling together, pop it in the fridge for five minutes while the oven heats, and every single one comes out shatteringly crisp.
These stay crunchy for a solid 20 minutes after coming out of the oven, which is exactly how long it takes my family to demolish a tray. If you want that fresh-from-the-fryer crunch without actually frying, this is the method that gets you there.
Everything You Need (And a Few Notes From Me)
- 2 cups shredded cooked chicken: I use rotisserie chicken every time — it’s already seasoned and saves me 20 minutes. Just pull the meat off and give it a rough chop so it mixes evenly. My kids can smell the difference when I try to use plain poached chicken. They don’t know that’s why, but they definitely eat fewer when I skip the rotisserie.
- 4 oz cream cheese, softened: This makes the filling creamy and helps everything hold together. Don’t skip it or try to use Greek yogurt here — it’ll get watery and leak out. Set it out on the counter 30 minutes before you start so it softens properly.
- ½ cup buffalo wing sauce: I use Frank’s RedHot because it’s the classic, but any cayenne-based sauce works. If you like it really face-melting, use extra-hot. For a milder version that won’t make the kids cry, start with ⅓ cup and add more to your own plate later.
- 1 cup shredded sharp cheddar cheese: Sharp cheddar gives that tangy, salty bite that stands up to the heat. You could swap in Monterey Jack for a mellower flavor, or pepper jack if you’re feeling bold. I grate my own because the pre-shredded stuff doesn’t melt as smoothly — it has anti-caking agents that make the filling a little grainy.
- 2 green onions, thinly sliced: These add a fresh, oniony crunch that cuts through the richness. If my six-year-old is eating, I’ll mince them really fine so she doesn’t spot any green things and declare them “yucky.”
- ½ teaspoon garlic powder: Just a little background note. Do not use fresh garlic — it gets weird and bitter under the heat of the buffalo sauce.
- 10-12 egg roll wrappers: You’ll find these in the refrigerated produce section near the tofu. Keep them covered with a damp paper towel while you work or they’ll dry out and crack. If you can only find the larger spring roll wrappers, just use a little less filling and roll them tighter.
- Oil for brushing: I use avocado oil because it has a high smoke point and a neutral flavor, but regular canola or vegetable oil is fine. You only need about 2 tablespoons total.
What to Pull Out Before You Start
- A rimmed baking sheet — I use a half sheet pan (13×18 inches)
- A wire rack that fits inside the baking sheet (this is the non-negotiable part for crispiness)
- Pastry brush for the oil
- Mixing bowl and spatula
- Small bowl of water for sealing the wrappers
Let’s Make It (Step by Step)
This goes fast, so read through once before you start. The actual rolling is the only part that takes a little patience, but I promise you’ll have the hang of it by the third one.
Preheat and prep: Move an oven rack to the middle position and preheat to 400°F (200°C). Place the wire rack inside the baking sheet and set it aside. If your rack doesn’t fit perfectly, just make sure the baking sheet catches any drips.
- Make the filling: In a mixing bowl, combine the shredded chicken, softened cream cheese, buffalo sauce, shredded cheddar, green onions, and garlic powder. Stir until everything is evenly mixed and the cheese is distributed. This is the step where I usually taste-test a tiny spoonful — you can adjust the heat level now by adding a little more sauce if it seems too tame. (📸 Photo tip: A shot of the finished filling in the bowl, with the orange hue from the buffalo sauce and visible shreds of chicken — it should look creamy and well combined.)
- Chill the filling (optional but smart): Pop the bowl in the fridge for 5 minutes while you gather the wrappers and set up your rolling station. This cools the filling enough that it won’t steam the wrappers immediately, which is the number one secret to crispy egg rolls.
- Set up your rolling station: Place a small bowl of water nearby. Lay a clean kitchen towel on the counter and put your stack of egg roll wrappers on it, covering them with a damp paper towel so they don’t dry out.
- Fill and roll: Working with one wrapper at a time, place it in front of you like a diamond (one point facing you). Spoon about 2 heaping tablespoons of filling horizontally across the center, leaving at least an inch on each side. Dip your finger in the water and run it along all four edges — this acts like glue. Fold the bottom corner up and over the filling, tucking it snugly. Fold in the two side corners, then roll it tightly upward, sealing the top corner with a little more water if needed. It should look like a little burrito. (📸 Photo tip: An overhead shot showing the steps of rolling — wrapper diamond, filling on, bottom folded, sides in, rolling up.)
- Place on the rack: Put the finished egg roll seam-side down on the wire rack. Repeat with the remaining wrappers and filling. You should get 10-12 egg rolls, depending on how generous you are with the filling. Don’t overcrowd the rack — leave a little space between each one so the air can circulate.
- Brush with oil: Using the pastry brush, lightly coat the top and sides of each egg roll with oil. Don’t drench them, just a thin, even layer. This is what gives them that beautiful golden color and helps them crisp up.
- Bake: Slide the baking sheet into the oven and bake for 12-15 minutes, until the egg rolls are deep golden brown and the edges look shatteringly crisp. You might hear a little sizzling from the oil — that’s a good sign. No need to flip them halfway; the rack does all the work. (📸 Photo tip: A photo through the oven door window with golden egg rolls inside, or the rack pulled out slightly to show the beautiful color.)
- Cool slightly and serve: Let them sit on the rack for 2-3 minutes — I know it’s torture, but straight out of the oven the filling is molten hot and will burn your mouth. Transfer to a plate and serve with ranch or blue cheese dressing for dipping. If I’m really tired, I just squirt the dressing straight onto the plate and call it art.
How I Meal Prep These for the Week
Egg rolls are definitely best fresh, but I promised you real talk, and the truth is we don’t always have time to make them from scratch on a Tuesday. So on Sundays I assemble a whole batch, freeze them unbaked, and then we can have crispy buffalo chicken egg rolls any night of the week — straight from the freezer to the oven. I wrap each one individually in plastic wrap before freezing so my husband can grab exactly two for a snack without thawing the whole bag.
- Fridge: Assemble the egg rolls and place them on the wire rack, but do not brush with oil yet. Cover loosely with plastic wrap and refrigerate up to 24 hours. When you’re ready to bake, brush with oil and pop them in the oven; you may need an extra 2-3 minutes.
- Freezer: Yes! Place the unbaked, un-oiled egg rolls on a parchment-lined tray and freeze until solid (about 2 hours). Then transfer to a zip-top freezer bag. They’ll keep for up to 3 months. Bake directly from frozen: place on the rack, brush with oil, and bake at 400°F for 18-22 minutes until golden and cooked through. No need to thaw.
- Reheat: To recrisp leftover baked egg rolls, skip the microwave — it makes them chewy and sad. Instead, pop them in a 375°F oven or air fryer for 5-7 minutes. They’ll be almost as good as fresh.
Things I Wish I’d Known the First Time
- Don’t overstuff: Two heaping tablespoons is plenty. If you try to cram in more, the wrapper will tear when you roll it and all that cheesy, saucy goodness will leak out in the oven. I’ve done it. It’s messy. Less is more here.
- Seal those edges like your reputation depends on it: Use enough water to really glue the wrapper shut. If you see any gaps, press them closed. A poorly sealed egg roll is a ticking time bomb of molten buffalo sauce on your baking sheet. Trust me on this one.
- Use the wire rack or accept soggy bottoms: I know I’ve said it three times now, but it’s that important. If you don’t have a rack, you can place them directly on a parchment-lined baking sheet and flip them halfway through, but they won’t be as uniformly crispy. The $8 wire rack is worth it — I use mine for bacon, roasted veggies, and so many other things.
- Even if you mess this up a little, it’ll still taste good: My first batch looked like they’d been through a car wash, but my friends still ate every single one. The flavor is in the filling, and even an ugly egg roll with a little cheese leakage is better than no egg roll at all.
Swaps That Actually Work
- Dairy-Free: Use a dairy-free cream cheese (I like the Kite Hill or Violife brand) and a dairy-free shredded cheddar. The texture will be a touch softer, but still delicious. This is the version I make for my nephew with a dairy allergy, and he requests them every time he visits.
- Gluten-Free: Replace egg roll wrappers with gluten-free spring roll wrappers (available at many Asian markets) or use gluten-free tortillas cut into smaller squares — they won’t be as crispy, but they’ll hold together. Brush with a little extra oil to help them brown.
- Spicy Up or Down: My kids need the mild version, so I halve the buffalo sauce and mix in a little ranch dressing to cool things off. For the adults after bedtime, I add a thinly sliced jalapeño to the filling and use extra-hot wing sauce. Everyone’s happy.
- Blue Cheese Lovers: Swap the cheddar for crumbled blue cheese. It gets melty, funky, and absolutely incredible. Just know that the flavor is intense — if you’re not sure, do half cheddar and half blue cheese.
- Air Fryer Version: Preheat your air fryer to 380°F. Place egg rolls in a single layer in the basket (don’t crowd them), spray or brush lightly with oil, and cook for 8-10 minutes, flipping halfway, until golden and crisp. This is my go-to for a smaller batch on a weeknight.
Questions I Get About This Recipe All the Time
Q: Why did my egg rolls turn out soggy and not crispy at all?
A: Ugh, I’ve been there. Usually it’s because the filling was too warm when you wrapped it, or you didn’t use a wire rack. If the filling steams the wrapper before it bakes, it’ll never get truly crispy. Also, don’t be shy with the oil brush — you need that thin layer to conduct the heat and get the browning. Next time, chill the filling for five minutes and make sure they’re on a rack, not directly on the pan. You’ve got this.
Q: Can I make these gluten-free?
A: Yes! I’ve tested this with gluten-free egg roll wrappers (find them in the refrigerated section of natural grocery stores) and they work, though they can be a little more fragile when rolling. Handle them gently and don’t overfill. Another option is to use thin rice paper wrappers, but those will turn out softer, more like a summer roll — still tasty, just not crispy. If you go that route, eat them right away.
Q: How long do leftover buffalo chicken egg rolls last? Can I freeze them after baking?
A: Baked egg rolls will keep in the fridge for up to 3 days, but honestly, they lose their crunch after day one. Reheat them in the oven or air fryer to bring back some of that crispiness — the microwave will make them rubbery. You can freeze baked egg rolls, but they won’t be as perfect as fresh. Let them cool completely, wrap tightly in foil, and freeze. Reheat from frozen in a 375°F oven for 12-15 minutes. For the best results, freeze them unbaked (see my meal prep notes above) and bake when you want them.
Q: What do you serve with these egg rolls?
A: Ranch or blue cheese dressing is non-negotiable for dipping, but I like to add carrot and celery sticks on the side to make it feel like a proper wing platter. For a more substantial meal, I’ll toss together a simple green salad or serve them with a ranch-dressing-drizzled coleslaw. On game day, they go next to a pile of homemade potato skins and maybe some soft pretzel bites. My kids love them with apple slices — the sweet-and-spicy thing really works.
More Recipes My Family Makes on Repeat
If you liked this one, here are a few others that get the same “make a double batch or we’ll fight over the last one” reaction at our table:
- [INTERNAL LINK PLACEHOLDER: Crispy Baked Chicken Wings] — All the crunch of fried wings with zero hot oil, and my Buffalo sauce is basically married to them.
- [INTERNAL LINK PLACEHOLDER: Sheet Pan Pulled Pork Nachos] — The easiest game-day dinner, loaded with melty cheese and ready in 20 minutes if you’ve got leftover pulled pork.
- [INTERNAL LINK PLACEHOLDER: Homemade Soft Pretzel Bites] — Chewy, salty, perfect for dipping in that same ranch or a little cheese sauce; they disappear faster than I can make them.
I hope these bring the same amount of joy (and maybe a little friendly competition) to your kitchen that they do to mine. There’s just something about a plate of crispy, cheesy, spicy egg rolls that makes everyone, from toddlers to grown men, hover around the oven waiting for the timer to beep. If you try them, drop a comment below — I love hearing how it goes for you, and whether you managed to save one for yourself before they were all gone.
📌 Crispy buffalo chicken egg rolls that are better than wings — save this recipe for your next game day spread, movie night, or that random Tuesday when you just need something dippable and epic.
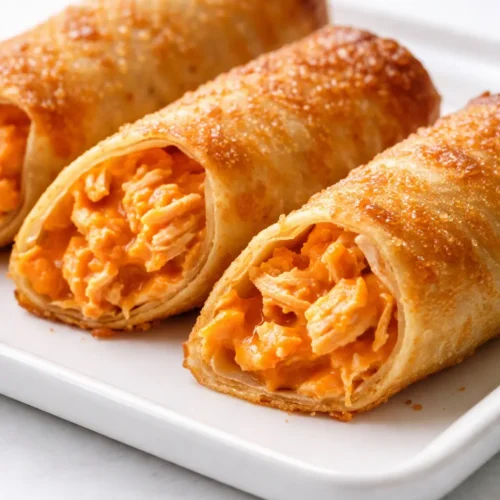
Buffalo Chicken Egg Rolls That Are Crispy, Cheesy, and Better Than Wings — in 30 Minutes
Equipment
- Rimmed baking sheet
- Wire Rack
- Pastry brush
- Mixing bowl
- Small Bowl
Ingredients
Filling
- 2 cups shredded cooked chicken
- 4 oz cream cheese, softened
- ½ cup buffalo wing sauce
- 1 cup shredded sharp cheddar cheese
- 2 green onions, thinly sliced
- ½ teaspoon garlic powder
For Assembly
- 10-12 egg roll wrappers
- 2 tablespoons avocado oil (for brushing)
Instructions
- Preheat oven to 400°F (200°C) with rack in middle position. Place a wire rack inside a rimmed baking sheet and set aside.
- In a mixing bowl, combine shredded chicken, softened cream cheese, buffalo sauce, shredded cheddar, sliced green onions, and garlic powder. Stir until evenly mixed. Taste and adjust heat if needed.
- Optionally, chill the filling in the fridge for 5 minutes while you set up the rolling station—this helps prevent soggy wrappers.
- Set up a rolling station: place a small bowl of water nearby. Lay egg roll wrappers on a clean kitchen towel, covering them with a damp paper towel.
- Working with one wrapper at a time, place it like a diamond. Spoon about 2 heaping tablespoons of filling across the center, leaving 1 inch on each side. Dip your finger in water and moisten all four edges. Fold the bottom corner up over the filling, tuck it snugly, fold in both side corners, then roll tightly upward, sealing the top corner with more water if needed.
- Place each egg roll seam-side down on the wire rack, leaving space between them for air circulation.
- Lightly brush the tops and sides of the egg rolls with oil using a pastry brush.
- Bake for 12-15 minutes, until deep golden brown and crisp. Let cool on the rack for 2-3 minutes before serving with ranch or blue cheese dressing for dipping.
Notes
Related Recipes:
 Cheesy Hamburger Casserole Bake That’s Ready in 40 Minutes (No Canned Soup Here)
 Creamy Garlic Tagliatelle That Looks Like a Restaurant Dish in 20 Minutes
 Texas Roadhouse Style Baked Salmon with Sweet and Savory Glaze — Ready in Under 30 Minutes
 Easy Italian Meatloaf That’s Actually Juicy (Not Dry) — in 1 Hour
 The Biscuits and Gravy Casserole That’s Actually Crispy on Top (And Ready in 40 Minutes)
 Air Fryer Chicken and Vegetables That Don’t Taste Like a Regret (30 Minutes, One Pan)