
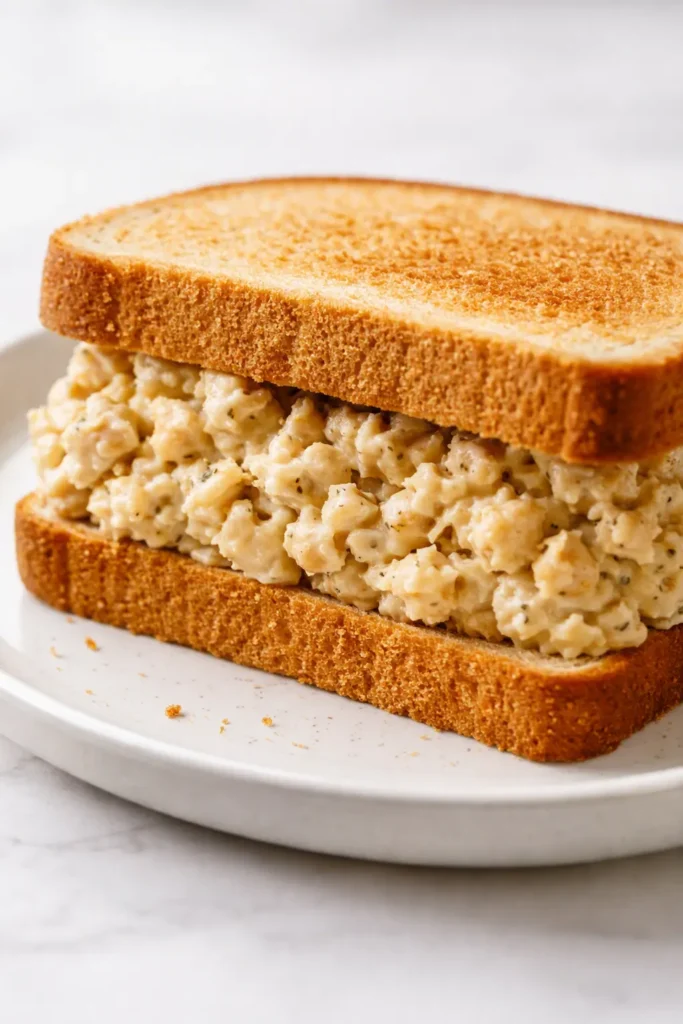
The first time I tried a chickpea salad sandwich, I used the back of a spoon, forgot the lemon, and ate the whole thing over the sink out of pure optimism. That was not the sandwich worth telling anyone about. This one is. It’s creamy without being heavy, crunchy in every bite, and it sits on sturdy toasted bread that stays crisp long enough for you to actually enjoy it instead of racing before it turns to mush. It takes fifteen hands-on minutes and zero stove time, which makes it the lunch I come back to every single week.
The short version: No cooking, fifteen minutes of hands-on work, and a filling that actually holds its shape between two slices of toast.
I’ve made this version roughly thirty times since spring. It’s what I pack for the kind of day when I want lunch to feel like something I chose, not something I grabbed. My nephew, who will tell you he hates beans, ate half a sandwich without asking what was in it. That’s the whole review.
- Serves: 2 as a main (or 4 as tea sandwiches)
- Hands-On Time: 15 min | Total Time: 20 min
- Difficulty: Easy — no stove, no skills required
- Cost per serving: ~$1.50
- Calories: ~360 per sandwich
- Dietary Notes: Vegetarian; vegan with vegan mayo
(Photo above: overhead shot of the sandwich cut in half on a light wooden board, the creamy chickpea filling studded with green chives and bits of red onion, a few extra crispy chickpeas scattered on the plate for texture, soft natural window light from the left.)
The Three Rules That Keep This Sandwich From Going Mushy
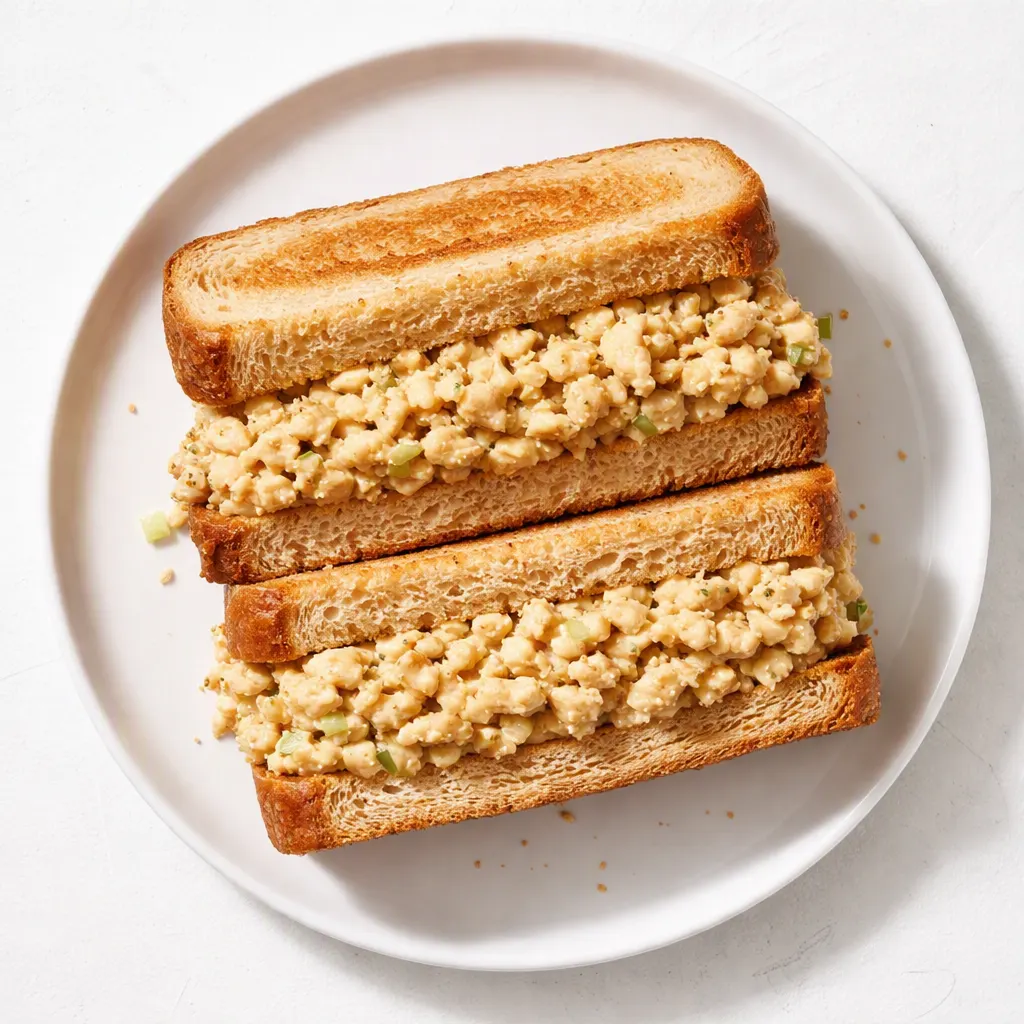
Most chickpea salad sandwiches turn into a damp disappointment because the filling is one texture: paste. I fix that before anything else goes in the bowl. Mash about two-thirds of the chickpeas and leave the rest whole. The smashed part gives you the creamy, spreadable base; the whole ones give you something to actually bite. If you mash everything, you get baby food with bread.
The second rule is the bread seal. A thin layer of mayo spread edge-to-edge on both slices of bread, right after toasting. You’re not doing this for flavor — although it doesn’t hurt — you’re building a moisture barrier. The filling never touches the bread directly, so the toast stays crisp instead of going soggy by bite three. This is the step everyone skips and the step that separates a sandwich you enjoy from a sandwich you endure.
The last rule is the least glamorous: pat the chickpeas dry. Like, actually dry. A can of chickpeas holds a surprising amount of water, and that water will end up in your filling and then on your bread. I pat them with a paper towel, let them sit for a minute, and pat again. It costs a single paper towel and it buys you a sandwich that holds its shape.
What Goes In (Plus My Honest Notes on Each Thing)
- 1 can (15 oz) chickpeas, drained and rinsed: The backbone. Buy the plain ones, not the pre-seasoned kind — you want a blank canvas. Dry them well; this is the single most important thing you can do for texture.
- 1/4 cup mayonnaise (or vegan mayo): This is the glue. Full-fat mayo holds the filling together the way light versions never quite do. If you use vegan mayo, add an extra squeeze of lemon to the dressing — it tends to need it.
- 1 tsp Dijon mustard: A sharp edge that keeps the mayo from being boring. Any mustard works in a pinch, but Dijon has the right level of bite without screaming.
- 1 celery stalk, finely diced: Crunch, and a flavor so distinctly sandwich it should have its own zip code. Dice it small — nobody wants to pull a full celery string out of the sandwich mid-bite.
- 2 tbsp red onion, finely chopped: A sharp note that wakes up the whole bowl. If raw onion is too much for you, soak the diced pieces in cold water for five minutes, drain, and pat dry. It softens the punch.
- 1 tbsp fresh lemon juice + 1 tsp lemon zest: The acid that makes everything else taste like itself. Do not skip this. The lemon is the difference between a sandwich that tastes like food and one that tastes like filling.
- 1 tbsp fresh chives, snipped: The herb that belongs here — mild onion flavor, no frilly sadness. Chives cut with a knife look better and taste cleaner than chopped.
- Salt, black pepper, and flaky salt for finishing: Season in layers and finish with flaky crystals on top of the filling before you close the sandwich. The flaky salt is doing both texture and flavor work; don’t bury it.
- 4 slices sturdy bread — sourdough or a dense whole wheat: This is not the moment for flimsy sandwich bread. You need something with structure that can hold a serious filling. I’ve used leftover baguette, brioche, and a seedy whole-grain loaf — all great, all different.
What to Pull Out Before You Start
- A medium mixing bowl
- A fork (or potato masher — the fork gives you more control)
- A fine-mesh strainer for rinsing the chickpeas
- A chef’s knife and cutting board
- A butter knife or offset spatula for the mayo seal
- A toaster or a skillet — the skillet gives you the golden crust, the toaster is faster
No food processor and no blender. The whole point is the texture that comes from a fork.
Making It: My Exact Process (No Fancy Skills Required)
This goes fast. Read the steps once before you start, and you’ll see why there’s no cooking involved — it’s all assembly and one solid trick.
Prep and dry the chickpeas: Drain the can into the strainer, rinse well, and dump them onto a clean kitchen towel or paper towels. Pat them dry — actually pat, not just shake. Let them air out for a minute while you do the next part.
- Smash the chickpeas: Put the dried chickpeas in the mixing bowl and mash with a fork until about two-thirds are broken down and one-third are still whole. (📸 Photo tip: You should still see distinct chickpea halves — this is what gives the filling its pleasantly uneven texture.)
- Mix the dressing: In a small bowl, stir the mayo, Dijon, lemon juice, and lemon zest until smooth.
- Season the crunchy stuff first: Add the celery, red onion, a pinch of salt, and a few cracks of black pepper to the mashed chickpeas. Stir once, taste a celery piece, and adjust the salt — this is the layer everyone forgets.
- Bring it together: Pour the dressing over the chickpea mixture, add the chives, and fold until everything is coated but not overworked.
- Rest the filling: Set the bowl aside for five minutes. This isn’t a waiting step — it’s when the mayo soaks into the smashed chickpeas and the lemon stops shouting and starts singing.
- Toast the bread: Toast it well — golden edges, not tepid warm. If you use a skillet, a little butter or olive oil in the pan makes the crust taste like diner toast. (📸 Photo tip: Toast until deep golden at the edges, like bread that’s taken a vacation.)
- Seal the bread: Spread a thin layer of mayo on one side of each slice, all the way to the edges. This is the anti-soggy move — it’s also delicious, so consider this a win-win.
- Assemble: Divide the filling between two slices, spread it evenly, and top with the remaining slices. Press gently, like you mean it.
- Wrap, rest, and cut: Wrap each sandwich in parchment paper and let it sit for five minutes. This lets the filling set into the bread so the sandwich cuts clean. Slice diagonally and sprinkle the cut edge with flaky salt if you want the full café effect.
The Make-Ahead Version (Because Weekday Lunches Aren’t Negotiable)
The filling is the part to prep ahead. I make a double batch on Sunday, and it lives in the fridge until Wednesday — the flavor honestly gets better by day two, when the lemon and herbs have had time to settle into the chickpeas. I keep the bread separate and assemble in the morning so every sandwich gets a freshly toasted slice.
- Fridge: The filling keeps 4 days in an airtight container. Give it a stir before using and add a few drops of lemon — it brightens right back up.
- Freezer: I wouldn’t. The texture changes when the chickpeas thaw, and the celery goes from crunchy to limp. This is a fridge recipe, not a freezer recipe.
- Reheat: You don’t. Take the filling out of the fridge about ten minutes before you assemble so the flavors open up; cold filling straight from the fridge tastes muted.
Things I Learned the Hard Way (So You Don’t Have To)
- The water is the enemy: If your sandwich turns out soggy, it wasn’t the bread — it was the chickpeas. Pat them dry even if you think they’re dry. You’re wrong, they’re wet.
- Season at every layer: Salt goes in twice — once with the celery and onion, once at the end after you taste. That second salt is what makes it taste like a real recipe instead of a snack.
- Resting isn’t optional: The five-minute rest before you cut the sandwich is the difference between a clean half and a filling explosion. I know it feels like a waste of time. I promise it’s not.
- Don’t overstuff: Two generous forkfuls per sandwich is the right amount. More than that and the filling squirts out sideways on the first bite, which I’ve done, and it’s not elegant. Spread it even — it’s a sandwich, not a treasure hunt.
- Perfection is overrated: Even if you skip half of these rules, the worst case is a delicious, slightly messy pile on toast. That’s still a better lunch than most people are having. I’ve made it both ways.
Swaps That Actually Worked When I Tested Them
- Vegan version: Use a good vegan mayo. If you’d rather skip packaged stuff, whisk 1 tablespoon tahini, 1 teaspoon lemon juice, and 1 tablespoon water into a creamy dressing that’s more savory and just as satisfying. My sister prefers this version, and she’s not vegan — she’s right.
- Dairy-free flair: Crumble a little feta or a dairy-free tofu feta into the mix. It adds a salty tang that turns this into a Mediterranean-style filling.
- Spicy option: Add 1/2 teaspoon smoked paprika and a dash of hot sauce to the dressing. The heat cuts the creaminess and makes the sandwich feel like a different recipe entirely. My nephew wants nothing to do with this version; my brother and I fight over the last sandwich.
- Kid-friendly version: Swap the red onion for a finely grated carrot and add a spoonful of golden raisins if your kid likes a little sweet. My nephew, the bean-hater, eats the carrot version without complaining.
- No mayo at all: Mashed avocado replaces the mayonnaise one-to-one. You get a green, creamy filling that’s richer, with the same structure — just use the ripest avocado you can find.
Questions People Keep Asking About This Sandwich
Q: Why did my sandwich get soggy even though I toasted the bread?
A: I’ve been there. The culprit is almost always moisture in the filling — the chickpeas weren’t dried thoroughly, or the celery released water after you mixed it. Pat the chickpeas dry on paper towels, then again, and make sure the mayo seal reaches every edge of the bread. The seal is the whole trick; it’s what keeps the toast crisp.
Q: Can I make this without mayo?
A: Yes. Greek yogurt is the closest swap — same tang, more protein, slightly thinner consistency. Add a half teaspoon of olive oil to the dressing to give it back the richness it lost. I’ve tested it with my sister and it works; just don’t use the watery part of the yogurt.
Q: How long does the filling keep in the fridge?
A: Four days in an airtight container. It gets better on day two, when the flavors have had time to talk to each other. Give it a stir and a squeeze of fresh lemon before you assemble. If it looks dry, that’s normal — the chickpeas absorb the dressing. A little extra lemon fixes the balance.
Q: What do you serve with this?
A: Something crunchy and something pickled. My go-to is dill pickle spears and kettle chips, but it’s also excellent with tomato soup if you’re not opposed to a hot side. For weekends, I cut it into small triangles and serve it with fruit — that’s the tea-sandwich version that disappears first at our house.
More Recipes My Family Makes on Repeat
If this one earned a spot in your rotation, here are a few others that get the same reaction at our table:
- [INTERNAL LINK PLACEHOLDER: The Mediterranean Chickpea Salad That Gets Better on Day Two] — The easiest lunch bowl you’ll make all summer, and the vinaigrette pulls double duty as a marinade.
- [INTERNAL LINK PLACEHOLDER: My No-Fail Egg Salad for the Days You Have a Dozen Eggs] — Same creamy logic, but with the yolk that makes people ask for the recipe.
- [INTERNAL LINK PLACEHOLDER: The Simplest Tomato Soup That Pairs With Every Sandwich] — Fifteen minutes, one pot, and it turns this lunch into a sit-down meal.
Make this on a Sunday for the week ahead, or on a Tuesday for the kind of lunch that makes you want to sit at the table with a glass of lemonade. Wrap it, slice it, and set it on a plate like you’re charging nine dollars for it.
If you try it, tag me on Pinterest or Instagram — I genuinely love seeing how the sandwiches turn out! And drop a comment below if you’ve got a bread recommendation better than mine, because I’m always looking.
📌 Save this chickpea salad sandwich recipe for your next no-cook lunch — 15 hands-on minutes and it stays crisp from first bite to last.
The Chickpea Salad Sandwich That Doesn’t Get Soggy — Finally
Equipment
- Mixing bowl
- Fork or Potato Masher
- Fine-Mesh Strainer
- Chef’s Knife and Cutting Board
- Butter Knife or Offset Spatula
- Toaster or Skillet
Ingredients
For the chickpea salad filling
- 1 can (15 oz) chickpeas, drained and rinsed
- 1/4 cup mayonnaise (or vegan mayo)
- 1 tsp Dijon mustard
- 1 stalk celery, finely diced
- 2 tbsp red onion, finely chopped
- 1 tbsp fresh lemon juice plus 1 tsp lemon zest
- 1 tbsp fresh chives, snipped
- to taste salt, black pepper, and flaky salt for finishing
- 4 slices sturdy bread (sourdough or dense whole wheat)
Instructions
- Drain and rinse the chickpeas, then pat them dry with a clean towel or paper towels. Let them air out for a minute while you prep the rest.
- Put the dried chickpeas in a mixing bowl and mash with a fork until about two-thirds are broken down and one-third remain whole.
- In a small bowl, stir the mayo, Dijon, lemon juice, and lemon zest until smooth.
- Add the celery, red onion, a pinch of salt, and a few cracks of black pepper to the mashed chickpeas. Stir once, taste a celery piece, and adjust the salt.
- Pour the dressing over the chickpea mixture, add the chives, and fold until everything is coated but not overworked.
- Set the bowl aside for five minutes so the mayo soaks into the smashed chickpeas and the lemon mellows.
- Toast the bread until golden at the edges. If using a skillet, a little butter or olive oil makes the crust taste like diner toast.
- Spread a thin layer of mayo on one side of each slice, all the way to the edges. This is the anti-soggy move.
- Divide the filling between two slices, spread it evenly, top with the remaining slices, and press gently.
- Wrap each sandwich in parchment paper and let it sit for five minutes so the filling sets. Slice diagonally and sprinkle the cut edge with flaky salt.
Notes
Related Recipes:
 Cheesy Hamburger Casserole Bake That’s Ready in 40 Minutes (No Canned Soup Here)
 Creamy Garlic Tagliatelle That Looks Like a Restaurant Dish in 20 Minutes
 Texas Roadhouse Style Baked Salmon with Sweet and Savory Glaze — Ready in Under 30 Minutes
 Easy Italian Meatloaf That’s Actually Juicy (Not Dry) — in 1 Hour
 The Biscuits and Gravy Casserole That’s Actually Crispy on Top (And Ready in 40 Minutes)
 Air Fryer Chicken and Vegetables That Don’t Taste Like a Regret (30 Minutes, One Pan)