
That first bite — where the sticky honey hits your lips right before the coarse black pepper crunch and the bright lemon zest finish — is exactly why I stopped ordering wings out. I’m being serious. I haven’t ordered a wing in a restaurant in over two years, because these Honey Lemon Pepper Wings are better, cheaper, and I can eat them in my actual kitchen with a glass of something cold and no one judging me for using my fingers. These come together in 20 minutes of actual work and a couple hours of letting the oven do its thing. My friends now request them by name for every game day and casual dinner. That’s the kind of staying power a recipe has when it actually works.
The short version: Oven-baked wings that are shatteringly crisp, tossed in a glossy browned butter honey lemon pepper glaze, and finished with flaky salt. No deep fryer required. No sad, soggy skin.
I have strong opinions about chicken wings. The main one is that they should be crispy, they should be glossy, and they should never, ever taste like the inside of a fast-food bag. I’ve made this exact recipe about fifteen times now, tweaking the oven temperature and the glaze ratios until it became the thing I bring to every gathering. My brother-in-law, who is a self-proclaimed wing snob, asked for the recipe before he finished his third one. That’s when I knew I had it right.
- Serves: 4 as an appetizer / 2 as a main (with salad)
- Hands-On Time: 20 min | Total Time: 1 hour 10 min (includes 45 min resting)
- Difficulty: Easy. The only “trick” is the wire rack and the broil at the end.
- Cost per serving: ~$3.50 (wings in bulk are still a steal)
- Calories: ~480 per serving as an appetizer
- Dietary Notes: Naturally gluten-free. Adaptable for dairy-free (use oil instead of butter).
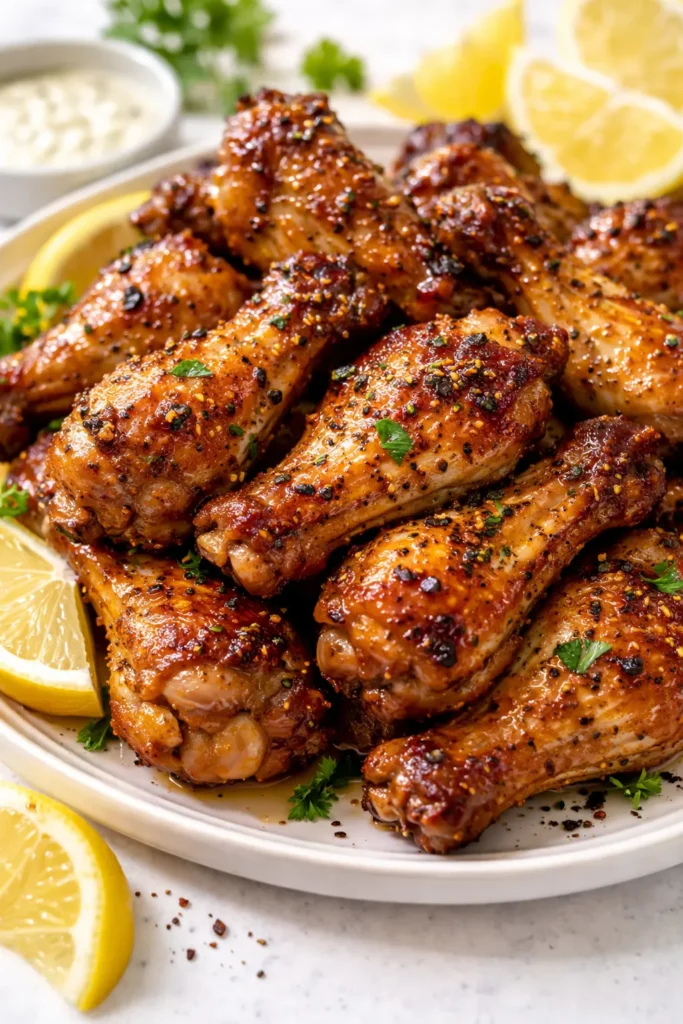
(Photo above: An overhead shot of a large white platter mounded with glossy golden-brown chicken wings, scattered with fresh lemon zest, cracked black peppercorns, and a light dusting of flaky salt. A small bowl of extra honey lemon pepper glaze sits in the corner. The light is from a window on the left, casting soft shadows across the table.)
The Trick to Oven Wings That Actually Snap When You Bite Them
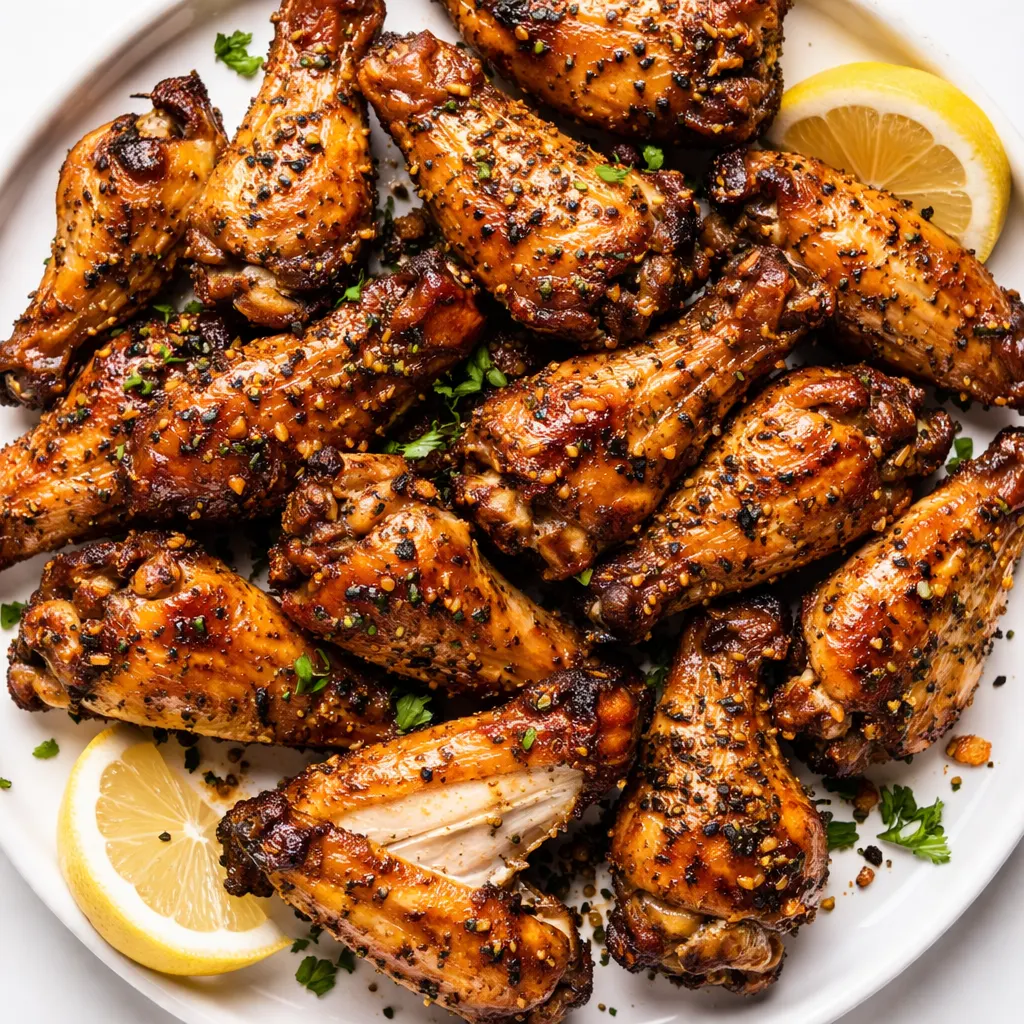
The enemy of a good oven wing is moisture. If the skin is damp when it goes in, it steams instead of crisps. You end up with something that tastes okay but has the texture of regret. The fix is two things: patting the wings completely dry, and using a wire rack set inside a baking sheet. The rack lets air circulate all around the wing, so every single surface gets dry and hot. No soggy bottoms. No steamed skin. It’s the single most important thing you can do for a baked wing, and I will stand on this hill until someone proves me wrong.
The second trick is aluminum-free baking powder. It sounds weird — putting baking powder on chicken — but what it actually does is raise the pH of the skin, which helps it brown faster and more evenly. It also dries the skin out even further. The result is a wing that has the shatter of a fried wing without the gallon of oil. I learned this the hard way after making flat, pale wings for years. Never again. Just make sure it’s aluminum-free. Regular baking powder tastes metallic and you will be sad.
Then there’s the glaze. Butter, honey, lemon juice, and a generous amount of freshly cracked black pepper. The butter is browned first because brown butter makes everything taste like it took more effort than it actually did. The honey gives it that sticky, lacquered look that catches the light in a photo and makes everyone at the table reach for another one before they’ve finished chewing.
The Grocery List (With My Two Cents)
- 2 lbs chicken wings, separated into flats and drums: You can buy them already separated or do it yourself with a sharp knife. I prefer flats because they have more skin-to-meat ratio, but drums are perfectly fine. Pat them very dry with paper towels. I cannot stress the drying enough. Use three paper towels if you have to. Dry skin is crispy skin.
- 1 tbsp aluminum-free baking powder: This is not optional. Do not use regular baking powder. It will taste like a dentist’s office. I use Bob’s Red Mill or Rumford. My kids can smell the difference when I use the wrong kind, I’m not kidding.
- 1 tsp kosher salt: Plus more for finishing. Diamond Crystal is my go-to because it’s less salty by volume and easier to control.
- 2 tsp freshly cracked black pepper: Plus another teaspoon for the glaze. Pre-ground black pepper from a can has no business in this recipe. Crack it fresh. The texture matters.
- 3 tbsp unsalted butter: We’re browning it, so don’t use salted — you want to control the salt level yourself.
- 1/3 cup honey: Orange blossom honey if you have it, clover is fine. The floral notes in orange blossom play really nicely with the lemon.
- 2 lemons: One for juicing, one for zesting. Meyer lemons are lovely but regular Eureka lemons have more acidity, which cuts the honey better. I always buy an extra lemon just in case I get too generous with the zest.
- Flaky salt for finishing: Maldon or a similar flaky sea salt. This is the garnish that makes it look like you know what you’re doing.
What You Need (It’s Mostly a Sheet Pan)
- A wire rack that fits inside a rimmed baking sheet. The rack is essential for airflow.
- A rimmed baking sheet (half-sheet pan is perfect).
- A small saucepan for the glaze.
- A microplane or fine zester. I have a strong preference for the long, thin Microplane brand ones. They zest in one direction without tearing the pith.
- Tongs for tossing the wings.
- Paper towels. Lots of them.
If you don’t have a wire rack, you can use a broiler pan, or even flip the wings halfway through. But a wire rack is the best investment you’ll make for crispy oven food.
Let’s Make These Wings (Start to Finish)
Read through this once before you start. The active parts are short but they come in bursts, and it helps to know what’s coming next.
Prep the Wings: This is the step that makes or breaks the whole thing.
- Pat the wings dry: Use paper towels and really press them into the skin. You want the wings to feel dry to the touch, not damp. This is the single most important step for crispy skin. (📸 Photo tip: The wings should look matte, not shiny. If they still look wet, grab another paper towel.)
- Season the wings: In a large bowl, whisk together the baking powder, 1 teaspoon salt, and 1 teaspoon cracked black pepper. Add the wings and toss until every piece is evenly coated. The mixture will look a little dusty — that’s correct.
- Arrange on the rack: Place the wings on the wire rack in a single layer, not touching each other. This is important for air circulation. Refrigerate uncovered for 45 minutes. This drying time in the fridge is what makes the baking powder work its magic. If you’re in a rush, you can skip this, but don’t come crying to me about soggy skin.
- Bake low and slow: Preheat your oven to 250°F. Move the rack to the middle position. Bake the wings for 30 minutes. This renders the fat slowly so you end up with tender meat, not tough rubber. (📸 Photo tip: At this stage, the wings will look pale and slightly bumpy. The fat is rendering out and the skin is beginning to dry. This is exactly what you want.)
- Crank up the heat: Increase the oven temperature to 425°F. Bake for another 40-45 minutes, until the wings are deep golden brown and the skin is crispy. No need to flip them. The rack handles that for you.
- Make the glaze while wings bake: In a small saucepan, melt the butter over medium heat. Let it cook, swirling occasionally, until it turns golden brown and smells nutty — about 3-4 minutes. Reduce the heat to low and whisk in the honey, the juice of 1 lemon, and 1 teaspoon freshly cracked black pepper. Simmer for 2 minutes, then remove from heat. The glaze should be thick enough to coat the back of a spoon. If it’s too thin, let it simmer another minute.
- Toss the wings: Transfer the hot wings to a large bowl. Pour the glaze over them and toss with tongs until every wing is completely coated. The glaze will look shiny and slightly sticky.
- Broil to caramelize: Turn your oven to broil. Return the glazed wings to the wire rack (line the pan with foil for easier cleanup). Broil for 2-3 minutes, watching closely — honey burns fast. The glaze will bubble and caramelize into a lacquered coating. This is the step that makes them look like restaurant wings.
- Finish with flair: Transfer the wings to a platter. Zest one lemon directly over the top. Sprinkle with flaky salt and a little more cracked black pepper. Serve immediately, while the glaze is still sticky and the skin is still shatteringly crisp.
Making These Ahead (For Sanity’s Sake)
I make these for every gathering now, and I never do it all the day of. Here’s how I break it up so I’m not running around when people show up. I do the prep on Thursday for a Saturday party and it’s genuinely stress-free.
- Fridge: You can prep the wings through step 3 (seasoned and on the rack) up to 24 hours ahead. Just keep them uncovered in the fridge. The longer drying time only makes the skin crispier. The glaze can also be made 3 days ahead and stored in an airtight container in the fridge. Reheat it gently on the stove before tossing.
- Freezer: You can freeze the unglazed baked wings after step 5. Let them cool completely, then freeze them in a single layer on a baking sheet. Once frozen, transfer to a zip-top bag for up to 1 month. When ready to serve, thaw in the fridge, then reheat in a 400°F oven for 10 minutes before glazing and broiling.
- Reheat: The best way to reheat leftovers (if you have any) is in an air fryer at 375°F for 4-5 minutes. The oven at 400°F for 5-7 minutes works too. The microwave will make the skin soft. Don’t do it. You’ve come too far.
Stuff I Wish Someone Had Told Me
- Don’t skip the drying time in the fridge. I know it adds 45 minutes, but it’s hands-off time and it does more for the texture than almost any other step. Even 20 minutes in the fridge is better than nothing.
- Aluminum-free baking powder is not negotiable. I made the mistake once. Once. The whole batch had a weird, metallic aftertaste that no amount of honey could cover. Bob’s Red Mill and Rumford are the ones I trust.
- Watch the broil like a hawk. Honey has a low smoke point and it burns fast. Every oven broils differently. The first time I made these, I walked away for three minutes and came back to a kitchen full of acrid smoke. Set a timer and stand there.
- Double the glaze if you like extra. Some people want to dip their wings in more glaze. I respect that. If you’re a dipper, make one and a half times the glaze recipe and serve the extra on the side. Just don’t toss the wings in all of it or they’ll get soggy.
- Even if you mess up the broil a little, they’re still good. I’ve definitely let them get a tiny bit too dark on the edges. You know what? They still disappeared. Don’t let perfect be the enemy of good wings.
Ways to Change It Up (Without Ruining It)
- Spicy Honey Lemon Pepper: Add 1 teaspoon of cayenne pepper or a tablespoon of chili crisp to the glaze. The heat cuts the honey beautifully. I make this version for the adults after bedtime and my kids stick to the original.
- Garlic Lover’s Version: Add 3 cloves of grated garlic to the butter while it browns. Garlic and browned butter is a combination that should be illegal. My husband thinks this version is the best thing I’ve ever made.
- Air Fryer Method: Cook the seasoned wings at 380°F for 20-22 minutes, shaking the basket halfway through. Toss in the glaze, then air fry for another 2-3 minutes at 400°F to caramelize. The air fryer gets them even crispier than the oven, if you can believe it.
- Dairy-Free: Swap the butter for a good quality olive oil or vegan butter. The glaze won’t be quite as rich, but it will still be delicious. I’ve made this for friends who can’t do dairy and they cleaned the platter.
- Herb Finish: Add a tablespoon of finely chopped fresh parsley or chives to the final plating. It adds a pop of green that looks beautiful against the golden wings. I usually do this for fancier dinners when I’m trying to impress people.
Questions I Get About This Recipe All the Time
Q: Why did my wings turn out soggy instead of crispy?
A: Ugh, I’ve been there. It almost always comes down to moisture. Either the wings weren’t dried well enough before they went into the oven, or the oven wasn’t hot enough at the end. Make sure you patted them very dry, used a wire rack, and gave them that final blast of high heat. Also check that your baking powder isn’t expired — old baking powder loses its effectiveness.
Q: Can I use store-bought lemon pepper seasoning instead of making my own?
A: You can, but check the label. A lot of store-bought lemon pepper blends contain sugar, which will burn under the broiler. If you’re using one, skip the honey in the glaze or use less, and watch the broil carefully. I prefer making my own because I can control the salt and the pepper-to-lemon ratio. But if you’re in a bind, Lawry’s is okay in a pinch.
Q: How long do these last in the fridge? Can I freeze the glazed wings?
A: Leftover glazed wings last 3 days in the fridge in an airtight container. They won’t be as crispy as the day you made them, but they’ll still be tasty. I don’t recommend freezing the glazed wings — the glaze gets watery when it thaws and the texture suffers. Freeze them unglazed, then glaze and broil fresh.
Q: What do you serve with these wings?
A: I always do a simple celery and carrot salad with a lemon vinaigrette to cut the richness. My kids love them with ranch dressing for dipping — I make a quick buttermilk ranch that takes five minutes. For a party, I pile them on a platter with extra lemon wedges and a bowl of the extra glaze on the side. They’re also incredible with cold beer and nothing else, honestly.
More Recipes My Family Makes on Repeat
If you liked these wings, here are a few others that get the same reaction at our table:
- Honey Sriracha Brussels Sprouts — Crispy, spicy, sweet, and the only way my kids will eat Brussels sprouts without complaining.
- The Best Crispy Baked Chicken Thighs — Same crispy-skin trick, different format. I make these on Sundays and eat them all week.
- Whipped Feta Dip with Roasted Tomatoes — The perfect sidekick for these wings. Salty, creamy, tangy — it balances everything out.
I make these wings for every single gathering now, and they disappear before anything else on the table. That’s the kind of recipe this is. The one people stand around in the kitchen eating straight off the platter while the rest of the food gets cold. Try it and you’ll see what I mean.
If you try this recipe, drop a comment below — I genuinely love hearing how it goes for you. And if you post a photo on Pinterest or Instagram, tag me so I can see your gorgeous glazed wings in the wild!
📌 These honey lemon pepper wings stay shatteringly crispy even after glazing — save this recipe for your next game day platter or weeknight dinner win.
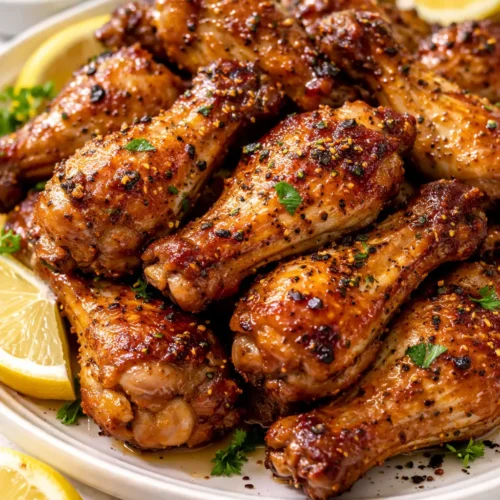
The Only Honey Lemon Pepper Wings Recipe You Need (Crispy, Sticky, Oven-Baked)
Equipment
- Wire rack that fits a rimmed baking sheet
- Rimmed baking sheet (half-sheet pan)
- Small saucepan
- Microplane or fine zester
- Tongs
Ingredients
- 2 lbs chicken wings, separated into flats and drums
- 1 tbsp aluminum-free baking powder
- 1 tsp kosher salt, plus more for finishing
- 2 tsp freshly cracked black pepper, plus 1 tsp for glaze
Glaze
- 3 tbsp unsalted butter
- 1/3 cup honey (orange blossom or clover)
- 2 lemons (1 juiced, 1 zested)
- Flaky salt for finishing (e.g., Maldon)
Instructions
- Pat the wings completely dry with paper towels. In a large bowl, whisk together baking powder, 1 tsp salt, and 1 tsp cracked black pepper. Add wings and toss until evenly coated.
- Arrange wings in a single layer on a wire rack set inside a rimmed baking sheet, not touching. Refrigerate uncovered for 45 minutes to dry the skin.
- Preheat oven to 250°F. Bake wings for 30 minutes. Increase oven temperature to 425°F and bake for another 40-45 minutes until deep golden and crispy.
- While wings bake, make the glaze: In a small saucepan, melt butter over medium heat. Cook until golden brown and nutty, about 3-4 minutes. Reduce heat to low and whisk in honey, juice of 1 lemon, and 1 tsp cracked black pepper. Simmer 2 minutes, then remove from heat.
- Transfer hot wings to a large bowl. Pour glaze over and toss to coat. Return glazed wings to the wire rack. Broil on high for 2-3 minutes, watching closely until caramelized.
- Transfer to a platter. Zest remaining lemon directly over the wings. Sprinkle with flaky salt and extra cracked black pepper. Serve immediately.
Notes
Related Recipes:
 Cheesy Hamburger Casserole Bake That’s Ready in 40 Minutes (No Canned Soup Here)
 Creamy Garlic Tagliatelle That Looks Like a Restaurant Dish in 20 Minutes
 Texas Roadhouse Style Baked Salmon with Sweet and Savory Glaze — Ready in Under 30 Minutes
 Easy Italian Meatloaf That’s Actually Juicy (Not Dry) — in 1 Hour
 The Biscuits and Gravy Casserole That’s Actually Crispy on Top (And Ready in 40 Minutes)
 Air Fryer Chicken and Vegetables That Don’t Taste Like a Regret (30 Minutes, One Pan)