
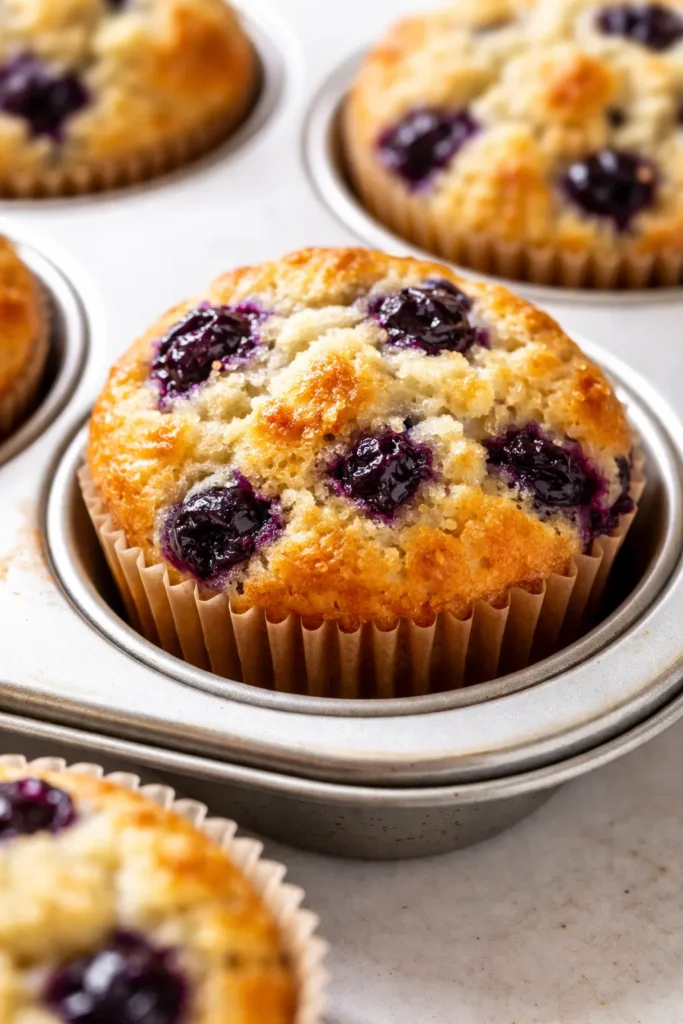
I have a whole notes file on my phone just called “Muffin Notes.” Recipes I’ve tested, tweaked, and mostly abandoned over the years. This one stuck. Not because it’s fancy — it uses exactly the ingredients you’d expect — but because every single time I make it, the tops dome, the berries stay suspended in the middle (not huddled at the bottom), and the crumb stays soft for three days. That is not luck. It is two specific steps that make all the difference.
The short version: These are the blueberry muffins you’d actually buy from a good bakery, made at home in half an hour.
I’ve tested this over a dozen times, tweaking the oven temperature and mixing method until it worked exactly the way I wanted. My friends now ask for these constantly. I don’t tell them how easy it is — I let them think I spent all morning on it.
- Serves: 12 standard muffins
- Hands-On Time: 10 min | Total Time: 30 min
- Difficulty: Easy enough for a weekday morning, impressive enough for a brunch spread
- Cost per serving: ~$0.80
- Calories: ~320 per muffin
- Dietary Notes: Vegetarian. Easily adaptable for dairy-free.
(Photo above: overhead shot of golden-brown blueberry muffins on a wire cooling rack, one torn open to show the tender crumb and juicy, suspended berries, natural morning light streaming in from the left.)
The Two Things That Make These Muffins Actually Different
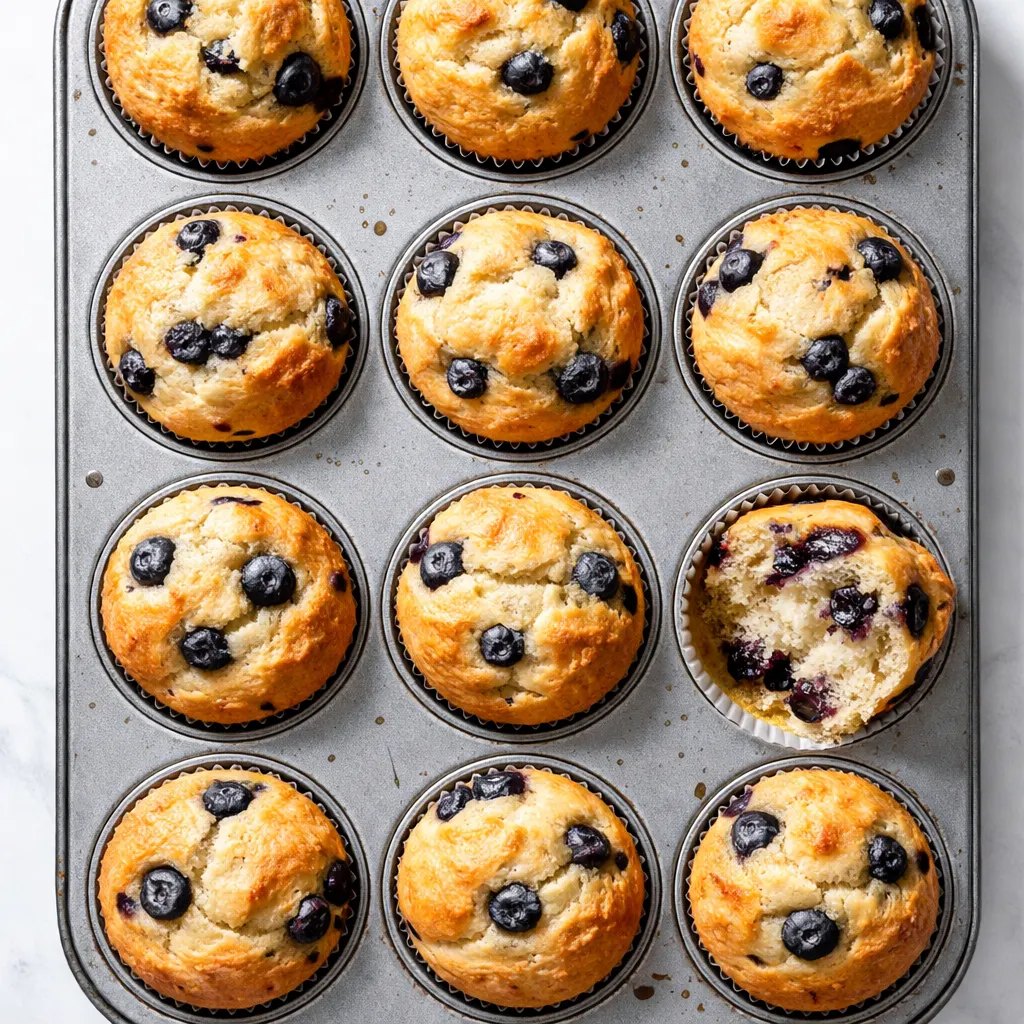
First: the flour toss. Before the blueberries go into the batter, you toss them in a tablespoon of flour. This coats the berries and keeps them suspended. I learned this after way too many batches where the blueberries gave up and sank into a sad, concentrated line at the bottom of the liner. The flour acts like little anchors. It is not a complicated step. It is a non-negotiable one.
Second: the oven temperature blast. A 425°F blast sets the dome before the batter has a chance to spread out into a flat top. Five minutes is all it takes. Then you turn it down to 375°F to let the middles catch up without burning the tops. This produces the tall, golden-brown dome you associate with professional bakeries. Your oven does all the work. You just have to be willing to turn a dial.
Together, these two techniques produce a muffin that looks like it came from a pastry case and tastes like you put real thought into it. Which you did. For about thirty seconds of active effort.
Everything You Need (And a Few Notes From Me)
- 2 cups all-purpose flour: Spoon it into the measuring cup and level it off with a knife. Scooping directly from the bag packs it down and gives you dry muffins.
- 1/2 cup granulated sugar + 1/4 cup light brown sugar: The brown sugar adds a hint of molasses that makes the blueberry flavor deeper without tasting like a dessert muffin.
- 2 tsp baking powder + 1/2 tsp baking soda: This combination gives the muffin its rise. Make sure both are fresh — if your baking powder is over a year old, it will not lift the batter properly.
- 1/2 tsp salt: It balances the sweetness. Don’t skip it.
- 1 cup buttermilk: This is the difference between a tender crumb and a tough one. The acid in buttermilk interacts with the baking soda to keep the muffin soft. My kids can tell if I try to sub regular milk — the texture gives it away immediately.
- 1/3 cup vegetable oil: Oil makes for a moister muffin than butter. If you want to use melted butter instead, go ahead, but the texture will be slightly denser.
- 1 large egg: Pull it out of the fridge 10 minutes before you start so it mixes in evenly.
- 1 tsp vanilla extract: Use the real stuff. The imitation version leaves a chemical note that doesn’t fade during baking.
- 1 1/2 cups fresh or frozen blueberries: Fresh is ideal, frozen works perfectly. If using frozen, do not thaw them first — the flour toss still works with frozen berries, and skipping the thaw prevents the batter from turning gray.
- 1 tbsp flour (for the toss): This is the anchor step. Do not skip it.
What to Pull Out Before You Start
- A standard 12-cup muffin tin
- Paper muffin liners (the tulip-shaped ones make them look extra bakery-style, but regular work just fine)
- Two mixing bowls (one medium, one large)
- A whisk and a rubber spatula
- A cookie scoop (this is the key to even muffins — I use a #20 scoop for perfectly uniform portions)
That is genuinely all you need. No stand mixer. No hand mixer. Just a bowl and a spatula.
Let’s Make It (Step by Step)
This goes fast, so read through once before you start. The oven does most of the heavy lifting here.
Preheat and prep: Set your oven to 425°F. Line your muffin tin with paper liners. No need to spray the liners — the batter handles that on its own.
- Whisk the dry ingredients: In a large bowl, whisk together the flour, granulated sugar, brown sugar, baking powder, baking soda, and salt. Make sure everything is evenly distributed. (📸 Photo tip: The mixture should look uniform with no streaks of brown sugar clumps.)
- Whisk the wet ingredients: In a medium bowl, whisk together the buttermilk, oil, egg, and vanilla until smooth. It will look slightly separated at first — keep whisking until it comes together.
- Toss the blueberries: In a small bowl, toss the blueberries with the 1 tablespoon of flour until they are all lightly coated. This keeps them suspended in the batter.
- Combine wet and dry: Pour the wet mixture into the dry mixture. Fold with a rubber spatula until just combined — a few streaks of flour are fine. Do not overmix. Overmixing produces tough, dense muffins with pointy tops instead of round domes.
- Fold in the blueberries: Gently fold the floured blueberries into the batter. A few strokes is all it takes. The batter should be thick — almost scoopable. If it is runny, you overmixed. It will still taste fine, but it will not dome as dramatically. (📸 Photo tip: The batter should just barely hold its shape when scooped — not stiff, but definitely not pourable.)
- Scoop and bake: Use the cookie scoop to divide the batter evenly among the 12 liners. Fill them all the way to the top — this gives you the tall dome. Bake at 425°F for 5 minutes. Without opening the oven, reduce the temperature to 375°F and bake for another 15–18 minutes, until the tops are golden brown and a toothpick inserted in the center comes out with a few moist crumbs (not liquid batter).
- Cool: Let the muffins cool in the pan for exactly 5 minutes. Then transfer them to a wire rack to finish cooling. This prevents the bottoms from steaming and turning soggy.
Sunday Prep = Stress-Free School Mornings
I make a double batch on Sundays and we grab one for breakfast all week. They reheat beautifully, which makes them the kind of recipe that keeps giving.
- Fridge: Store in an airtight container for up to 4 days. Place a paper towel at the bottom of the container to absorb excess moisture, and swap it out after 2 days.
- Freezer: Yes. Cool the muffins completely, then freeze them in a single layer on a baking sheet for 2 hours. Transfer them to a freezer-safe bag. They keep for up to 3 months. (My secret: I wrap individual muffins in plastic wrap before bagging them — easy to grab one at a time.)
- Reheat: Microwave for 20 seconds for a just-baked texture. For a crisper top, reheat in a 350°F oven for 5 minutes. The microwave works in a pinch, but the oven keeps the muffin closer to its original state.
Things I Wish I’d Known the First Time
- The flour toss is not optional: I explain the science above, but let me be clear: the first time I skipped it to save time, the muffins looked like the blueberries had given up on life. They were all at the bottom. The flour toss takes 15 seconds. It is worth every single one.
- Lumpy batter is good batter: When you combine the wet and dry ingredients, stop folding as soon as the flour disappears. It is okay if there are a few small lumps. Overmixing develops the gluten, which makes the muffins tough. I have made this mistake more times than I care to admit. Trust the lumps.
- Fill the liners to the top: If you fill them two-thirds full, you will get flat-topped muffins. If you fill them to the rim, you get tall, domed, bakery-style muffins. This is one of the few places in cooking where more is unequivocally more.
- Invest in a cookie scoop: It gives you perfectly even muffin sizes, which means they all bake at the same rate. No more pulling out a tray where half are overdone and half are underbaked. A #20 scoop is the perfect size for standard muffin tins.
Swaps That Actually Work
- Dairy-Free: Use 1 cup almond milk mixed with 1 tablespoon white vinegar or lemon juice. Let it sit for 5 minutes before using. It mimics buttermilk’s acidity well enough that the texture is barely affected. I make this version for my friend who can’t do dairy, and she never complains.
- Lemon Blueberry: Add 1 tablespoon of lemon zest to the dry ingredients and 1 tablespoon of lemon juice to the wet ingredients. The lemon brightens the blueberries without overpowering them.
- Streusel Topping: Mix 1/4 cup flour, 2 tablespoons brown sugar, 2 tablespoons cold cubed butter, and a pinch of cinnamon with your fingers until crumbly. Sprinkle it on top of the batter before baking. This adds a crunchy, buttery layer that texts “I tried hard” even though it took 45 seconds.
- Raspberry Muffins: Swap the blueberries for fresh or frozen raspberries. Raspberries are more delicate, so fold them in even more gently than you would blueberries. They will break slightly and streak the batter pink — which looks beautiful in the finished muffin.
- Gluten-Free: Use a 1:1 gluten-free baking flour blend. The recipe works exactly the same. I tested this with my go-to brand and the texture was maybe a hair more crumbly, but nobody at my table noticed enough to mention it.
Questions I Get About This Recipe All the Time
Q: Why did my blueberries sink to the bottom?
A: Ugh, I have been there. The most likely culprit is that you skipped the flour toss or used berries that were too wet. Thawed frozen berries release liquid that makes them heavy. Next time, toss them in flour while they are still frozen and do not let them thaw first.
Q: Can I use frozen blueberries?
A: Yes, and I actually prefer them for this recipe if fresh are out of season. Do not thaw them. Just increase the flour toss to 1 1/2 tablespoons to account for the extra surface moisture.
Q: How long do these muffins last? Can I freeze them?
A: They stay tender in the fridge for 4 days. I recommend reheating them before eating — 20 seconds in the microwave brings them right back to life. Freezing: Cool completely, flash freeze on a baking sheet for 2 hours, then transfer to a freezer bag. They keep for 3 months. To reheat from frozen, microwave for 30 seconds or let them thaw on the counter for 30 minutes.
Q: What do you serve with these?
A: A generous pat of salted butter and a cup of strong coffee is the correct answer. My kids love them with a glass of cold milk. For a brunch spread, I pair them with scrambled eggs and crispy bacon. The savory-sweet combination is exactly right.
More Recipes My Family Makes on Repeat
If you liked this one, here are a few others that get the same reaction at our table:
- [INTERNAL LINK PLACEHOLDER: Best Banana Bread with Sour Cream] — The secret ingredient that makes it the moistest banana bread you have ever had.
- [INTERNAL LINK PLACEHOLDER: Easy Chocolate Chip Scones] — Flaky, buttery, and ready in 25 minutes.
- [INTERNAL LINK PLACEHOLDER: Simple Cinnamon Streusel Muffins] — The one my kids request most for school breakfasts.
When people ask me what my “signature bake” is, I always say it is this muffin. Not because it is the most impressive thing I can make, but because it is the one that consistently makes people close their eyes and say “mm-hmm” before they put their bags down. That is the reaction you are aiming for, and these deliver it every time.
If you try them, drop a comment below — I love hearing how they turned out for you.
📌 Save this best blueberry muffins recipe for your next lazy Sunday morning baking session — it is the one that finally produces tall, tender, bakery-style results at home without any fuss.
Tall, Bakery-Style Blueberry Muffins That Stay Tender for Days — in 30 Minutes
Equipment
- Standard 12-cup Muffin Tin
- Paper muffin liners
- Two mixing bowls (medium and large)
- Whisk
- Rubber Spatula
- Cookie scoop (#20 recommended)
Ingredients
Dry Ingredients
- 2 cups all-purpose flour, spooned and leveled
- 1/2 cup granulated sugar
- 1/4 cup light brown sugar, packed
- 2 tsp baking powder
- 1/2 tsp baking soda
- 1/2 tsp salt
Wet Ingredients
- 1 cup buttermilk
- 1/3 cup vegetable oil
- 1 large egg, at room temperature
- 1 tsp vanilla extract
Blueberries and Flour Toss
- 1 1/2 cups fresh or frozen blueberries (do not thaw if frozen)
- 1 tbsp all-purpose flour (for tossing)
Instructions
- Preheat oven to 425°F. Line a 12-cup muffin tin with paper liners.
- Whisk dry ingredients: In a large bowl, whisk together flour, granulated sugar, brown sugar, baking powder, baking soda, and salt until uniform.
- Whisk wet ingredients: In a medium bowl, whisk buttermilk, oil, egg, and vanilla until smooth.
- Toss blueberries: In a small bowl, toss blueberries with 1 tablespoon flour until lightly coated. This keeps them suspended in the batter.
- Combine: Pour wet mixture into dry mixture. Fold with a rubber spatula until just combined (a few streaks of flour are fine). Do not overmix.
- Fold in blueberries: Gently fold floured blueberries into batter with a few strokes. Batter should be thick and scoopable.
- Scoop and bake: Divide batter evenly among liners, filling to the top. Bake at 425°F for 5 minutes. Without opening oven, reduce temperature to 375°F and bake 15–18 minutes more, until golden brown and a toothpick inserted in center comes out with a few moist crumbs.
- Cool: Let muffins cool in pan for 5 minutes, then transfer to a wire rack to finish cooling.
Notes
Related Recipes:
 The Perfectly Pillowy Chocolate Chip Milk Buns (Tangzhong Method)
 Cheesy Hamburger Casserole Bake That’s Ready in 40 Minutes (No Canned Soup Here)
 Creamy Garlic Tagliatelle That Looks Like a Restaurant Dish in 20 Minutes
 Texas Roadhouse Style Baked Salmon with Sweet and Savory Glaze — Ready in Under 30 Minutes
 Moist Lemon Zucchini Bread with a Crunchy Lemon Sugar Top
 Strawberry Shortcake Rice Krispie Treats That Actually Taste Like Shortcake — Ready in 15 Minutes