
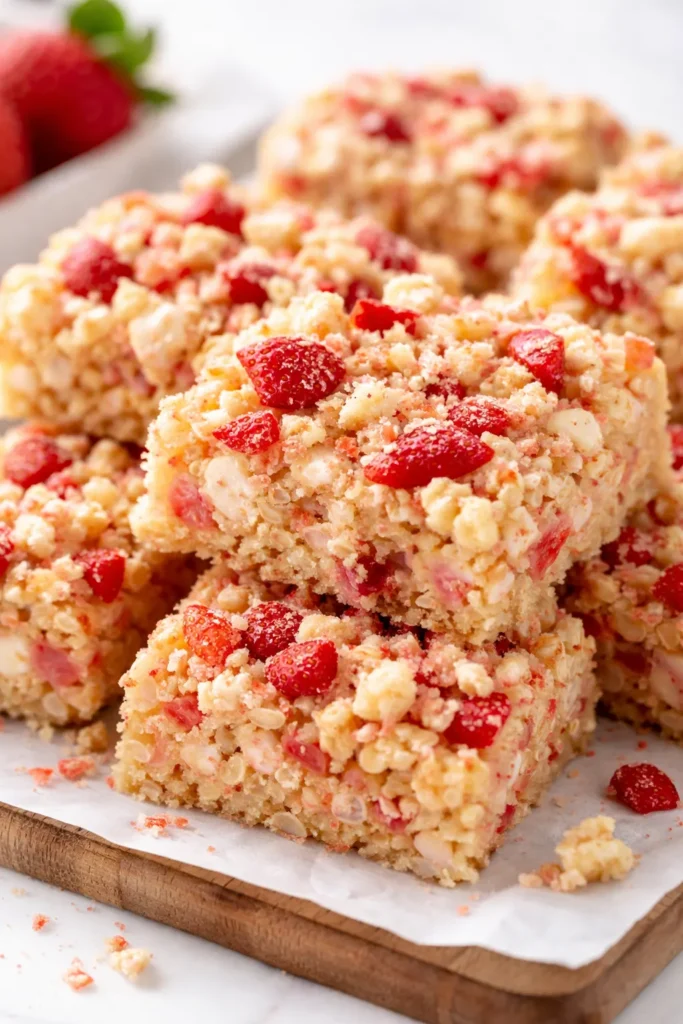
That first bite — the crunch of the crispy rice against the creamy white chocolate, the pop of strawberry jam running through every square — my kids were silent for an entire minute. That never happens. I made these for a weekend treat expecting the usual “these are good” and instead got a full-blown text to their friends: “my mom made something actually amazing.” So, yeah. These are staying in the rotation.
The short version: Classic Rice Krispie treats get a strawberry shortcake upgrade with white chocolate, jam, and a sneaky trick that makes them taste like the real thing. 15 minutes, one pot, zero oven.
I’ve made this about twelve times now — tweaking the jam-to-marshmallow ratio, the white chocolate chip size, the pressing technique. This version is the one I’d serve to anyone who thinks “shortcake” means a complicated baking project. It does not.
- Serves: 12 as a dessert or snack
- Hands-On Time: 10 min | Total Time: 25 min
- Difficulty: Easy — I promise you can’t mess this up
- Cost per serving: ~$0.80
- Calories: ~210 per square
- Dietary Notes: Naturally gluten-free (check your cereal label), not vegan as written
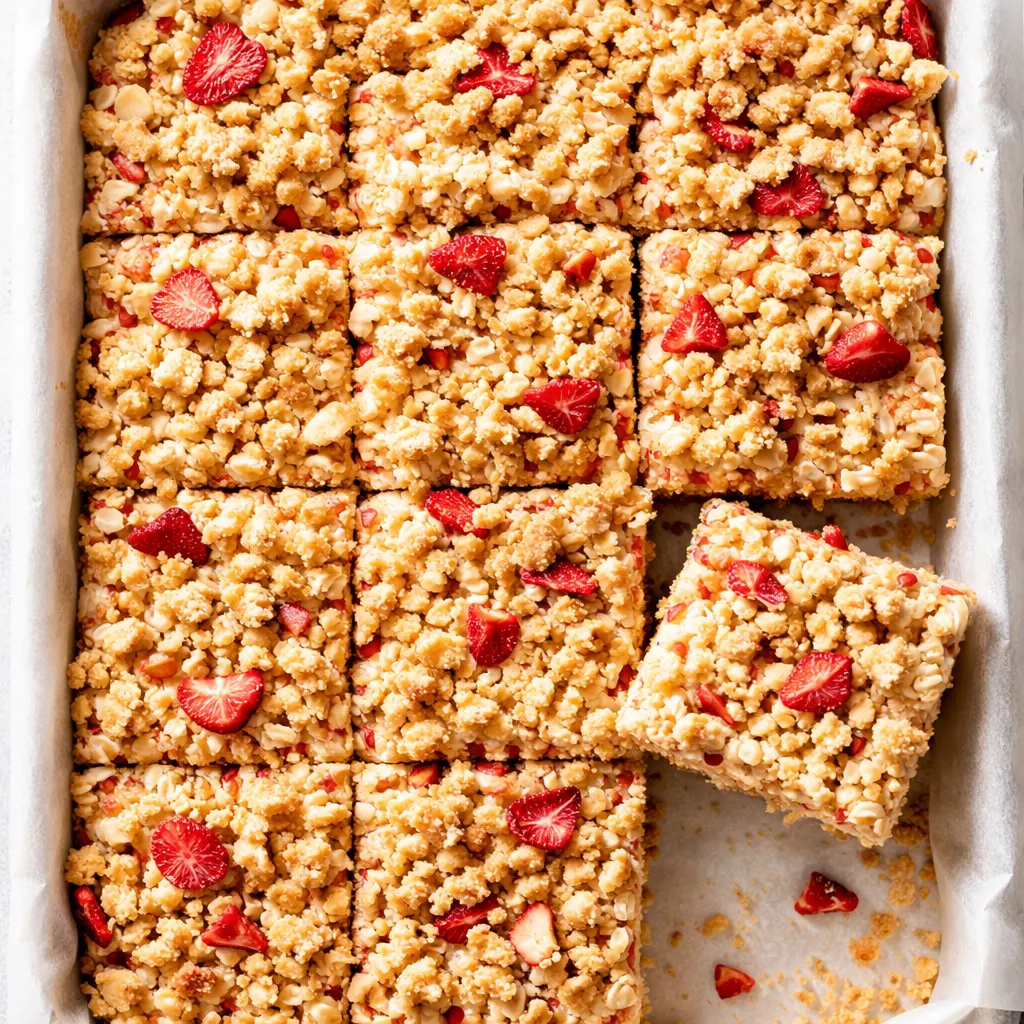
(Photo above: overhead shot of a pan of strawberry shortcake Rice Krispie treats cut into even squares, one lifted and pulled apart to show the gooey pink marbled interior with visible strawberry jam streaks and white chocolate chips, natural morning light from a kitchen window.)
The Trick That Makes These Taste Like Actual Shortcake (Not Just Pink Treats)
Most pink Rice Krispie treats rely on food coloring or freeze-dried strawberry powder that leaves a sandy texture. I wanted the real cream-and-strawberry thing. The trick is adding white chocolate chips after the marshmallow mixture comes off the heat — they melt just enough to stay creamy but hold their shape in chunks, giving you little pockets of “shortcake cream.”
Next, you swirl in strawberry jam at the very end, not mix it all the way through. That creates ribbons of real fruit flavor that taste like the jammy center of a shortcake. Skip the freeze-dried stuff — it’s expensive and doesn’t bring the moisture a good shortcake needs.
What you get is a bar that’s crunchy, creamy, jammy, and shockingly close to the real dessert. My husband, who is a strawberry shortcake purist, said “wait, these are actually good” and ate four in a row. That’s the highest praise he’s ever given a no-bake dessert.
Everything You Need (And a Few Notes From Me)
- 6 cups Rice Krispies cereal (or any crispy rice cereal): The base. Check the label — some store brands are not gluten-free. I use the original.
- 10 oz marshmallows (about 4 cups mini or 40 large): Standard mini marshmallows work best. Don’t use jet-puffed jumbo — they take longer to melt and get rubbery.
- 3 tbsp unsalted butter: Salted butter works too, just skip the salt in the recipe. My kids can’t tell the difference but I can — unsalted gives a cleaner sweet cream flavor.
- 1/2 cup white chocolate chips: Use good ones, not the cheap “white morsels” that are actually oil. Ghirardelli or Guittard. I tested with store brand and the texture was greasy. Worth the upgrade.
- 1/3 cup strawberry jam or preserves: No seeds if you can find it. Bonne Maman or a good local brand. The jam is doing double duty — flavor and color. Don’t use jelly, it doesn’t swirl as well.
- 1/2 tsp vanilla extract: Real vanilla, not imitation. It rounds out the white chocolate.
- Pinch of salt: Optional, but it makes the sweetness taste more like shortcake and less like candy.
What to Pull Out Before You Start
- A 9×13-inch baking dish (or similar — an 8×8 works too but your bars will be thicker)
- A large saucepan (at least 4 quarts — you need room to stir)
- A silicone spatula (wooden spoons work, but silicone won’t scratch your pan)
- Parchment paper (for easy lifting — don’t skip this)
- A small offset spatula or butter knife for swirling
One note: If you use a metal pan, line it with parchment or the treats will stick. Glass is more forgiving but I still line.
Let’s Make It (Step by Step)
This goes fast once you start melting, so have everything measured and ready. My kids love watching the marshmallows puff up — it’s the closest thing to kitchen magic.
Prep: Line a 9×13-inch baking dish with parchment paper, leaving an overhang on two sides so you can lift the whole block out later. Lightly grease the parchment with butter or cooking spray.
- Melt the butter and marshmallows: In a large saucepan over medium-low heat, melt the butter completely. Add the marshmallows and stir constantly until they’re smooth and fully melted, about 3–4 minutes. Remove from heat immediately. Don’t walk away — burnt marshmallow smells terrible and ruins the batch. (📸 Photo tip: The mixture should be glossy and thick, not bubbly. If you see brown spots, you went too long.)
- Stir in the vanilla and white chocolate chips: Add the vanilla and the white chocolate chips. Stir gently until the chips are mostly melted — you want some small chunks for texture. A few whole chips left is fine; they’ll soften as they sit. (📸 Photo tip: Streaks of white through the pink means you’re doing it right — don’t stir until uniform.)
- Fold in the cereal: Add the Rice Krispies all at once. Fold with a silicone spatula until all the cereal is coated. Work quickly — the mixture sets fast.
- Add the jam swirl: Pour the mixture into the prepared dish. Use the spatula to spread it in an even layer — don’t pack it down! Then drop spoonfuls of strawberry jam on top. Use a butter knife to swirl the jam through the top layer, creating ribbons. Don’t over-swirl or the jam disappears.
- Press lightly: With a piece of parchment paper on top (or lightly greased hands), press the mixture gently into an even layer. The key word is gentle — pressing too hard makes hard, dense bars. Just enough to flatten the top.
- Let set: Let the pan sit at room temperature for at least 15 minutes. If you’re impatient (I am), pop it in the fridge for 10. Use the parchment overhang to lift the whole block onto a cutting board, then slice into squares with a sharp knife.
How I Meal Prep These for the Week
I make a full batch on Sunday and we snack on them all week. They keep beautifully at room temperature — no refrigeration needed. The key is storing them properly so they don’t dry out.
- Fridge: Store in an airtight container at room temp for up to 5 days. If it’s hot or humid, refrigerate — but let them sit out 10 minutes before eating for the best texture.
- Freezer: Yes! Cut into squares, wrap each individually in plastic wrap, then place in a freezer bag. Thaw at room temp for 15 minutes. They taste almost fresh.
- Reheat: Not necessary — they’re good cold or room temp. If you want a softer texture, microwave a square for 5 seconds. Any longer and the marshmallow gets tough.
Things I Wish I’d Known the First Time
- Don’t skimp on the white chocolate quality: I made a batch with the store-brand white chips. They separated and left an oily film. Use chips that contain real cocoa butter — Ghirardelli, Guittard, or even Baker’s. The texture is night and day.
- Swirl the jam, don’t mix it in: If you stir the jam into the whole mixture, you get a uniform pink bar with no distinct shortcake flavor. Swirling creates pockets of jam that hit like a surprise. My kids fight over the squares with visible jam streaks.
- Let them set fully before cutting: I know it’s tempting to dig in while warm, but the bars need that 15 minutes to firm up. Warm cuts turn into a sticky mess. If you’re in a rush, the fridge is your friend.
- Grease your knife: To get clean cuts, spray your knife with cooking spray or run it under hot water between slices. Otherwise the marshmallow drags. I learned this after a very sad-looking pan.
Swaps That Actually Work
- Gluten-free: Use certified gluten-free crispy rice cereal (like Nature’s Path). Everything else is already gluten-free. My friend Celiac Sarah loves these — she says they’re better than the original.
- Vegan: Use vegan marshmallows (Dandies are great) and vegan butter (Miyoko’s or Earth Balance). The white chocolate chips need to be vegan — Pascha makes a good one. I tested this for a potluck and nobody noticed the difference.
- Extra strawberry: Add 1/4 cup freeze-dried strawberry powder along with the marshmallows. It’ll make the bars more pink and intensify the berry flavor. But honestly, the jam method gives a juicier result.
- Kid-friendly “just the base” version: Omit the white chocolate chips and just do marshmallow + jam. My younger one prefers it simpler. I make a half batch that way and nobody complains.
Questions I Get About This Recipe All the Time
Q: Why are my Rice Krispie treats too hard?
A: The most common culprit is pressing them too firmly into the pan. You want just enough pressure to level the top — don’t pack it down like you’re making a crust. Also, make sure you’re using fresh marshmallows. Old or stale ones don’t melt properly and lead to a stiff texture.
Q: Can I use fresh strawberries instead of jam?
A: I wouldn’t. Fresh strawberries release too much water and turn the marshmallow mixture into a sticky mess that never sets. If you really want fresh flavor, mash a few berries with a bit of sugar and use that as a topping on the finished bars — but not in the base.
Q: How long do these keep?
A: At room temperature in an airtight container, they’re good for 4–5 days. After that, the cereal starts to soften. In the fridge they last up to a week. Freezer: up to 2 months. I’ve frozen a batch and forgotten about it for three months — still tasty, just a bit less crispy.
Q: What’s the best way to cut clean squares?
A: Let them set completely at room temp, then lift the whole block out with the parchment. Use a sharp chef’s knife and clean it between cuts with a paper towel. For absolutely perfect edges, chill the block for 10 minutes in the fridge first. And spray that knife with cooking spray — trust me.
More Recipes My Family Makes on Repeat
If you liked these strawberry shortcake bars, here are a few others that get the same reaction at our table — the “wait, these are gone already?” kind.
- Classic Rice Krispie Treats (the only recipe you’ll ever need) — The original. Buttery, perfectly chewy, and takes 10 minutes.
- No-Bake Strawberry Cheesecake Bars — Cream cheese, fresh berries, and a graham cracker crust that doesn’t require an oven.
- Easy Chocolate Peanut Butter Rice Krispie Treats — For when the strawberry phase ends and chocolate calls.
These bars are now part of our weekend rotation — the kind of treat that feels special but takes almost zero effort. I love that they come together while the kids are setting the table, and they’re gone before I’ve even poured my coffee the next morning.
If you try them, drop a comment below — I love hearing how they turn out for your family. Tag me on Pinterest or Instagram so I can see your strawberry swirls!
📌 Save this strawberry shortcake Rice Krispie treats recipe for your next summer picnic or bake sale — it’s the no-bake dessert that disappears in minutes and tastes like the real thing.
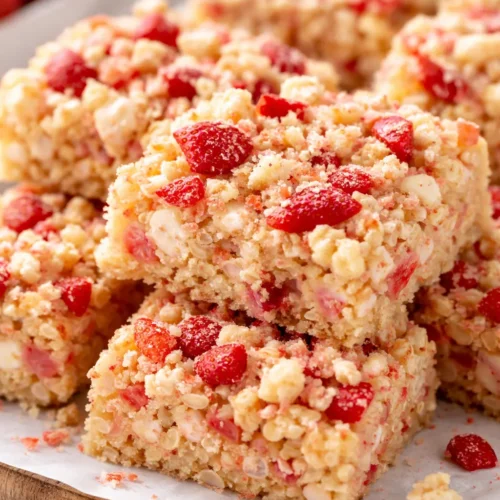
Strawberry Shortcake Rice Krispie Treats
Equipment
- 9×13-inch baking dish
- Large saucepan (at least 4 quarts)
- Silicone spatula
- Parchment Paper
- Small offset spatula or butter knife
Ingredients
- 6 cups Rice Krispies cereal (or any crispy rice cereal)
- 10 oz marshmallows (about 4 cups mini or 40 large)
- 3 tbsp unsalted butter
- 1/2 cup white chocolate chips (preferably Ghirardelli or Guittard)
- 1/3 cup strawberry jam or preserves (seedless if possible)
- 1/2 tsp vanilla extract
- 1 pinch salt (optional but recommended)
Instructions
- Line a 9×13-inch baking dish with parchment paper, leaving an overhang on two sides. Lightly grease the parchment with butter or cooking spray.
- In a large saucepan over medium-low heat, melt the butter completely. Add the marshmallows and stir constantly until smooth and fully melted, about 3-4 minutes. Remove from heat immediately.
- Add the vanilla and white chocolate chips. Stir gently until mostly melted, leaving some small chunks for texture.
- Add the Rice Krispies all at once. Fold with a silicone spatula until all cereal is coated.
- Pour mixture into prepared dish. Spread in an even layer without packing down. Drop spoonfuls of strawberry jam on top and swirl with a butter knife to create ribbons.
- With a piece of parchment paper on top (or greased hands), gently press the mixture into an even layer. Do not press hard.
- Let pan sit at room temperature for at least 15 minutes, or refrigerate for 10 minutes. Use parchment overhang to lift block onto cutting board, then slice into squares.
Notes
Related Recipes:
 The Perfectly Pillowy Chocolate Chip Milk Buns (Tangzhong Method)
 Cheesy Hamburger Casserole Bake That’s Ready in 40 Minutes (No Canned Soup Here)
 Creamy Garlic Tagliatelle That Looks Like a Restaurant Dish in 20 Minutes
 Texas Roadhouse Style Baked Salmon with Sweet and Savory Glaze — Ready in Under 30 Minutes
 Easy Italian Meatloaf That’s Actually Juicy (Not Dry) — in 1 Hour
 Moist Lemon Zucchini Bread with a Crunchy Lemon Sugar Top