
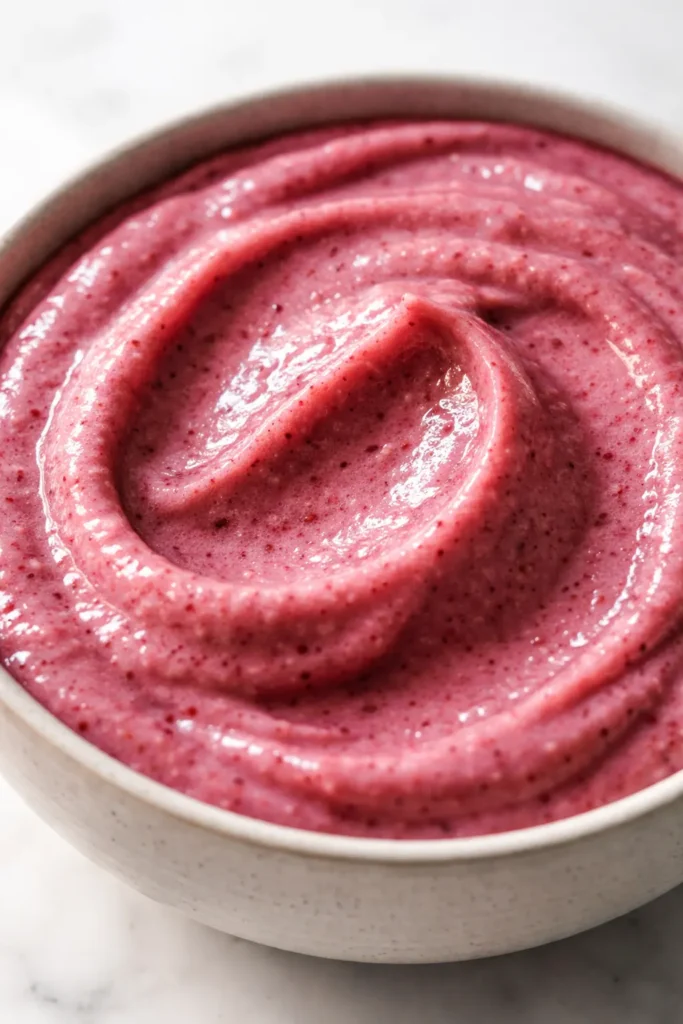
The first spoonful has to crack through the frozen fruit shell. That crackle is the sound of a smoothie bowl done right — thick enough to hold a row of sliced banana and a drift of toasted coconut without collapsing into a puddle. This version uses exactly three ingredients in the base, zero added sugar, and the kind of topping situation that makes a Tuesday morning feel like a weekend resort stay.
The short version: Five minutes of blender work, one bowl, and a spoon that stands straight up in the center.
I’ve made this roughly forty times since strawberry season started. My neighbor texted me the other morning asking what I was eating because she could see the coconut chips from across the courtyard. That is the kind of visual pull a smoothie bowl should have.
- Serves: 1 as a meal, 2 as a side
- Hands-On Time: 5 min | Total Time: 10 min
- Difficulty: Beginner — no blending tricks required
- Cost per serving: ~$3.50
- Calories: ~320 per bowl
- Dietary Notes: Naturally vegan, gluten-free, no added sugar
(Photo above: overhead shot of a thick pink smoothie bowl on a marble counter, topped with sliced banana, raspberries, coconut chips, and a drizzle of almond butter. Morning light from the left. The spoon is already in it.)
What Makes This Different From Every Other Smoothie Bowl I’ve Tried
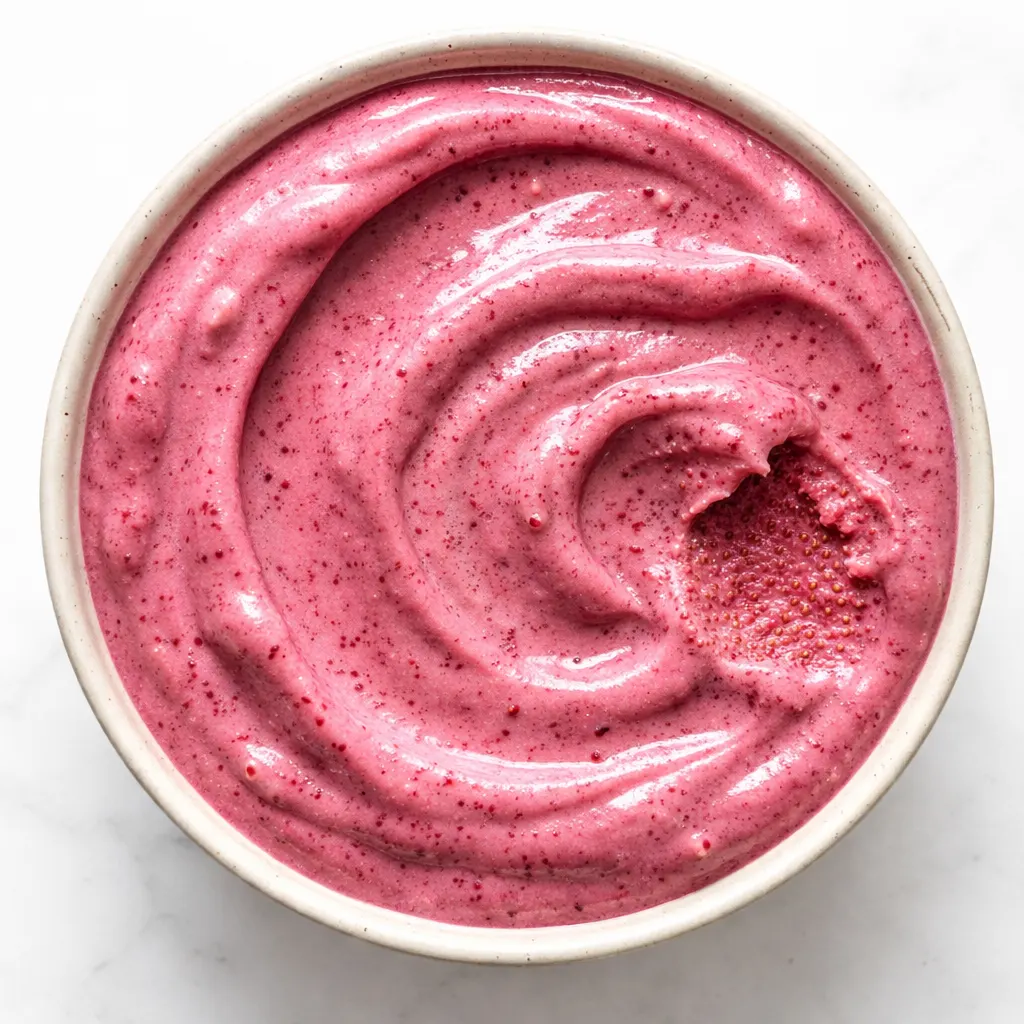
Most smoothie bowls are just smoothies poured into a wider container. That is not a bowl. That is a lie. This one stays thick because the liquid-to-fruit ratio is deliberately low — just enough to get the blender moving, not enough to let the ice crystals dissolve into water. The frozen banana is doing the heavy lifting here. It adds creaminess without needing a scoop of yogurt or a splash of milk, and it keeps the base sweet without a drop of maple syrup or honey. The result is a bowl that actually eats like a meal — cold, dense, spoon-standing-up thick.
Everything You Need (And a Few Notes From Me)
- 1 cup frozen strawberries: The backbone of the flavor. Do not use fresh here — frozen gives it the structure it needs. I buy the big bags from Costco and they last me a month.
- 1/2 cup frozen raspberries: Adds a slightly tart edge that keeps the bowl from tasting like jam. If your raspberries are particularly tart, add another few slices of banana, not sugar.
- 1 frozen banana, sliced: The single most important ingredient. It must be frozen. A room-temperature banana makes a thin, sad smoothie. I freeze my bananas when they’re spotty — that’s where the sweetness comes from.
- 1/4 cup unsweetened almond milk (plus more if needed): Just enough to get the blender moving. Start with less. You can always add more. I use plain oat milk sometimes — it’s slightly sweeter and works beautifully.
- Toppings (your architecture): Sliced banana, fresh raspberries, toasted coconut chips, almond butter, chia seeds, bee pollen. This is where the visual happens. Odd numbers. Intentional placement. No scattering from a height.
The Setup (It’s Minimal, I Promise)
- High-speed blender: A Vitamix or Ninja works best. A regular blender will work but you might need to tamp the sides more.
- A rubber spatula: For scraping down the sides. Essential for thickness.
- A wide, shallow bowl: The bowl shape matters. A wide rim gives you room to arrange toppings without them sliding into the center.
Let’s Make It (Step by Step)
This goes fast. Have your toppings ready before you start blending — the window for perfect thickness is real.
- Layer the blender: Add the almond milk first. Then the frozen banana slices. Then the frozen strawberries and raspberries. This helps the blender grab everything evenly. (📸 Photo tip: Your blender should look like a packed freezer bag — dense, no gaps.)
- Blend, scrape, repeat: Start on low, then ramp to high. Use the tamper to push the fruit into the blades. Stop, scrape the sides, and blend again. It should look like a sorbet — thick enough to hold its shape on a spoon. If it won’t blend, add 1 tablespoon of liquid at a time. No more. (📸 Photo tip: Right after blending, the surface should be smooth and matte, not shiny or wet.)
- Transfer immediately: Scoop the base into your bowl. Do not let it sit in the blender — it will start to melt and lose that thick, scoopable texture.
- Build your toppings: Start with a base layer of sliced banana and fresh raspberries. Add the coconut chips. Drizzle the almond butter in a deliberate diagonal line — not a puddle. Finish with chia seeds and bee pollen. The last thing you add should be the smallest. It frames the whole bowl.
- Eat immediately: This doesn’t wait. That first crack of the spoon through the frozen top layer is the whole experience.
Sunday Prep = Stress-Free Mornings
I make smoothie bowl prep part of my Sunday routine. A few minutes of work and I have breakfast ready for the first half of the week.
- Fridge: Not recommended — the base is best fresh. But if you’ve already made it, press plastic wrap directly onto the surface and eat within 24 hours. It won’t be as thick but the flavor is still there.
- Freezer: Yes. Portion the frozen fruit and banana into individual freezer bags. In the morning, dump the bag into the blender, add liquid, and blend. No thinking required.
- Reheat: You don’t. But if you’re using frozen smoothie cubes, let them sit on the counter for 5 minutes before blending — it’s easier on your blender motor.
Things I Wish I’d Known the First Time
- Frozen banana is non-negotiable: A fresh banana makes a thin, icy smoothie. You want the banana to be spotty and frozen solid. That’s where the sweet creaminess comes from without any added sugar.
- Don’t over-blend: The goal is a thick, scoopable consistency. If you run the blender for too long, the friction melts the ice crystals and you’ll end up with a smoothie that’s too thin to hold toppings. Blend just until smooth and stop.
- Less liquid is more: Start with 1/4 cup of milk and add more only if the blender struggles. It’s easier to add liquid than to take it away. A thick base means your toppings sit on top instead of sinking.
- Toppings are architecture: Think about texture and placement. A row of banana slices, a cluster of raspberries, a drift of coconut chips. Everything lands exactly where it’s supposed to. It takes 30 extra seconds and makes the bowl look intentional. Even if you mess this part up a little, it’ll still taste incredible — I’ve done it.
Swaps That Actually Work
- Protein Boost: Add a scoop of unflavored or vanilla collagen or protein powder. Blend it with the fruit. Add an extra tablespoon of liquid to compensate.
- Dairy-Free / Vegan: It already is! But if you want a creamier version, swap the almond milk for a spoonful of coconut cream or full-fat oat milk.
- Tropical Version: Swap the raspberries for frozen mango and the strawberries for frozen pineapple. Keep the banana. Top with toasted coconut and macadamia nuts.
- Kid-Friendly Version: Use all strawberries (kids can find raspberry seeds annoying). Top with granola, banana slices, and a drizzle of peanut butter. My nephew calls it “ice cream for breakfast.”
Questions I Get About This Smoothie Bowl All the Time
Q: Why did my smoothie bowl turn out too thin?
A: Ugh, I’ve been there. The most common reason is too much liquid. Next time, start with 1/4 cup of milk and add 1 tablespoon at a time. It should barely be moving in the blender before you tamp it down. Another culprit is a not-frozen-enough banana. Make sure it’s frozen solid.
Q: Can I make this without a high-speed blender?
A: You can! A regular blender works, but you’ll need to stop and scrape the sides more often. Let the frozen fruit sit on the counter for 5 minutes before blending to soften it slightly. It’s still good — just takes a little more patience.
Q: How long does the smoothie base last in the fridge?
A: It doesn’t, unfortunately. The texture changes completely once it starts to melt. But you can freeze the blended base in an airtight container for up to 2 months. Thaw on the counter for 15 minutes, then blend again with a splash of milk.
Q: What do you serve with this to make it a filling meal?
A: A smoothie bowl is already pretty substantial, but if I want it to last until lunch, I’ll add a side of toast with almond butter or a hard-boiled egg. For weekends, a latte on the side feels right. My kids like it with a glass of orange juice — extra vitamin C to start the day.
More Recipes My Friends Ask For
If you liked this one, here are a few others that get the same reaction in my kitchen:
- [INTERNAL LINK PLACEHOLDER: The Actually-Crispy Tofu Scramble] — The trick is pressing the tofu long enough. I know. But it works.
- 5-Minute Chia Seed Pudding — The make-ahead breakfast that saves me on busy mornings.
- One-Bowl Banana Oat Muffins — The ones that taste like you tried but took exactly zero effort.
This is the breakfast that makes me look like I have my life together, even when I absolutely do not. That thick, cold spoonful with the crunch of coconut and the tart burst of raspberry — it resets the whole day. If you try it, drop a comment below — I love hearing how it goes for you.
📌 This thick, spoon-standing-up strawberry raspberry smoothie bowl has zero added sugar — save it for your next Sunday reset morning.
The Strawberry & Raspberry Smoothie Bowl You’d Never Guess Has No Added Sugar — Ready in 10 Minutes
Equipment
- High-speed blender
- Rubber Spatula
- Wide shallow bowl
Ingredients
- 1 cup frozen strawberries
- 1/2 cup frozen raspberries
- 1 frozen banana, sliced
- 1/4 cup unsweetened almond milk (plus more if needed)
Toppings
- to taste sliced banana
- to taste fresh raspberries
- to taste toasted coconut chips
- to taste almond butter (for drizzling)
- to taste chia seeds
- to taste bee pollen (optional)
Instructions
- Layer the blender: Add almond milk first, then frozen banana slices, then frozen strawberries and raspberries. This helps the blender grab everything evenly.
- Blend, scrape, repeat: Start on low, then ramp to high. Use the tamper to push fruit into blades. Stop, scrape sides, blend again until thick as sorbet. If needed, add 1 tablespoon liquid at a time.
- Transfer immediately into a wide shallow bowl — do not let it sit in the blender.
- Build your toppings: Start with a base layer of sliced banana and fresh raspberries. Add coconut chips. Drizzle almond butter in a deliberate diagonal line. Finish with chia seeds and bee pollen.
- Eat immediately — the first crack of the spoon through the frozen top layer is the whole experience.
Notes
Related Recipes:
 The Perfectly Pillowy Chocolate Chip Milk Buns (Tangzhong Method)
 Bagel Breakfast Sliders That Taste Like a Diner Breakfast — in 25 Minutes
 Cheesy Hamburger Casserole Bake That’s Ready in 40 Minutes (No Canned Soup Here)
 Creamy Garlic Tagliatelle That Looks Like a Restaurant Dish in 20 Minutes
 Easy Shrimp Guacamole Bites That Look Like a Party in 20 Minutes
 Texas Roadhouse Style Baked Salmon with Sweet and Savory Glaze — Ready in Under 30 Minutes