
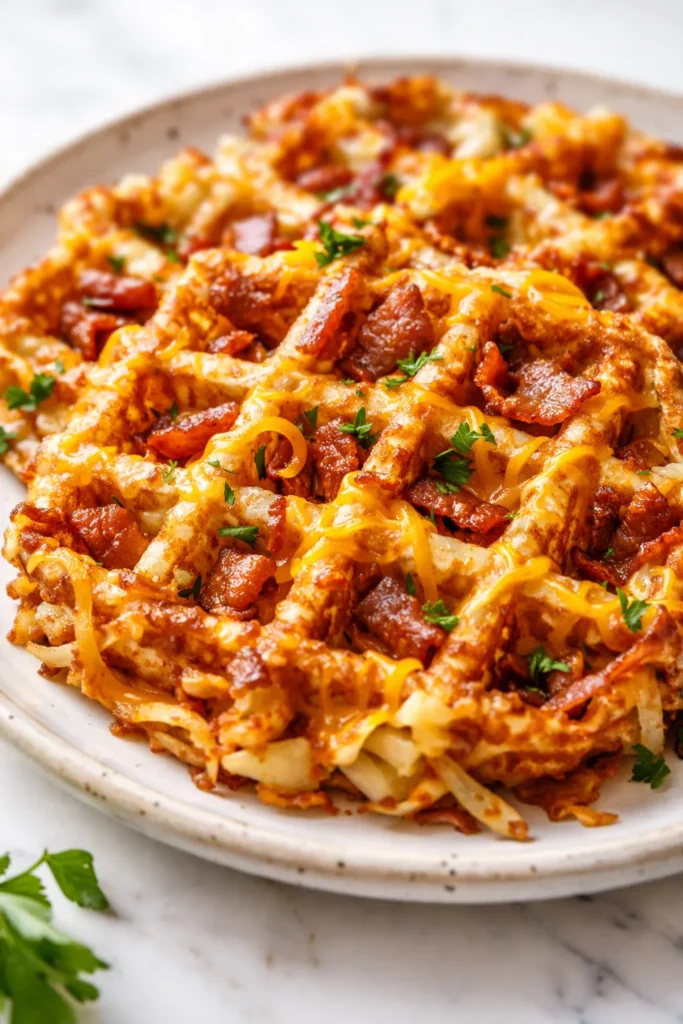
The first time I made these, I stood over the waffle iron eating a wedge directly off the output tray before I even bothered with a plate. Not because I was in a rush. Because that first bite — shatteringly crisp edges, molten pockets of cheddar, a hit of smoky bacon — demanded immediate attention. The secret to this texture isn’t a fancy technique. It’s one very specific, very physical step. And once you do it, you won’t go back to regular hashbrowns again.
The short version: Frozen hashbrowns, bacon, cheddar, and a waffle iron. Twenty minutes. You will look like a breakfast genius without breaking a sweat.
I’ve made these for friends who claimed they “couldn’t cook,” for lazy Sunday mornings alone with a pot of coffee, and for a dinner party where I served them as a base for poached eggs and hollandaise. They’ve never once left leftovers.
- Serves: 2–4 (makes 4 standard waffles)
- Hands-On Time: 15 min | Total Time: 20 min
- Difficulty: Easy — even if you’ve never used a waffle iron before
- Cost per serving: ~$2.50
- Calories: ~410 per waffle
- Dietary Notes: Contains gluten (breadcrumbs) and dairy. Easily adaptable for GF.
(Photo above: An overhead shot of two golden-brown waffles on a dark slate plate, a fork resting to the side. A small ramekin of sour cream sits in the corner, and chopped chives are scattered with deliberate intent over the waffles. Morning light streams in from a window on the left, catching the crispy edges and cheese bubbles.)
The Trick That Makes These Actually Crispy (Not Soggy)
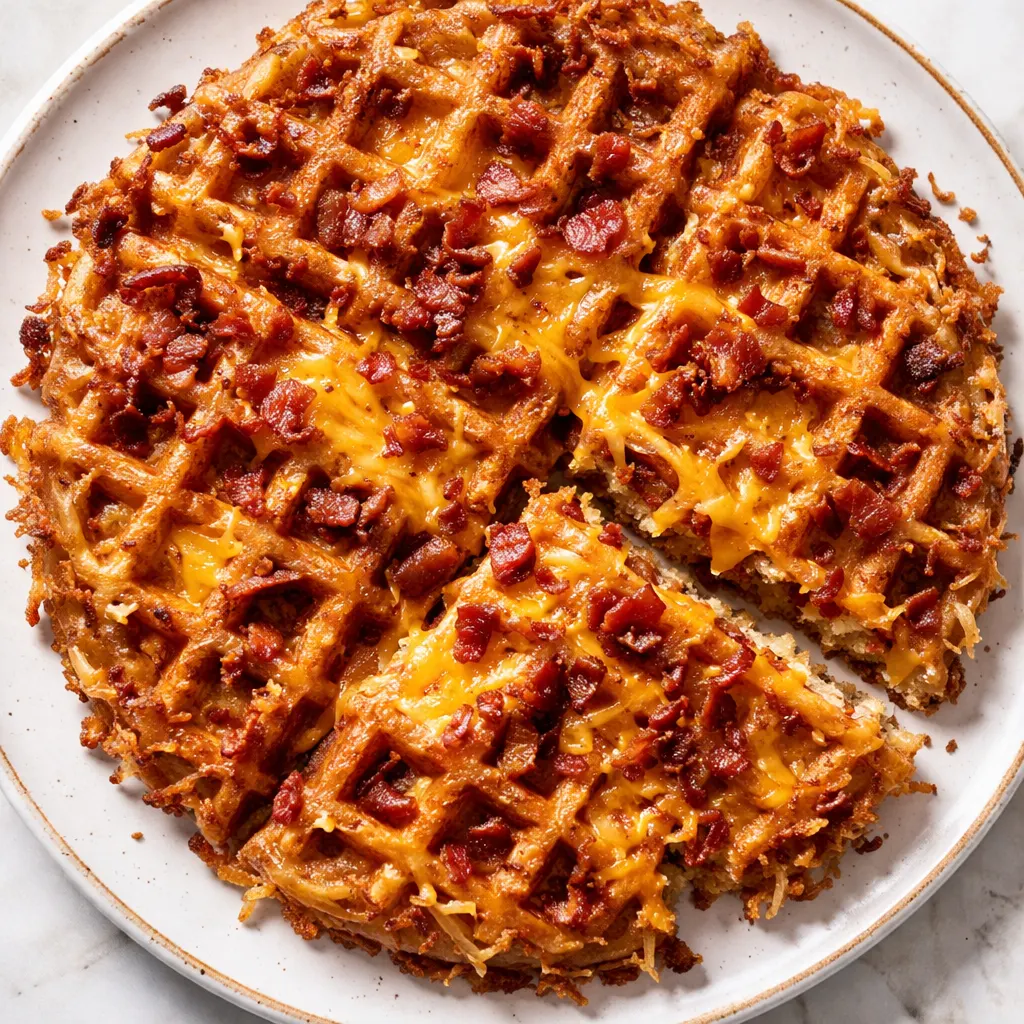
The enemy of a good hashbrown waffle is moisture. Pure and simple. You can have the best bacon and the sharpest cheddar, but if your shredded potatoes are holding onto water, you will end up with a dense, steamed interior instead of that lacy, crisp structure we’re all chasing. I learned this the hard way after a batch turned into potato pudding in my waffle iron. Not cute.
Wringing every drop of water out of the thawed hashbrowns is the one non-negotiable step. It sounds extreme. It feels extreme on your wrists. But it is the difference between a waffle that shatters when you bite into it and a waffle that sighs. Do not skip it.
The pre-cooked bacon does double duty here. It adds smoky, salty pops throughout the waffle, and rendering the fat first means you aren’t left with flabby, unappetizing bits hiding inside the batter. Every bite should be intentional, and every bite should be delicious.
What Goes In — Plus My Honest Notes
- Frozen shredded hashbrowns (thawed): 3 cups: The shortcut that saves your morning. Just make sure they’re thawed so you can wring them out properly. I’ve used fresh potatoes in a pinch, and it works, but frozen is consistently excellent and saves me 10 minutes.
Do not use hashbrown patties. You need the loose shreds. - Bacon: 6 strips: Thick-cut is the move here. Thin bacon disappears into the batter and leaves you searching for flavor. You want a definitive, chewy, meaty piece in every second or third bite.
Cook it until crisp, then chop it into small bits. Reserve a tablespoon of the rendered fat for the waffle iron. - Sharp cheddar: 1 cup, shredded: Melts better than mild and has enough personality to stand up to the bacon and potatoes. Pre-shredded bagged cheese has anti-caking agents that make it less melty. Grate your own. It takes two minutes and the texture difference is real.
- Panko breadcrumbs: 1/4 cup: The secret weapon for texture. They grab the fat and turn into little crunchy pockets throughout the waffle. Standard breadcrumbs will work, but panko gives you that extra shatter factor.
- Eggs: 2 large: The glue that holds everything together. Not enough egg and it crumbles apart when you open the iron. Too much flour and it’s dense and bready. This ratio is gold.
- All-purpose flour: 1/4 cup: Just enough to bind the mixture. Think of it as insurance for structure.
- Salt and black pepper: Potatoes are sponges for salt. Do not be shy. I use a full teaspoon of kosher salt and a generous amount of fresh cracked pepper.
- Chives and sour cream (for serving): This is not decoration. The chives add a fresh, oniony bite that cuts through the richness. The sour cream adds a cool, tangy contrast. Both are essential.
Do not skip the finish. It turns breakfast into a plate that looks like it costs $18.
The Setup (It’s Minimal, I Promise)
- Waffle iron (standard square or round — Belgian works great, just adjust the cook time)
- Large mixing bowl
- Clean kitchen towel or several layers of cheesecloth (for squeezing potatoes — this is non-negotiable)
- Skillet (for the bacon) or a paper towel-lined plate
- A wire rack (for resting the finished waffles — a plate traps steam and undoes all your hard work)
If you don’t have a wire rack, just serve them immediately. They won’t last long enough on the counter to get soggy anyway.
Let’s Make It (Step by Step)
This moves fast, so read through once before you start. Don’t let the steps intimidate you — most of them take about thirty seconds.
Prep and bacon: Set the oven to 200°F to keep finished waffles warm. Cook the bacon in a skillet over medium heat until crisp. Transfer to a paper towel-lined plate, then chop into small bits. Reserve a tablespoon of the bacon fat in a small bowl.
- Squeeze the potatoes: Place the thawed hashbrowns in the center of your clean kitchen towel. Gather the edges, twist, and wring it with everything you’ve got. You will be genuinely shocked at how much liquid comes out. Keep going until no more moisture drips. This is the single most important step.
(📸 Photo tip: You should see a tight, almost dry ball of potato shreds when you’re done. If the towel feels damp, you’re good. If it’s soaked, keep twisting.) - Mix the batter: In a large bowl, combine the wrung-out hashbrowns, chopped bacon, shredded cheddar, panko, eggs, flour, salt, and pepper. Stir with a fork until everything is evenly distributed and the mixture holds together when pinched. Do not overmix. You want it cohesive but not pasty.
- Preheat the waffle iron: Plug it in and let it get screaming hot. Brush or spray the grates with the reserved bacon fat or a neutral oil. The bacon fat adds a subtle extra layer of flavor that oil alone cannot replicate.
- Cook the waffles: Scoop about 3/4 cup of the mixture into the center of the iron. Spread it gently into an even layer, leaving a small border around the edges. Close the lid and cook until deep golden brown and crisp, about 5–7 minutes. Do not open the lid early to check on it. Let it do its thing.
(📸 Photo tip: When it’s ready, the steam escaping from the sides will slow down significantly. The waffle should release easily from the iron without sticking. If it resists, give it another minute.) - Rest and repeat: Transfer the finished waffle to a wire rack set over a baking sheet. This keeps it crisp while you cook the remaining batter. If you stack them on a plate, the steam will soften the bottom crust. Trust me on this one.
How I Make These for the Week
These reheat like a dream, which is dangerous knowledge. I make a double batch on Sunday and we’re set for three rushed weekday mornings. The key is reheating them properly so you restore that initial crisp.
- Fridge: Layer the cooled waffles between sheets of parchment paper in an airtight container. They’ll stay good for up to 4 days.
- Freezer: Flash freeze the cooled waffles on a baking sheet for about 30 minutes, then transfer them to a freezer-safe bag. They keep for up to a month.
- Reheat: The toaster is your best friend here. Two cycles on medium-high heat will bring the exterior back to life while warming the center through. The air fryer works beautifully too — 350°F for 5 minutes. The microwave makes them sad and limp. Please don’t do it.
Things I Wish I’d Known the First Time
- Don’t overmix the batter: Stir until it just comes together. Overworking the mixture activates the starch in the potatoes, which can make the waffles dense and gummy instead of light and crisp. You want pockets of cheese and bacon, not a uniform paste.
- Season the potatoes well: Potatoes are neutral. They need salt. I use a full teaspoon of kosher salt for this amount, and that’s after the bacon’s saltiness is accounted for. If you’re using unsalted bacon or reducing the cheese, add a pinch more.
- Let the waffles rest on a wire rack, not a plate: I cannot emphasize this enough. A plate traps steam. Steam softens the crisp exterior you just worked so hard to create. A wire rack allows air to circulate around the entire waffle, keeping every side as crunchy as the moment it left the iron.
- Eat them immediately when you can: While the wire rack trick is great for batch cooking, these waffles peak in the first two minutes off the iron. Eat the first one while you’re standing at the counter. You’ve earned it.
Make It Yours: Easy Variations
- Spicy: Add 2 tablespoons of chopped pickled jalapeños and swap the cheddar for pepper jack. This is my Friday night version. The acidity from the jalapeños cuts the richness beautifully.
- Veggie: Swap the bacon for 1 cup of finely chopped sautéed mushrooms and onions. You still get the savory, umami depth without the meat. My vegetarian friends request this version constantly.
- Gluten-Free: Use gluten-free panko (they exist!) and a 1:1 gluten-free all-purpose flour blend. I’ve tested this and the texture holds up perfectly. The key is the egg, which provides the structure the gluten would normally contribute.
- Herbaceous: Fold in 2 tablespoons of finely chopped fresh dill or parsley (dill is better here, in my opinion). It brightens the whole dish and makes it feel like something you’d order at a café that charges $15 for avocado toast.
Questions I Get About This Recipe All the Time
Q: Why did my waffle come out mushy?
A: Ugh, I’ve been there. The cause is almost always the same: you didn’t squeeze the potatoes thoroughly enough. I know your wrists hurt. I know it feels like you got enough out. But you didn’t. Aim for shreds that look dry and feel almost squeaky. That’s your target. Next time, wring it out over the sink, open the towel, fluff the shreds, and wring it again. You’ve got this.
Q: Can I use fresh potatoes instead of frozen?
A: Absolutely. Shred them on the large holes of a box grater or use the shredding disc on your food processor. Once shredded, place them in a bowl of cold water and swish them around to remove the excess starch. Drain, then wring them out in a clean towel just like you would the frozen ones. It’s one extra step, but the result is just as good.
Q: Can I freeze the cooked waffles?
A: Yes, and you should. Flash freeze them flat on a baking sheet for about 30 minutes, then stack them with a small square of parchment paper between each one to prevent sticking. Transfer the stack to a freezer bag. To reheat, pop them directly from the freezer into the toaster. They’ll be crisp in 3-4 minutes.
Q: What do you serve with these?
A: They’re phenomenal on their own with a side of sour cream and chives, but my favorite way is topped with a poached egg and a drizzle of hot sauce. The runny yolk soaks into all the crispy crevices. I also love them alongside a simple arugula salad dressed with lemon vinaigrette — the peppery greens and bright acid balance the richness of the waffles.
More Recipes My Kitchen Loves
If you liked this one, I think you’ll love these other favorites that live in heavy rotation at my place:
- Crispy Sheet Pan Bacon — The no-mess, hands-off method for perfectly crispy bacon every time.
- The Best Oven Fries of Your Life — Same crisp logic, different format. You’ll never deep-fry again.
- Easy Cheddar Herb Scones — The savory baking project that takes 30 minutes and disappears in 10.
Make these on a morning when you want breakfast to feel like an event, even if you’re the only one there to witness it. That first bite, where the crisp gives way to melted cheese and salty bacon, is exactly the kind of start a day deserves.
If you make them, tag me — I genuinely love seeing the crispy, cheesy creations. And save this one for the weekend. Your Saturday morning will thank you.
📌 These Bacon and Cheese Loaded Hashbrown Waffles stay crispy even after reheating — save it for your next lazy Sunday brunch when you want something that feels special but takes almost no effort.

Bacon and Cheese Loaded Hashbrown Waffles That Are Actually Crispy (Not Soggy) — in 20 Minutes
Equipment
- Waffle iron
- Large Mixing Bowl
- Clean kitchen towel or cheesecloth
- Skillet
- Wire Rack
Ingredients
- 3 cups frozen shredded hashbrowns, thawed
- 6 strips thick-cut bacon
- 1 cup sharp cheddar, shredded
- 1/4 cup panko breadcrumbs
- 2 large eggs
- 1/4 cup all-purpose flour
- 1 tsp kosher salt
- 1/2 tsp black pepper
- 2 tbsp chopped fresh chives (for serving)
- 1/2 cup sour cream (for serving)
Optional: reserved bacon fat for the waffle iron
Instructions
- Preheat oven to 200°F to keep finished waffles warm. Cook bacon in a skillet over medium heat until crisp. Transfer to a paper towel-lined plate, then chop. Reserve 1 tablespoon of the bacon fat.
- Place thawed hashbrowns in the center of a clean kitchen towel. Gather edges, twist, and wring out as much moisture as possible. You should have a tight, dry ball of shreds.
- In a large bowl, combine wrung-out hashbrowns, chopped bacon, shredded cheddar, panko, eggs, flour, salt, and pepper. Stir with a fork until evenly distributed and the mixture holds together when pinched. Do not overmix.
- Preheat the waffle iron on high. Brush or spray grates with the reserved bacon fat (or neutral oil).
- Scoop about 3/4 cup of the mixture into the center of the iron. Spread gently into an even layer, leaving a small border. Close lid and cook until deep golden brown and crisp, about 5–7 minutes. Do not open early.
- Transfer finished waffle to a wire rack set over a baking sheet. Repeat with remaining batter. Serve immediately with sour cream and chives.
Notes
Related Recipes:
 Cheesy Hamburger Casserole Bake That’s Ready in 40 Minutes (No Canned Soup Here)
 Lemon Capellini Salad for Late Summer Evenings: Bright, Tangy, Ready in 20 Minutes
 Creamy Garlic Tagliatelle That Looks Like a Restaurant Dish in 20 Minutes
 Texas Roadhouse Style Baked Salmon with Sweet and Savory Glaze — Ready in Under 30 Minutes
 Grilled Chicken Wraps That Stay Crispy (Even the Next Day) — in 35 Minutes
 Easy Italian Meatloaf That’s Actually Juicy (Not Dry) — in 1 Hour