
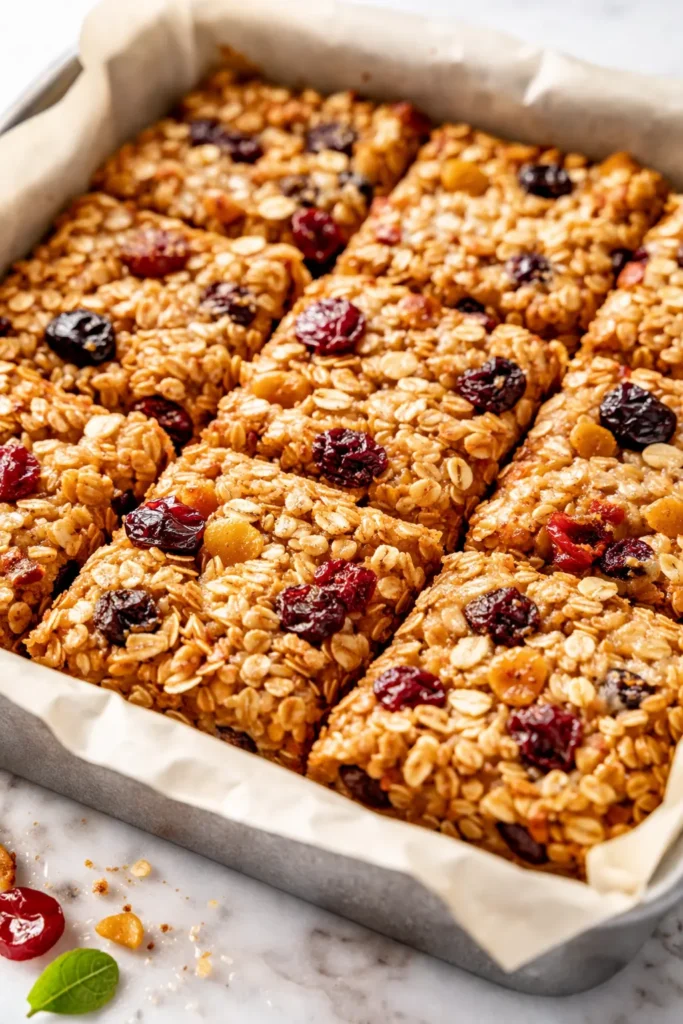
I have a confession to make. For years, I bought those boxes of cereal bars at the grocery store, telling myself they were a “healthy shortcut.” They were not. They were tiny, crumbly, and I was hungry again by 10am. So I started making my own, and honestly? I haven’t looked back. These are chewy, not hard. Sweet, but not sugar-bomb sweet. And they actually stick with you.
The short version: They come together in one bowl, bake for 25 minutes, and my kids have never once asked for the boxed kind again.
I’ve made these about 30 times now through trial and error. This version is the one that everyone asks for the recipe for.
- Serves: 12 bars (as breakfast or snack)
- Hands-On Time: 10 min | Total Time: 35 min
- Difficulty: Easy enough for a Sunday afternoon with the kids helping
- Cost per serving: ~$0.75
- Calories: ~210 per bar
- Dietary Notes: Naturally dairy-free. Can be made gluten-free and nut-free.
(Photo above: Overhead shot of golden brown cereal bars cooling on a wire rack, a crumbly corner piece lifted to show the chewy interior studded with dried fruit and oats, soft morning light from the kitchen window hitting the edge of the sheet pan.)
The Trick That Keeps Them from Crumbling Into a Million Pieces
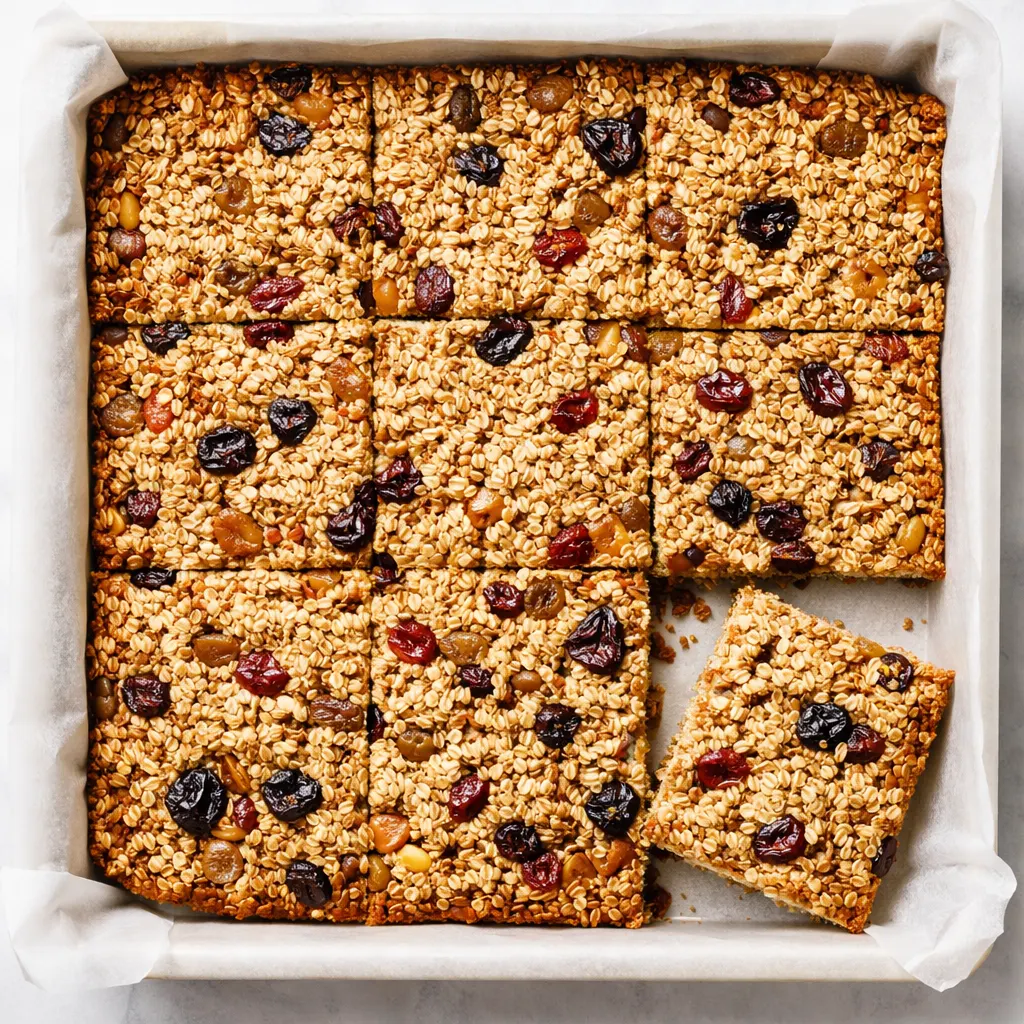
The enemy of a good cereal bar is dryness. Most recipes over-bake them because they’re waiting for the top to get brown. But by then, it’s too late — you’ve got a tray of brittle, sad crumbs. The trick here is to pull them when the edges are just barely golden and the center still looks slightly underdone. It sets up perfectly as it cools, giving you that chewy, bendy texture that actually holds together in a lunchbox.
The second trick is the wet-to-dry ratio. Just enough nut butter and honey to coat everything, not so much that it gets greasy. I tested this ratio about five times before I landed on it. It’s the sweet spot.
What you get is a bar that bends without breaking, tastes like a real baked good, and doesn’t make you feel like you’re eating a health food project.
Everything You Need (Plus What to Swap If Your Kids Are Picky)
- 2 cups rolled oats (not quick oats): They give the bars structure and that satisfying chew. Quick oats turn into mush.
My kids don’t notice if I use gluten-free oats — I just don’t tell them. - 1 cup crispy brown rice cereal: This is the secret to the texture. It keeps the bars light, not dense.
If you don’t have it, crushed cornflakes work too, but the rice cereal is way more fun. - 1/2 cup creamy peanut butter (or almond butter): The binder. Also the protein. Use the kind that’s just nuts and salt — no sugar added, or they get too sweet.
My youngest has a nut-free school, so I use sunflower seed butter here all the time. It works perfectly. - 1/3 cup honey (or maple syrup): Just enough sweetness.
I’ve tried it with regular maple syrup and it’s great. - 1/4 cup coconut oil (or unsalted butter): Helps everything hold together and adds a subtle richness.
- 1 teaspoon vanilla extract: Roundness. Don’t skip it.
- 1/2 cup dried fruit (chopped dates or dried cherries): Natural sweetness and little chewy pockets.
Raisins are fine but my kids pick them out. Diced dried apricots are a sleeper hit. - 1/4 cup mix-ins (chocolate chips, seeds, chopped nuts): Optional, but highly recommended for the “treat” factor.
I do mini chocolate chips for the kids and toasted pepitas for myself. - 1/2 teaspoon salt: Balances the sweetness and makes everything taste like itself.
What to Pull Out Before You Start
- 8×8-inch baking dish (a 9×9 works too, bars will be slightly thinner)
- Parchment paper (the overhang trick — I’ll explain below)
- Large mixing bowl
- Small saucepan (to melt the wet ingredients)
- Spatula
Let’s Make It (Step by Step)
This comes together faster than you think, so preheat the oven and line your pan first.
Preheat & Prep: Preheat the oven to 350°F. Line an 8×8-inch baking dish with parchment paper so it hangs over two sides — this is your “handle” to lift the bars out later.
- Mix the dry ingredients: In a large bowl, whisk together the rolled oats, brown rice cereal, dried fruit, mix-ins (if using), and salt.
(📸 Photo tip: Overhead shot of the oats and cereal mix in the bowl — shows the texture contrast before baking.) - Melt the wet ingredients: In a small saucepan over low heat, warm the peanut butter, honey, and coconut oil together. Stir until smooth and fully combined. Remove it from heat the second it gets glossy — don’t let it simmer.
This takes about 90 seconds. If you overheat it, the honey can get weirdly thick. - Combine wet and dry: Pour the warm peanut butter mixture over the dry ingredients. Add the vanilla. Stir with a spatula until every oat and cereal piece is coated. It’ll look a little sticky and that’s exactly right.
(📸 Photo tip: A hand shot, spatula folding the mixture — the sheen on the oats tells the reader it’s ready.) - Press into the pan: Transfer the mixture to the lined baking dish. Use the bottom of a measuring cup or a second piece of parchment to press it down firmly and evenly. This step is important — if it’s loose, the bars will fall apart later.
My trick: dampen the parchment slightly so it doesn’t stick to the mixture. - Bake: Bake for 20–25 minutes, until the edges are just barely golden. The center will still look slightly soft and underdone — that’s what you want.
If you bake until the center is firm, they’ll be too hard the next day. Trust the process. - Cool completely: Let the bars cool in the pan on a wire rack for at least 30 minutes. Then use the parchment handles to lift the block out onto a cutting board. Use a sharp chef’s knife to cut into 12 bars.
A serrated knife works best to get clean edges without crushing them.
How I Batch-Make These for the Week
I make a double batch on Sundays and we’re set for the school week. They disappear fastest when I pack them for after-school snacks right alongside a piece of fruit.
- Fridge: In an airtight container, they last up to 2 weeks. Honestly, they never last that long here.
- Freezer: Yes! Wrap individually in parchment and store in a freezer bag. They thaw in about 10 minutes at room temp or toss one in a lunchbox frozen — it’ll thaw by snack time.
- Reheat: No need. They’re perfect at room temperature. If you want a warm cookie-like experience, 10 seconds in the microwave does the trick.
Things I Wish I’d Known the First Time
- Press harder than you think you need to: I can’t stress this enough. A loosely packed pan means crumbly bars. Use the bottom of a glass or a measuring cup and really lean into it. Even if I’m tired, I spend an extra 30 seconds on this step.
- Let them cool all the way: I know the smell is incredible. I know you want to cut into them immediately. If you do, they will fall apart. Resist. The cooling is where they set. Walk away. Make a cup of coffee.
- Chop the dried fruit: If you’re using dates or apricots, chop them into small pieces — about the size of an oat flake. Big chunks create weak spots where the bar will break.
- If they get too hard: Microwave a bar for 10 seconds. It softens right back up to the perfect chewy texture. Works every time.
Swaps That Actually Work
- Gluten-Free: Use certified gluten-free oats and check your brown rice cereal. Works perfectly — I make this version for my friend’s celiac kid and he loves them.
- Nut-Free: Swap the peanut butter for sunflower seed butter or tahini. The color turns slightly green from the chlorophyll reaction (totally normal!), but the taste is great.
- Kid-Friendly (Lower Sugar): Use only 1/4 cup honey and add an extra mashed banana. The banana adds sweetness and moisture. My kids can’t tell the difference.
- Fancy Guest Version: Use dried tart cherries, dark chocolate chunks, and a flaky salt finish on top. Press a few extra chocolate chips into the top before baking so they’re visible. It looks like you bought them from a bakery.
- Seed-Based Protein Boost: Add 2 tablespoons of chia seeds or hemp seeds to the dry mix. Adds fiber and Omega-3s, doesn’t change the taste.
Questions I Get About This Recipe All the Time
Q: Why did my bars turn out crumbly and fall apart?
A: Ugh, I’ve been there. Two most likely reasons: 1) You didn’t press the mixture firmly enough into the pan. It needs serious compression. 2) You baked them a little too long. Next time, pull them when the center still looks soft. They firm up as they cool. You’ve got this!
Q: Can I make them completely sugar-free?
A: I’ve tested this with a monk fruit maple syrup substitute and it worked okay — slightly less sticky texture. You can also use a very ripe mashed banana (about 1/2 cup) to replace the honey, but the bars will be a bit softer and more cake-like. Still delicious, just different.
Q: How long do these last on the counter?
A: In an airtight container at room temperature, they stay fresh for about a week. My house is warm in the summer, so I keep them in the fridge where they last a full two weeks. If you freeze them, they’re good for up to 3 months.
Q: What do you serve with these for a complete breakfast?
A: Honestly, one bar and a piece of fruit is my go-to. My kids love them crumbled over plain yogurt like a granola. On busy mornings, I grab one, a banana, and call it good. It’s way more filling than you’d expect from something so small.
More Recipes My Family Makes on Repeat
If these bars disappeared faster than you expected (they always do here), here are a few other staples from my kitchen:
- Peanut Butter Oatmeal Energy Balls — No-bake, ready in 10 minutes, and my kids act like they’re cookies.
- Healthy Banana Oat Muffins — The ones the whole neighborhood asks me to bring to bake sales.
- Make-Ahead Freezer Breakfast Sandwiches — For when you need something savory to balance out all the sweet.
These bars have saved our mornings more times than I can count. Whether you’re packing them for a long school day or just need something to reach for with your coffee, they’re the kind of recipe you’ll come back to every week. I hope you love them as much as we do.
If you try them, drop a comment below — I’d love to hear how they turned out! Tag me on Pinterest so I can see your batch.
📌 These healthy breakfast cereal bars are chewy, naturally sweetened, and hold together perfectly in a lunchbox — save this recipe for your next Sunday meal prep session!
Healthy Breakfast Cereal Bars That Actually Keep You Full (and Taste Like a Treat)
Equipment
- 8×8-inch Baking Dish
- Parchment Paper
- Large Mixing Bowl
- Small saucepan
- Spatula
- Sharp chef’s knife
Ingredients
- 2 cups rolled oats (not quick oats)
- 1 cup crispy brown rice cereal
- 1/2 cup creamy peanut butter (or almond butter)
- 1/3 cup honey (or maple syrup)
- 1/4 cup coconut oil (or unsalted butter)
- 1 teaspoon vanilla extract
- 1/2 cup dried fruit (chopped dates or dried cherries)
- 1/4 cup mix-ins (chocolate chips, seeds, chopped nuts) (optional)
- 1/2 teaspoon salt
Instructions
- Preheat the oven to 350°F. Line an 8×8-inch baking dish with parchment paper so it hangs over two sides — this is your handle to lift the bars out later.
- In a large bowl, whisk together the rolled oats, brown rice cereal, dried fruit, mix-ins (if using), and salt.
- In a small saucepan over low heat, warm the peanut butter, honey, and coconut oil together. Stir until smooth and fully combined. Remove it from heat the second it gets glossy — don’t let it simmer.
- Pour the warm peanut butter mixture over the dry ingredients. Add the vanilla. Stir with a spatula until every oat and cereal piece is coated. It’ll look a little sticky and that’s exactly right.
- Transfer the mixture to the lined baking dish. Use the bottom of a measuring cup or a second piece of parchment to press it down firmly and evenly. This step is important — if it’s loose, the bars will fall apart later.
- Bake for 20–25 minutes, until the edges are just barely golden. The center will still look slightly soft and underdone — that’s what you want. If you bake until the center is firm, they’ll be too hard the next day.
- Let the bars cool in the pan on a wire rack for at least 30 minutes. Then use the parchment handles to lift the block out onto a cutting board. Use a sharp chef’s knife to cut into 12 bars. A serrated knife works best to get clean edges.
Notes
Related Recipes:
 The Perfectly Pillowy Chocolate Chip Milk Buns (Tangzhong Method)
 Cheesy Hamburger Casserole Bake That’s Ready in 40 Minutes (No Canned Soup Here)
 Creamy Garlic Tagliatelle That Looks Like a Restaurant Dish in 20 Minutes
 Texas Roadhouse Style Baked Salmon with Sweet and Savory Glaze — Ready in Under 30 Minutes
 Easy Italian Meatloaf That’s Actually Juicy (Not Dry) — in 1 Hour
 Moist Lemon Zucchini Bread with a Crunchy Lemon Sugar Top