
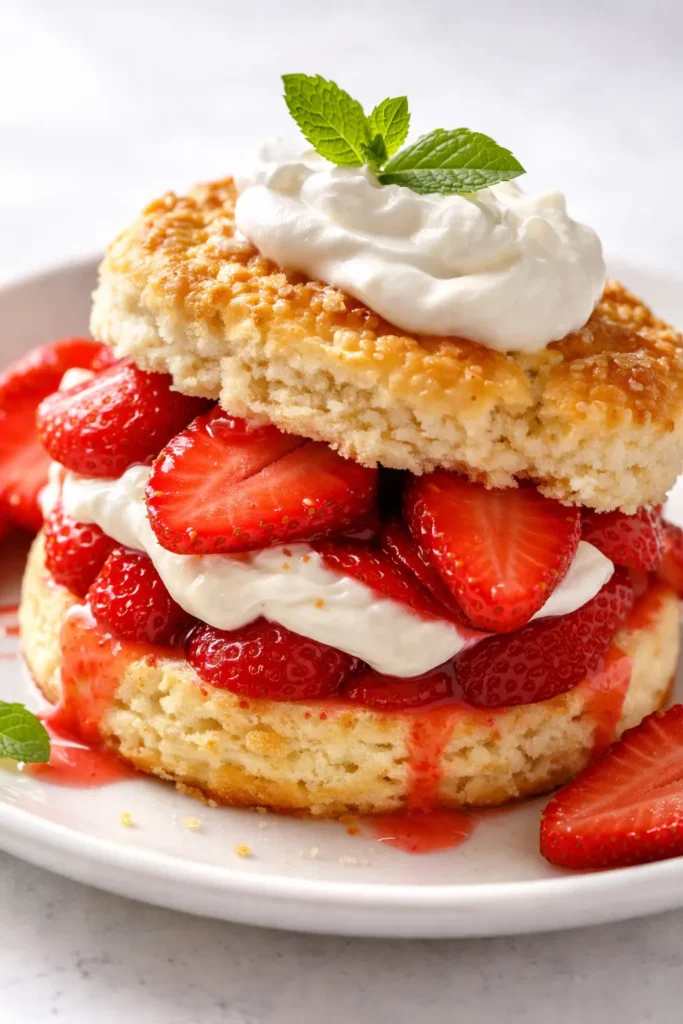
I spent years making strawberry shortcake that was… fine. Good biscuits, good berries, good cream. Never great. Never the kind of thing that made someone close their eyes and pause. Then I figured out the two things I was doing wrong: I wasn’t macerating the berries long enough, and I was working the biscuit dough like it was bread. This version? It’s the one I bring to every summer party now, and I always leave with an empty plate. It’s the strawberry shortcake recipe I wait all year to make — not because it’s complicated, but because it only works when the berries are good enough to stand on their own.
The short version: Tender, buttery biscuits with crisp edges, juicy macerated strawberries in their own syrup, and softly whipped cream — ready in 45 minutes.
I’ve tested this with six different strawberry batches. I’ve folded the dough wrong on purpose just to see what happens. This method is the one that delivers every single time.
- Serves: 6 as dessert or brunch
- Hands-On Time: 25 min | Total Time: 45 min
- Difficulty: Easy, with one non-negotiable step (the maceration)
- Cost per serving: ~$3.50
- Calories: ~420 per serving
- Dietary Notes: Vegetarian. Adaptable for gluten-free and dairy-free (see variations).
(Photo above: overhead shot of a split biscuit on a rustic wooden board, macerated strawberries piled high in the center, a swoosh of softly whipped cream visible on one side, a few whole berries and a sprig of mint scattered deliberately in the corner, natural window light from the left, shallow depth of field so the background falls away softly.)
The Two Tricks That Make This One Worth Saving
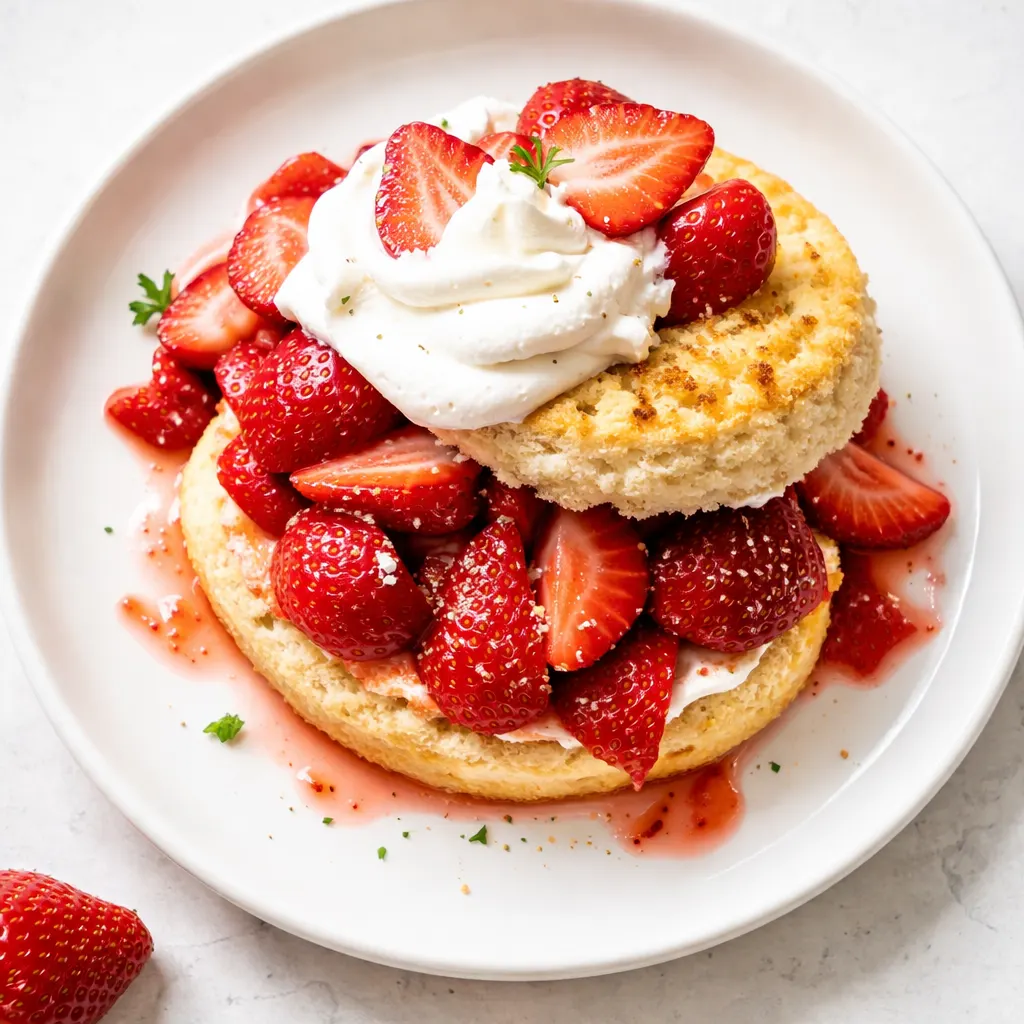
Macerating is not optional. The sugar pulls the juices out of the berries, creating its own syrup. No added sugar syrup or cornstarch needed. This does two things: it makes the berries taste more like themselves, and it creates that gorgeous red liquid that soaks into the warm biscuit. Fifteen minutes is the bare minimum. Thirty is better. If you skip it, you’re just putting berries on bread, and that’s not shortcake.
The biscuit method is everything. Cold butter, folded not kneaded. The fold method creates delicate layers without developing the gluten that makes biscuits tough. Pat it out, fold it over, pat it out again. Stop as soon as it comes together. I learned this the hard way after way too many shortcakes that crumbled into dust the second you looked at them.
Skip the fussy recipes that promise “bakery-style” results but require a chemistry degree. This one holds up to the berries and cream because it’s sturdy enough to soak up the juices without turning into mush.
What Goes In — With My Real-Talk Notes
- 2 lbs fresh strawberries (about 2 quarts): The ripest, reddest, most fragrant ones you can find. If they’re not in season, wait. Pale berries make pale shortcake with thin syrup. I once made this with out-of-season berries and my friend politely asked if I’d forgotten the sugar. Embarrassing. Don’t be me.
- 3-4 tablespoons granulated sugar: For the berries. This isn’t about sweetness — it’s about drawing out the natural juices. Taste after 15 minutes. If they’re still tart, add another tablespoon. I start with 3 and always end up adding one more.
- 2 cups all-purpose flour (spoon and leveled): Scooping directly from the bag packs in too much flour and makes the biscuits tough. Spoon it into the measuring cup and level it off. My neighbor thought I was being dramatic until she tried both versions.
- 2 tablespoons granulated sugar: For the biscuit dough. Just enough to make them tender without making them sweet.
- 1 tablespoon baking powder (fresh!): If your baking powder has been sitting in the cabinet for two years, buy a new can. Flat biscuits are heartbreaking biscuits. I set a calendar reminder every six months to replace mine.
- ½ teaspoon salt: Don’t skip it. It makes the sweetness taste brighter.
- 6 tablespoons unsalted butter, cold and cubed: This is non-negotiable. Warm butter makes dense biscuits. Cold butter makes flaky ones. Put it in the freezer for 10 minutes before you start if your kitchen runs warm. I do this even in winter. It’s just insurance.
- 1 ½ cups heavy cream, cold: For both the dough (¾ cup) and the whipped cream (¾ cup). Splurge on the good local stuff if you can. The flavor difference is noticeable and it whips up like a dream.
- 2 teaspoons vanilla extract (not imitation): One in the dough, one in the cream. Imitation extract is purely chemical and it tastes like it. I keep a bottle of the good stuff just for baking. It lasts forever because I use it sparingly, but it matters here.
- Turbinado or Demerara sugar (optional): For sprinkling on the biscuit tops before baking. It adds a crunchy, sparkly finish that looks and feels intentional. This is the cheapest upgrade you can make to a biscuit, visually speaking.
The Setup — Minimal, I Promise
- Mixing bowls (large and medium)
- Pastry cutter or two forks (or your hands — they’re genuinely the best tool for working butter into flour)
- Sheet pan lined with parchment paper
- Electric mixer or a whisk and some arm strength for the cream
- Chef’s knife and cutting board
- 3-inch biscuit cutter (a sharp-edged glass works in a pinch, but a proper cutter gives better rise)
That’s it. No food processor required. No special pans.
Let’s Make It — Here’s the Exact Process
This moves fast once you start, so read through the whole thing once before you begin.
1. Macerate the Berries: Hull and slice the strawberries into a large bowl. Add 3 tablespoons of sugar. Toss gently to combine. Let sit at room temperature for at least 20 minutes, stirring once halfway. (📸 Photo tip: You should see a deep red syrup pooling at the bottom of the bowl. If you don’t, give it more time and a gentle stir. The strawberries should look glossy and slightly collapsed.)
2. Preheat and Prep: Preheat your oven to 425°F (220°C). Line a baking sheet with parchment paper.
3. Make the Biscuit Dough: In a large bowl, whisk together the flour, 2 tablespoons sugar, baking powder, and salt. Add the cold butter cubes. Use your fingertips (or a pastry cutter) to smash the butter into the flour until it looks like coarse cornmeal with some pea-sized butter pieces remaining. Work quickly — you don’t want the butter to warm up.
4. Add the Cream: Make a well in the center of the flour mixture. Pour in ¾ cup of the cold heavy cream and 1 teaspoon of vanilla extract. Stir with a fork until it just comes together. It will be shaggy and look a little dry in places. That’s correct. Do not add more liquid.
5. Fold and Shape: Turn the dough out onto a lightly floured surface. Gently bring it together with your hands — no kneading. Pat it into a ¾-inch thick rectangle. Fold it in half. Pat it out again to ¾-inch. Fold it one more time. This is the secret to layers without toughness. Pat it out one final time to ¾-inch thickness. Use a sharp biscuit cutter to cut out 6 rounds. Press down firmly without twisting. (📸 Photo tip: The edges of the cut dough should be clean, not sealed. Twisting the cutter prevents the biscuits from rising.) Place them on the prepared sheet about 2 inches apart. Brush the tops with a little extra cream and sprinkle with turbinado sugar.
6. Bake: Bake for 14-16 minutes, until the biscuits are golden brown and firm to the touch on the bottom. The tops should be deeply golden and the sugar should be visibly crunchy. Transfer to a wire rack to cool slightly.
7. Whip the Cream: While the biscuits bake, pour the remaining ¾ cup cold heavy cream into a cold medium bowl. Add 1 tablespoon of sugar and the remaining 1 teaspoon of vanilla extract. Whip to soft peaks — the cream should droop slightly when you lift the whisk, not stand stiffly. Over-whipped cream is a tragedy. Stop just before you think it’s done.
8. Assemble and Serve Immediately: Split a warm biscuit in half. Spoon the macerated berries and their syrup generously over the bottom half. Dollop a generous spoonful of whipped cream on top. Place the biscuit top on at a slight angle so the berries peek out. Serve right away.
How I Prep This for a Week of Quick Desserts
You can absolutely build parts of this ahead. Just don’t assemble until you’re ready to eat, or the biscuits go soggy — and soggy shortcake is the saddest thing on a plate.
- Fridge: Macerate the berries up to 2 days ahead in the fridge. Whip the cream up to 6 hours ahead and keep chilled. Store separately. I often do the berries Friday night for a Saturday dinner — it actually gets better.
- Freezer: Bake the biscuits, cool completely, and freeze in a sealed bag for up to 1 month. Reheat directly from frozen in a 350°F oven for 8-10 minutes. This is my move for last-minute summer desserts.
- Reheat: Always reheat the biscuits before assembling, even if they’re freshly baked. A warm biscuit against cold berries and cream creates the perfect temperature contrast. The microwave works in a hurry but the oven keeps the crispy edges.
What I’ve Learned From Making These 30+ Times
- Don’t skip the maceration. This isn’t just for flavor. It creates that gorgeous syrup that soaks into the warm biscuit. That contrast in texture — crunchy, tender, soaked, creamy — is the whole point of the dessert. If you skip this step, you have a bowl of ingredients, not a finished dish.
- Cold butter, cold cream, cold hands. If your butter starts to soften while you’re working it into the flour, pop the bowl in the fridge for 5 minutes. I promise it makes a difference. My kitchen runs warm in the summer and I literally keep a bag of frozen peas nearby to chill my hands if needed. It sounds ridiculous. It works.
- The fold method matters more than you think. Patting, folding, and re-patting creates delicate layers. Kneading makes it tough. Stop as soon as it comes together — a shaggy dough is a tender biscuit.
- Use a sharp cutter and don’t twist. Twisting seals the edges and prevents the biscuits from rising fully. Press down firmly and lift straight up. Even if you mess this up a little, it’ll still taste good — I’ve done it. But the tall ones are the ones you’ll photograph.
- Taste your berries before serving. If they’re not sweet enough, add a tiny pinch of salt or another sprinkle of sugar. Salt makes the sweetness taste brighter. This is my most-used trick for making store-bought berries taste like they came from a farm stand.
Make It Yours — Easy Variations
- For a less sweet version: Swap half the granulated sugar in the maceration for honey or maple syrup. Use crème fraîche instead of whipped cream — it’s tangy, rich, and pairs beautifully with sweet berries. This is my preferred version when I’m serving it for brunch.
- Gluten-free: Use a 1:1 gluten-free baking flour blend (like King Arthur’s Measure for Measure). The texture will be slightly more tender and a bit crumbly, but it’s genuinely delicious. I made this for a friend who can’t do gluten and she asked for the recipe before she finished the first bite.
- Dairy-free: Use a high-quality vegan butter (like Miyoko’s or Country Crock Plant Butter) and full-fat oat or coconut cream. Chill everything thoroughly. It works surprisingly well — the key is the same: keep everything cold and don’t overwork it.
- The grown-up version: Add a splash of balsamic vinegar or a few cracks of black pepper to the macerating berries. Lemon zest in the biscuit dough brightens the whole thing. My friend swears by her strawberry-balsamic-basil version. She pretends it’s a sophisticated chef move but it’s actually a 1980s recipe from a magazine that just works.
The Questions I Get Every Single Time
Q: Why are my biscuits flat and dense?
A: I’ve been there. Flat biscuits usually mean one of three things: your oven wasn’t hot enough (use an oven thermometer — they’re $10 and worth it), your butter got too warm (chill the dough for 10 minutes before baking), or your baking powder is old. If it doesn’t fizz when you drop it in water, it’s done. You’ve got this next time.
Q: Can I make this with frozen strawberries?
A: Yes, for maceration they work fine. Let them thaw completely in the sugar. They’ll release a lot more liquid, so expect a soupier syrup. Still delicious, just less pretty for the final dish — perfect for a weeknight treat when no one’s photographing the table. For a dinner party, spring for fresh.
Q: How do I get really tall, fluffy biscuits?
A: Start with very cold ingredients, don’t overwork the dough, and make sure your baking powder is fresh. The fold method (pat, fold, pat again) creates those layers that push the biscuit upward in the oven. And don’t twist the cutter. I know I sound like a broken record on this, but the very first time I stopped twisting, I got my tallest biscuits ever. Not coincidentally.
Q: What do you serve with this?
A: Honestly, it doesn’t need anything else — it’s a complete dessert. But if you’re building a brunch spread, it’s fantastic with strong iced coffee or a dry rosé. My favorite unexpected pairing: crispy bacon. The salt and fat cut the sweetness in a way that makes you want another bite of everything. For a dinner party, I serve it with a pitcher of something cold and let people assemble their own.
More Recipes I Make on Repeat
If you liked this one, here are a few others that get the same reaction at my table — the ones people ask for the link to before they leave:
- [INTERNAL LINK PLACEHOLDER: Easy Buttermilk Drop Biscuits] — My go-to when I don’t want to bust out the cutter. They take 15 minutes and they’re impossible to mess up.
- [INTERNAL LINK PLACEHOLDER: No-Churn Vanilla Bean Ice Cream] — No ice cream maker required. It’s richer and creamier than store-bought, and it’s the perfect partner for any warm dessert.
- [INTERNAL LINK PLACEHOLDER: Bourbon Peach Cobbler] — For when it’s peach season and you want something a little grown-up. The bourbon caramelizes around the edges and it’s the most beautiful thing on a table.
- [INTERNAL LINK PLACEHOLDER: Classic Blueberry Crumble] — Juicy, jammy, and that oat topping stays crunchy for days. We make this all summer long.
If you make this strawberry shortcake, let me know. Drop a comment below or tag me on Pinterest — I genuinely love seeing the berry juice on someone else’s cutting board. It’s the most honest kind of cooking there is: good technique, great fruit, and the patience to let them do their thing.
📌 Pin this strawberry shortcake recipe that finally fixes flat biscuits and runny cream — save it for strawberry season and you’ll never use another version.
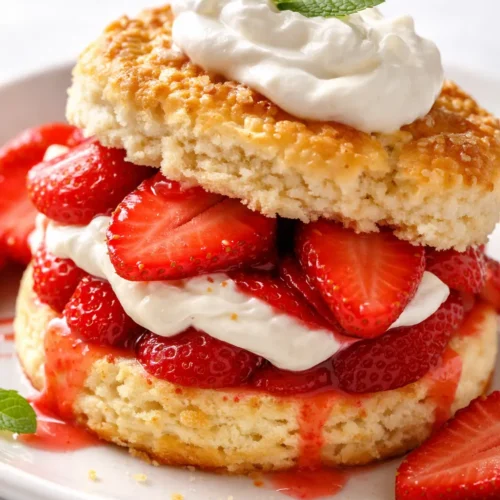
The Only Strawberry Shortcake Recipe That Works Every Time
Equipment
- Mixing bowls
- Pastry cutter or two forks
- Sheet pan lined with parchment paper
- Electric mixer
- Chef’s Knife and Cutting Board
- 3-inch biscuit cutter
Ingredients
For the Berries
- 2 lbs fresh strawberries (about 2 quarts), hulled and sliced
- 3-4 tablespoons granulated sugar (I start with 3 and add one more if needed)
For the Biscuits
- 2 cups all-purpose flour (spooned and leveled)
- 2 tablespoons granulated sugar
- 1 tablespoon baking powder (fresh!)
- 1/2 teaspoon salt
- 6 tablespoons unsalted butter, cold and cubed
- 3/4 cup heavy cream, cold (for the dough)
- 1 teaspoon vanilla extract (not imitation)
- 1 tablespoon turbinado or Demerara sugar (optional, for topping)
For the Whipped Cream
- 3/4 cup heavy cream, cold
- 1 tablespoon granulated sugar
- 1 teaspoon vanilla extract (not imitation)
Instructions
- 1. Macerate the Berries: Hull and slice the strawberries into a large bowl. Add 3 tablespoons of sugar. Toss gently to combine. Let sit at room temperature for at least 20 minutes, stirring once halfway. You should see a deep red syrup pooling at the bottom of the bowl. If you don’t, give it more time and a gentle stir. The strawberries should look glossy and slightly collapsed.
- 2. Preheat and Prep: Preheat your oven to 425°F (220°C). Line a baking sheet with parchment paper.
- 3. Make the Biscuit Dough: In a large bowl, whisk together the flour, 2 tablespoons sugar, baking powder, and salt. Add the cold butter cubes. Use your fingertips (or a pastry cutter) to smash the butter into the flour until it looks like coarse cornmeal with some pea-sized butter pieces remaining. Work quickly — you don’t want the butter to warm up.
- 4. Add the Cream: Make a well in the center of the flour mixture. Pour in ¾ cup of the cold heavy cream and 1 teaspoon of vanilla extract. Stir with a fork until it just comes together. It will be shaggy and look a little dry in places. That’s correct. Do not add more liquid.
- 5. Fold and Shape: Turn the dough out onto a lightly floured surface. Gently bring it together with your hands — no kneading. Pat it into a ¾-inch thick rectangle. Fold it in half. Pat it out again to ¾-inch. Fold it one more time. This is the secret to layers without toughness. Pat it out one final time to ¾-inch thickness. Use a sharp biscuit cutter to cut out 6 rounds. Press down firmly without twisting. The edges of the cut dough should be clean, not sealed. Twisting the cutter prevents the biscuits from rising. Place them on the prepared sheet about 2 inches apart. Brush the tops with a little extra cream and sprinkle with turbinado sugar.
- 6. Bake: Bake for 14-16 minutes, until the biscuits are golden brown and firm to the touch on the bottom. The tops should be deeply golden and the sugar should be visibly crunchy. Transfer to a wire rack to cool slightly.
- 7. Whip the Cream: While the biscuits bake, pour the remaining ¾ cup cold heavy cream into a cold medium bowl. Add 1 tablespoon of sugar and the remaining 1 teaspoon of vanilla extract. Whip to soft peaks — the cream should droop slightly when you lift the whisk, not stand stiffly. Over-whipped cream is a tragedy. Stop just before you think it’s done.
- 8. Assemble and Serve Immediately: Split a warm biscuit in half. Spoon the macerated berries and their syrup generously over the bottom half. Dollop a generous spoonful of whipped cream on top. Place the biscuit top on at a slight angle so the berries peek out. Serve right away.
Notes
Related Recipes:
 Salted Maple & Rosemary Croissant Rolls That Look Like You Spent All Day (The Secret Is Store-Bought Puff Pastry)
 Apple Rose Pastry Blooms That Look Like a Patisserie Display (With Zero Fancy Skills Needed)
 The Perfectly Pillowy Chocolate Chip Milk Buns (Tangzhong Method)
 Cheesy Hamburger Casserole Bake That’s Ready in 40 Minutes (No Canned Soup Here)
 Texas Roadhouse Style Baked Salmon with Sweet and Savory Glaze — Ready in Under 30 Minutes
 Moist Lemon Zucchini Bread with a Crunchy Lemon Sugar Top