
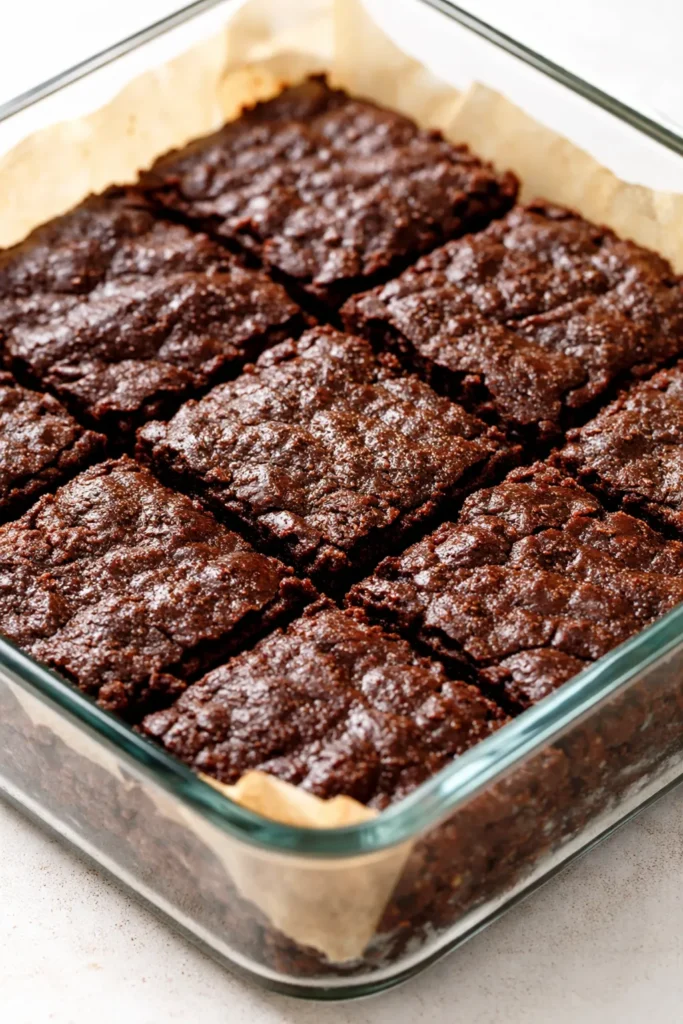
Every no-bake brownie I’d ever tried before landing on this version was a compromise. Gritty texture. Too soft in the middle. That weird waxy coating on your tongue from cheap chocolate. I wanted something that tasted like I’d actually turned on the oven — deep, fudgy, with that satisfying density that makes you close your eyes for a second when you take the first bite. This is that recipe. No oven required, no weird ingredients, and it comes together in about 15 minutes of actual work.
The short version: These set up perfectly in the fridge, slice cleanly, and taste exactly like the center square of a pan of baked brownies — the one everyone fights over.
I’ve brought these to holiday parties, summer gatherings, and last-minute dinner invites for three years. Not one person has ever asked if they’re no-bake. They just ask for the recipe.
- Serves: 16 squares
- Hands-On Time: 15 min | Total Time: 2 hr 15 min (includes chilling)
- Difficulty: Easy enough for a Tuesday craving
- Cost per serving: ~$0.80
- Calories: ~230 per square
- Dietary Notes: Vegetarian. Easily gluten-free (use GF wafers) and adaptable to dairy-free.
(Photo above: A straight-on shot of a single, perfectly cut square of no-bake brownie on a small white plate. The top is smooth with a slight sheen, scattered with a few flakes of finishing salt. The side reveals a dense, fudgy interior with no large crumbs. Natural window light, no fussy props, just the brownie and a fork resting on the edge of the plate.)
The Texture Trick That Makes These Taste Baked
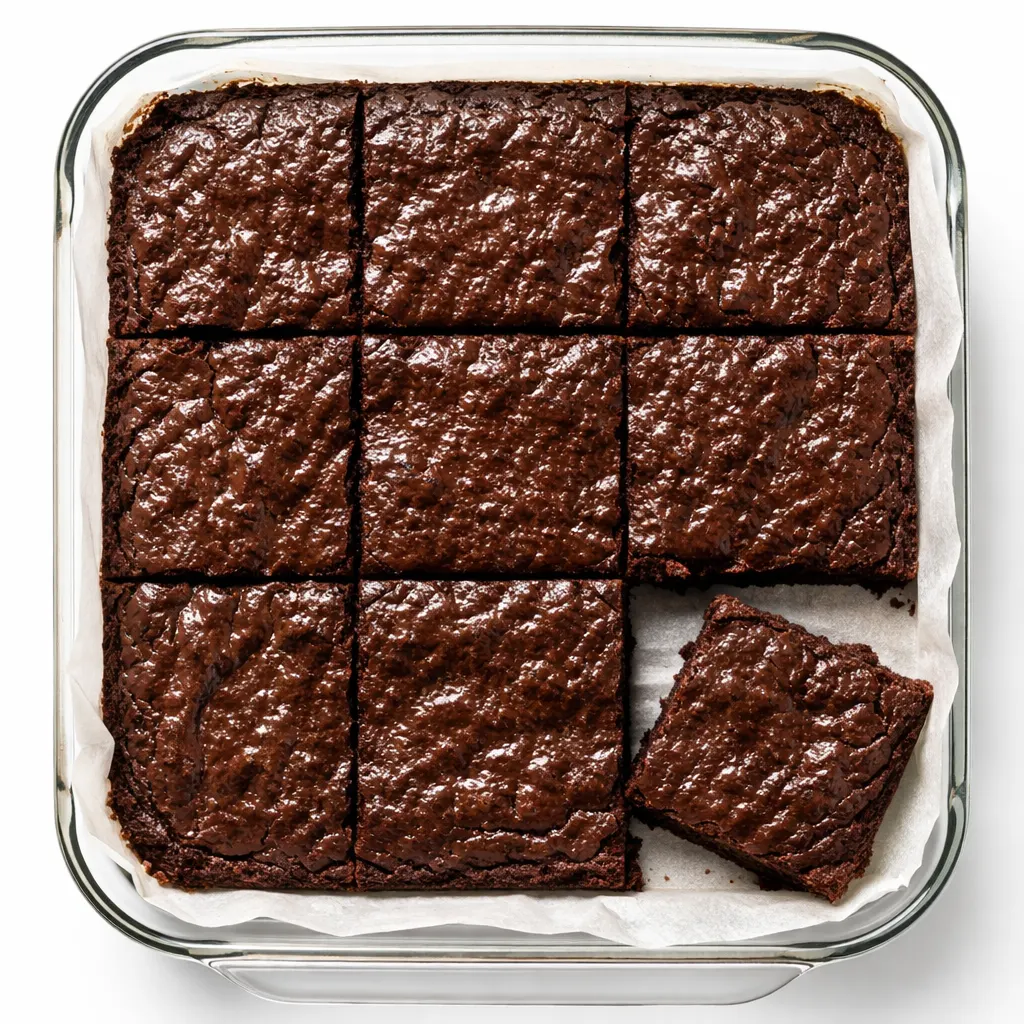
Most no-bake brownies fail because the crumb is wrong. If it’s too coarse, the mixture won’t hold together and you end up with a crumbly mess. If the fat ratio is off, they turn greasy instead of fudgy. The trick here is pulsing the wafers until they’re a fine, even powder — think beach sand, not gravel. This creates a uniform base that absorbs the chocolate-butter mixture evenly.
The second non-negotiable step is blooming the cocoa powder in the melted butter. Let it sit for a minute off the heat before you add the rest of the ingredients. This deepens the chocolate flavor in a way that no amount of extra cocoa can fix later. It takes sixty seconds and changes the entire flavor profile from “chocolate-adjacent” to “proper brownie.”
What you get is a brownie that’s dense but not heavy, rich but not greasy, and firm enough to slice into clean squares after a couple of hours in the fridge.
What Goes In (With the Honest Notes)
- 2 cups vanilla wafer crumbs (or digestive biscuits): This is the backbone. You can pulse them yourself in a food processor.
I’ve tried this with graham crackers, and it works in a pinch, but vanilla wafers give a cleaner, more neutral flavor that lets the chocolate shine. - 1 cup powdered sugar: Dissolves instantly into the fat base, preventing the gritty texture that granulated sugar leaves behind.
No sifting required unless your powdered sugar is particularly lumpy. I never sift mine and it’s fine. - 1/2 cup unsweetened cocoa powder, preferably Dutch-process: Dutch-process cocoa is smoother and darker. Regular natural cocoa works too, but the texture will be slightly more rustic.
The color difference alone is worth seeking out Dutch-process for this. - 1/4 tsp fine sea salt: Balances the sweetness. Don’t skip it.
- 1/2 cup unsalted butter (or vegan butter), melted: Adds richness and helps the mixture set firmly.
If using vegan butter, make sure it’s a stick-style variety, not the spreadable kind in a tub. - 1/4 cup whole milk or heavy cream (or full-fat oat milk): The liquid that brings everything together into a cohesive dough.
Heavy cream makes them extra fudgy. Milk works too — they’ll just be slightly less rich. - 1 tsp vanilla extract: The flavor bridge. It makes the chocolate taste more like itself.
- Flaky sea salt, for finishing: Not optional, in my opinion. It provides a textural pop and cuts the richness.
The Setup (Minimal, I Promise)
- 8×8-inch baking dish — glass or metal, either works
- Parchment paper — for easy lifting
- Food processor — for turning the wafers into fine crumbs
- Medium heat-proof bowl — for melting the butter and chocolate
- Rubber spatula — for pressing the mixture into the pan
If you don’t have a food processor, place the wafers in a ziptop bag and go at them with a rolling pin until they’re as fine as you can get them. Works fine, just takes a few more minutes and might be a decent stress reliever.
Making the Brownies (Start to Finish)
This goes fast. Read through once before you start so you’re not scrambling with a pot of melted butter while your food processor is still running.
Prep the pan: Line your 8×8 dish with two overlapping sheets of parchment paper, leaving a few inches of overhang on two opposite sides. This creates handles for lifting the whole block out later.
- Pulse the wafers: Add the vanilla wafers to a food processor and pulse until they become a fine, uniform powder. You should have exactly 2 cups of fine crumbs.
(📸 Photo tip: The crumbs should look like a consistent tan powder — no visible chunks bigger than a grain of sand.) - Mix the dry ingredients: In a large bowl, whisk together the wafer crumbs, powdered sugar, cocoa powder, and fine sea salt. Make sure there are no streaks of cocoa or sugar remaining.
- Bloom the cocoa (this is the step): In a medium heat-proof bowl, melt the butter in the microwave in 30-second bursts. Once melted, whisk in the cocoa powder you measured earlier and let it sit for 1 minute. This step deepens the chocolate flavor dramatically.
(📸 Photo tip: After 1 minute, the mixture will look like a smooth, dark paste — almost like a chocolate frosting base.) - Finish the wet mixture: Whisk the milk and vanilla into the butter-cocoa paste until smooth and fully combined.
- Bring it together: Pour the wet mixture into the bowl with the dry crumbs. Stir with a rubber spatula until the mixture forms a cohesive, slightly sticky dough. It should hold together when pressed.
- Press into the pan: Transfer the mixture to your prepared pan. Use the bottom of a glass or a measuring cup to press it down as evenly and firmly as possible. An even press is the difference between a clean slice and a crumbly one.
I learned this the hard way after my first batch fell apart because I was too gentle with it. - Chill: Refrigerate for at least 2 hours, or until firm. The full 2 hours is important — cutting them too early will result in ragged edges.
- Slice and finish: Use the parchment overhang to lift the entire block out of the pan. Place it on a cutting board and slice into 16 squares. Sprinkle flaky sea salt over the top immediately after slicing.
How to Make These Ahead (And Keep Them Fresh)
These brownies are the perfect make-ahead dessert. They actually improve after a day in the fridge — the flavors meld and the texture firms up to its ideal state.
- Fridge: Store in an airtight container for up to 2 weeks. I like to layer them between sheets of parchment paper so they don’t stick together.
- Freezer: Yes, they freeze beautifully. Flash freeze the sliced squares on a baking sheet for 30 minutes, then transfer them to a ziptop freezer bag. They’ll keep for 3 months.
- Reheat: No reheating needed. Eat them straight from the fridge or let them sit at room temperature for 5 minutes to soften slightly. The texture at room temp is softer and almost truffle-like — both are good, just different moods.
Things I Learned After Making These 30 Times
- Press firmly — genuinely firmly: A loosely packed pan leads to brownies that crumble when you pick them up. Use the flat bottom of a measuring cup and put your weight behind it. The surface should be smooth and level, not dimpled from your fingers.
- Don’t skip the flaky salt: I know it sounds like a finishing trend, but here it’s doing actual work. It cuts the richness and adds a tiny crunch that breaks up the dense fudgy texture. If you only have fine salt, sprinkle a small pinch over each square after slicing.
- Chill the full 2 hours: At 1 hour, they’ll look set but will still be soft in the center. At 2 hours, they slice cleanly. If you’re impatient (I get it), pop them in the freezer for 45 minutes instead.
- Use a sharp knife, and wipe it between cuts: This is the one piece of fussy advice I’ll give you. A clean knife between each slice gives you those crisp, bakery-style edges. A dirty knife drags crumbs across your perfect brownie tops.
Make It Yours (Swaps That Actually Work)
- Gluten-Free: Use certified gluten-free vanilla wafers or gluten-free digestive biscuits. The texture is identical.
- Dairy-Free: Use vegan butter and full-fat oat milk or canned coconut milk. Miyoko’s or Country Crock plant-based butter sticks work best.
- Nutty Brownies: Fold in 1/2 cup of toasted walnuts or pecans after you’ve mixed the dough but before pressing it into the pan.
- Peanut Butter Swirl: Warm 1/4 cup of peanut butter until it’s drizzle-able, pour it over the pressed brownie dough, and swirl it in with a knife before chilling.
- Extra Dark: Use black cocoa powder for 2 tablespoons of the regular cocoa. It gives a darker color and a more intense, Oreo-like flavor.
Questions People Keep Asking About These Brownies
Q: Why are my brownies crumbly?
A: Two most likely culprits: your crumbs were too coarse (pulse them finer next time), or you didn’t press the mixture firmly enough into the pan. The dough should hold together when you squeeze a handful of it before pressing.
Q: Can I use regular cocoa powder instead of Dutch-process?
A: Yes, but the flavor will be slightly less smooth and the color will be lighter. If all you have is natural cocoa, it still works — just add an extra tablespoon of powdered sugar to balance the slight bitterness.
Q: How long do these keep at room temperature?
A: They’re best stored in the fridge because of the butter content. But if you’re taking them to a picnic or leaving them out for a party, they’ll hold up for about 4 hours at room temperature before they start to soften too much.
Q: What’s the best way to get clean slices?
A: Lift the whole block out using the parchment paper. Use a long, sharp chef’s knife. Wipe the blade clean with a damp paper towel between each cut. Slice in one smooth motion — no sawing back and forth.
More No-Bake Treats My Family Loves
If you like having a dependable no-bake dessert in your back pocket, these three recipes get the same reaction at our table every time:
- No-Bake Peanut Butter Chocolate Bars — Same base concept, but with a creamy peanut butter layer that will ruin you for store-bought versions.
- [INTERNAL LINK PLACEHOLDER: Dark Chocolate Truffles] — Three ingredients, ten minutes, and they look like you bought them from a fancy chocolate shop.
- [INTERNAL LINK PLACEHOLDER: Chocolate Coconut Energy Balls] — For the days when you want something sweet that also has enough fiber to call it a snack.
These are the kind of brownies that disappear faster than anything else on the dessert table. People pick one up, take a bite, and then their eyes go a little wide. That’s the moment I know the recipe worked.
If you make them, tag me in your photos — I genuinely love seeing the flaky salt on top and the clean slice shots.
📌 Save this dense, fudgy no-bake brownie recipe for your next gathering or late-night chocolate craving — it comes together in just 15 minutes and tastes like it spent an hour in the oven.
The Only No-Bake Brownie Recipe You’ll Ever Need (Dense, Fudgy, No Oven)
Equipment
- 8×8 baking dish
- Parchment Paper
- Food Processor
- Heat-Proof Bowl
- Rubber Spatula
- Sharp Knife
Ingredients
- 2 cups vanilla wafer crumbs
- 1 cup powdered sugar
- 1/2 cup Dutch-process cocoa powder
- 1/4 tsp fine sea salt
- 1/2 cup unsalted butter, melted
- 1/4 cup whole milk
- 1 tsp vanilla extract
- flaky sea salt, for finishing
Instructions
- Line an 8×8-inch baking dish with parchment paper, leaving a few inches of overhang on two opposite sides.
- Pulse the vanilla wafers in a food processor until they become a fine, uniform powder. You should have exactly 2 cups of fine crumbs.
- In a large bowl, whisk together the wafer crumbs, powdered sugar, cocoa powder, and fine sea salt until no streaks remain.
- In a medium heat-proof bowl, melt the butter in the microwave in 30-second bursts. Once melted, whisk in the cocoa powder and let it sit for 1 minute. This blooms the cocoa and deepens the flavor.
- Whisk the milk and vanilla into the butter-cocoa paste until smooth and fully combined.
- Pour the wet mixture into the bowl with the dry crumbs. Stir with a rubber spatula until the mixture forms a cohesive, slightly sticky dough that holds together when pressed.
- Transfer the mixture to the prepared pan. Use the bottom of a glass or measuring cup to press it down as evenly and firmly as possible. The surface should be smooth and level.
- Refrigerate for at least 2 hours, or until firm. (For faster setting, freeze for 45 minutes.)
- Use the parchment overhang to lift the entire block out of the pan. Place on a cutting board and slice into 16 squares. Sprinkle flaky sea salt over the top immediately after slicing. Wipe the knife clean between cuts for neat edges.
Notes
Related Recipes:
 The Perfectly Pillowy Chocolate Chip Milk Buns (Tangzhong Method)
 Bagel Breakfast Sliders That Taste Like a Diner Breakfast — in 25 Minutes
 Cheesy Hamburger Casserole Bake That’s Ready in 40 Minutes (No Canned Soup Here)
 Creamy Garlic Tagliatelle That Looks Like a Restaurant Dish in 20 Minutes
 Texas Roadhouse Style Baked Salmon with Sweet and Savory Glaze — Ready in Under 30 Minutes
 Easy Italian Meatloaf That’s Actually Juicy (Not Dry) — in 1 Hour